


This guide will lead you through signing a document hash and PDF file with SSL.com’s eSigner cloud signing service and the Cloud Signature Consortium (CSC) API. All API request examples will be shown with Postman, and we recommend installing the Postman desktop app on your computer if you want to work through the examples. cURL command examples of the API requests are also included.
If you’re ready to work with the CSC API in SSLcom’s production eSigner environment, please read Remote Document Signing with eSigner CSC API.
Create a Test Order
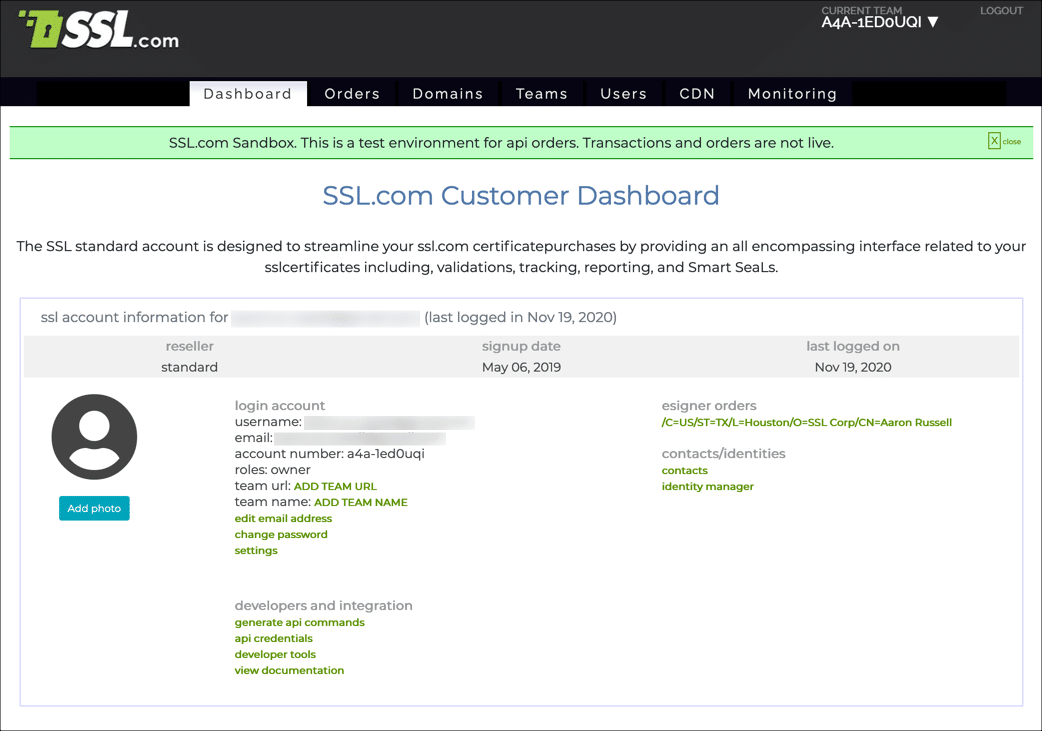
- First, you’ll need to create a document signing order in the Sandbox. Begin by signing into your Sandbox account and going to the Dashboard tab.

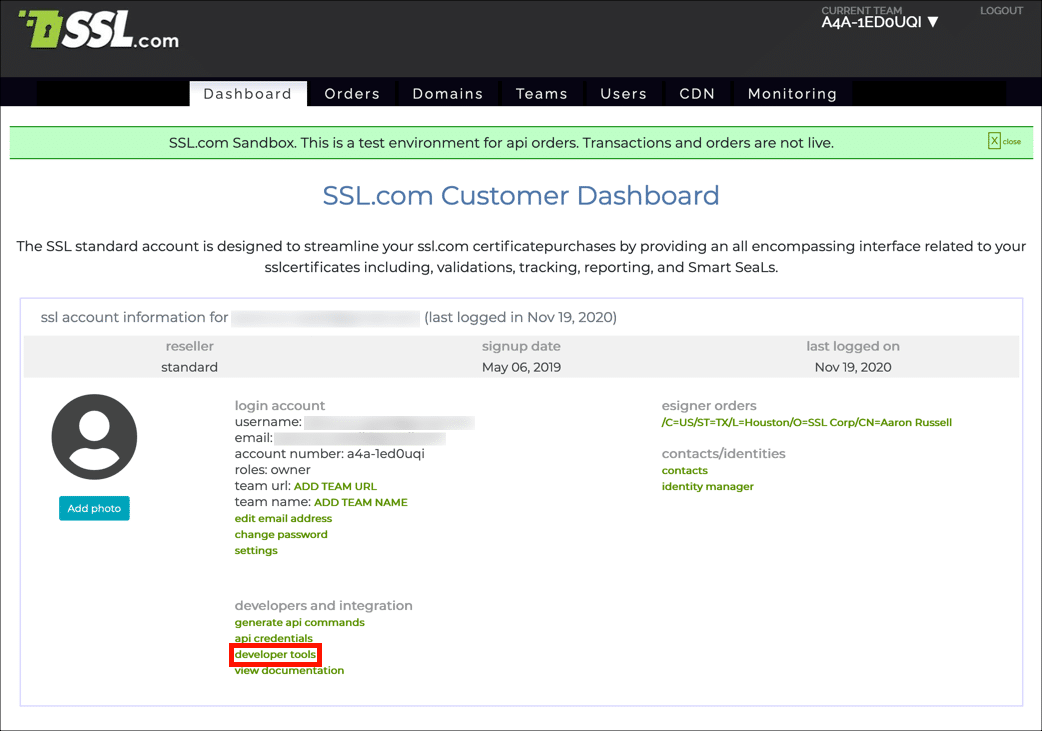
- Click developer tools.
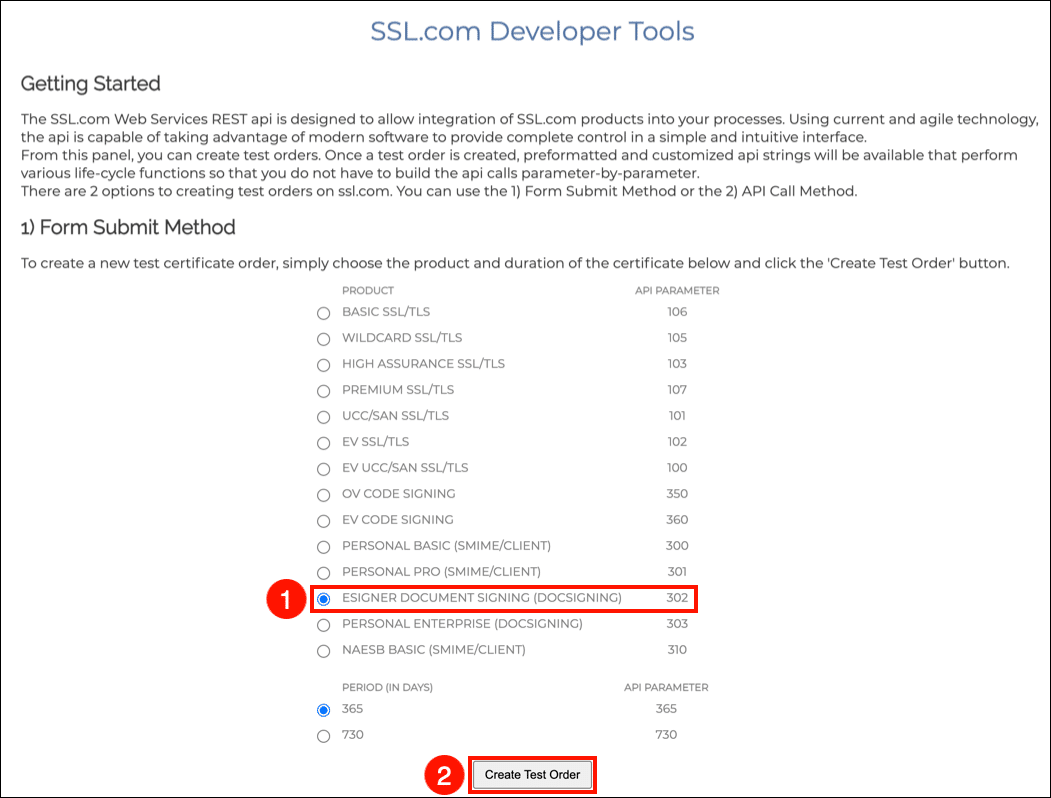
- Select eSigner Document Signing, then click the Create Test Order button.

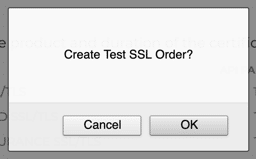
- A dialog box will appear. Click the OK button.

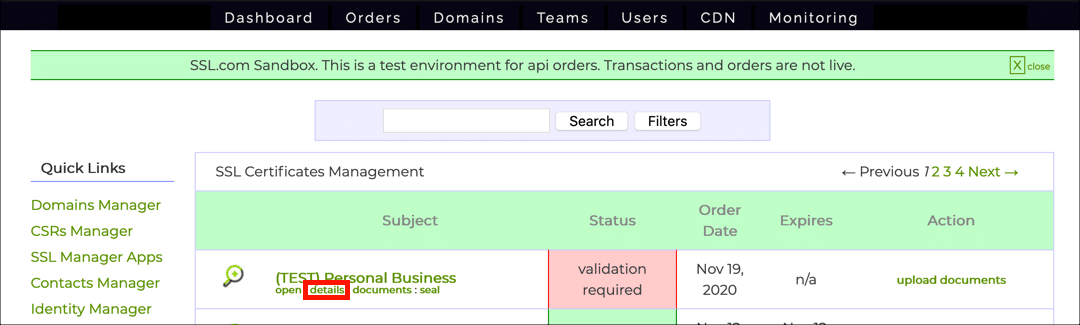
- Locate your test order, then click the details link.

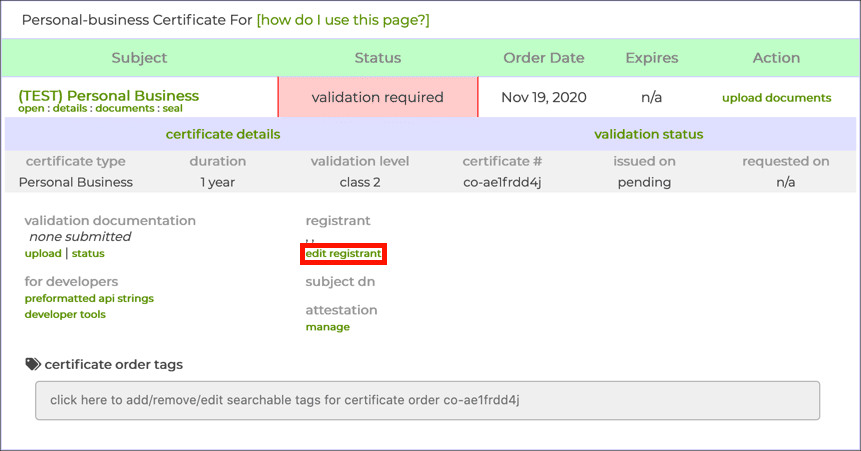
- Click edit registrant to begin entering applicant and recipient information for your test order. Note that since this information will not be used to issue a valid document signing certificate, you can enter fictitious information if desired.

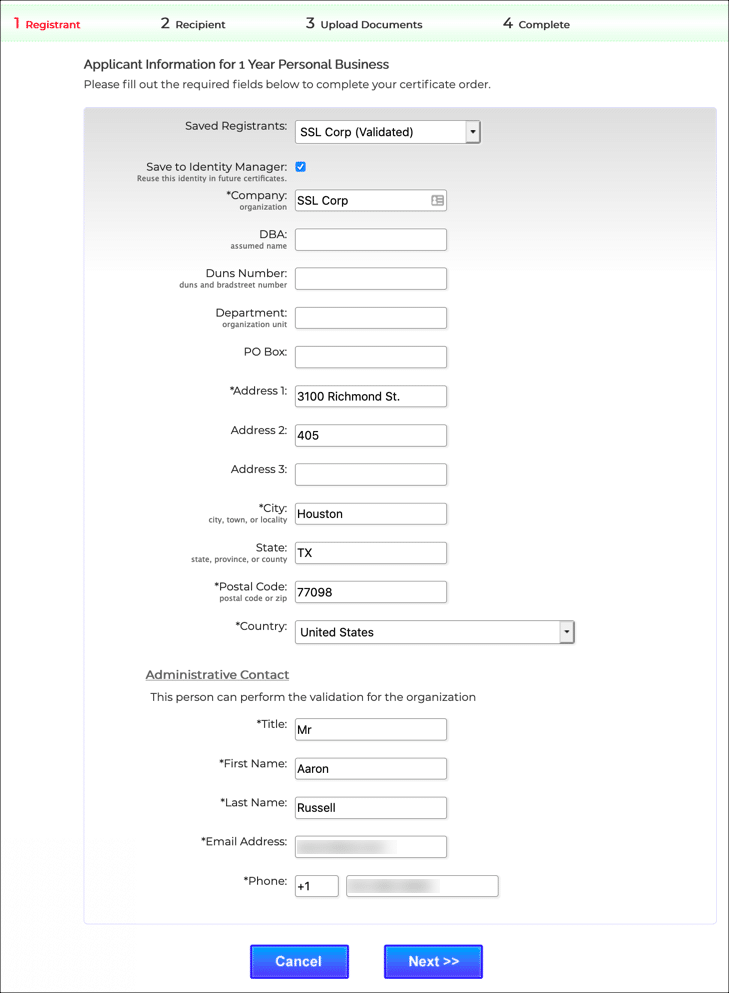
- Add applicant information for the test certificate, then click the Next>> button.

- Enter recipient information, then click the Next>> button.

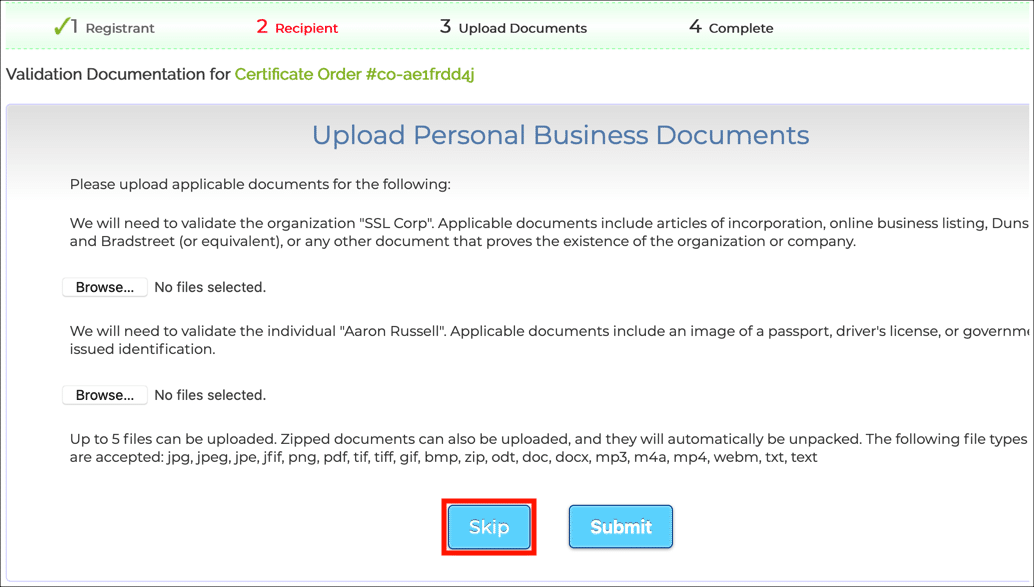
- Click the Skip button to skip uploading validation documents for the test certificate.

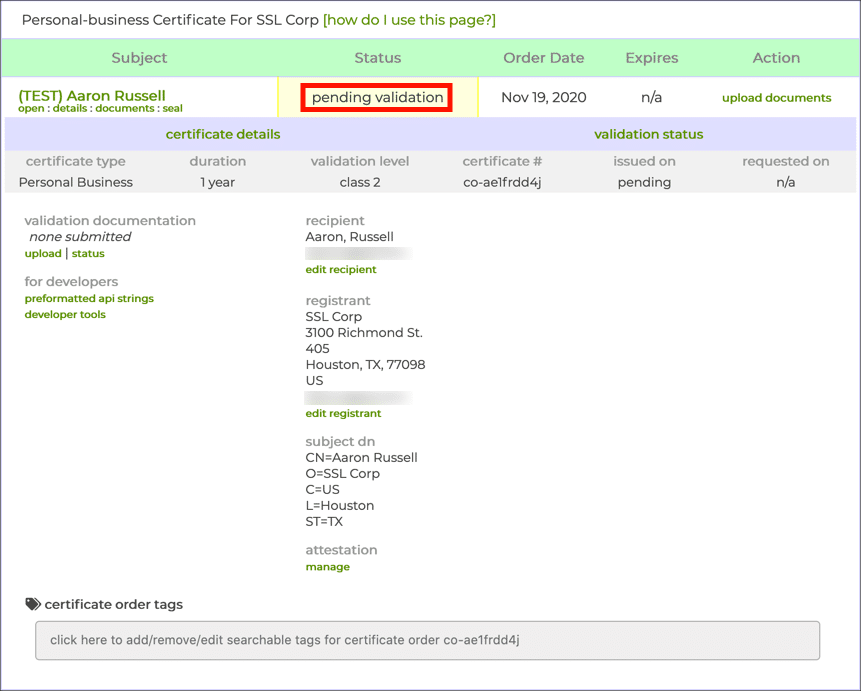
- Your test order should now have a status of pending validation. Contact the SSL.com support team at Support@SSL.com to have your test certificate validated.


Enroll in eSigner and Set Up Two-Factor Authentication
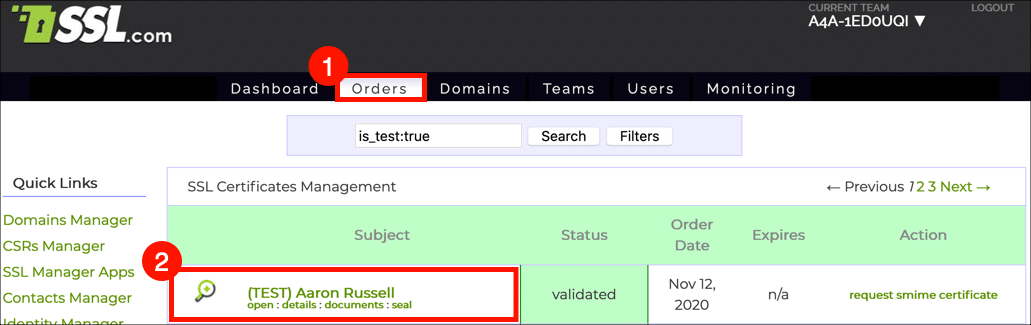
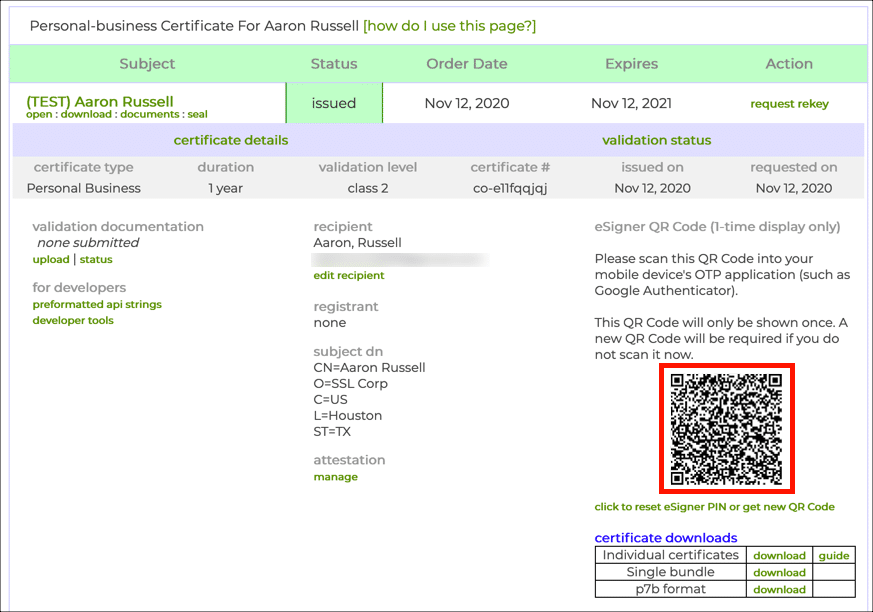
- Once your test order has been validated by SSL.com support staff, you can enroll it in eSigner. Navigate to the Orders tab in your SSL.com sandbox account and locate your test order.

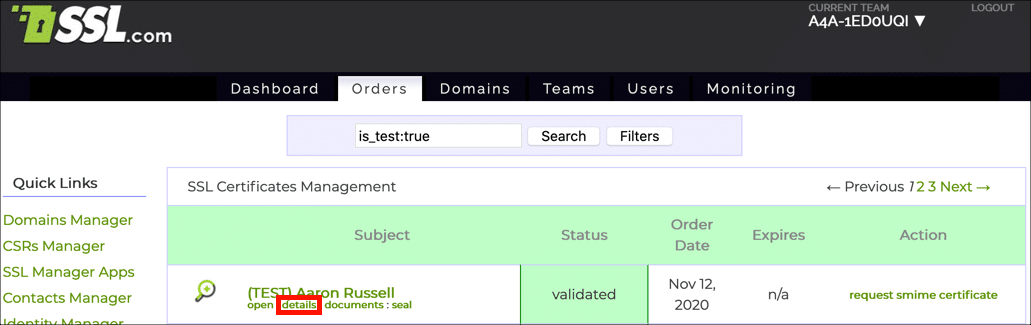
- Click the order’s details link.
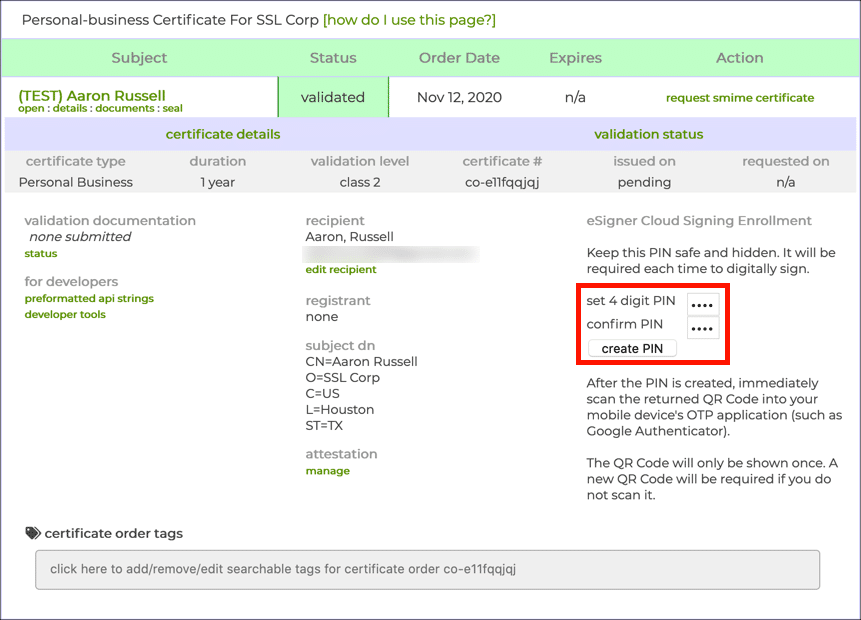
- Create and confirm a 4-digit PIN, then click the create PIN button.
If you need to reset your eSigner PIN, please read this how-to.
- A QR code will appear.
The next time you reload the page the QR code will not be visible. If you need to to view or reset your eSigner QR code, please read this how-to.
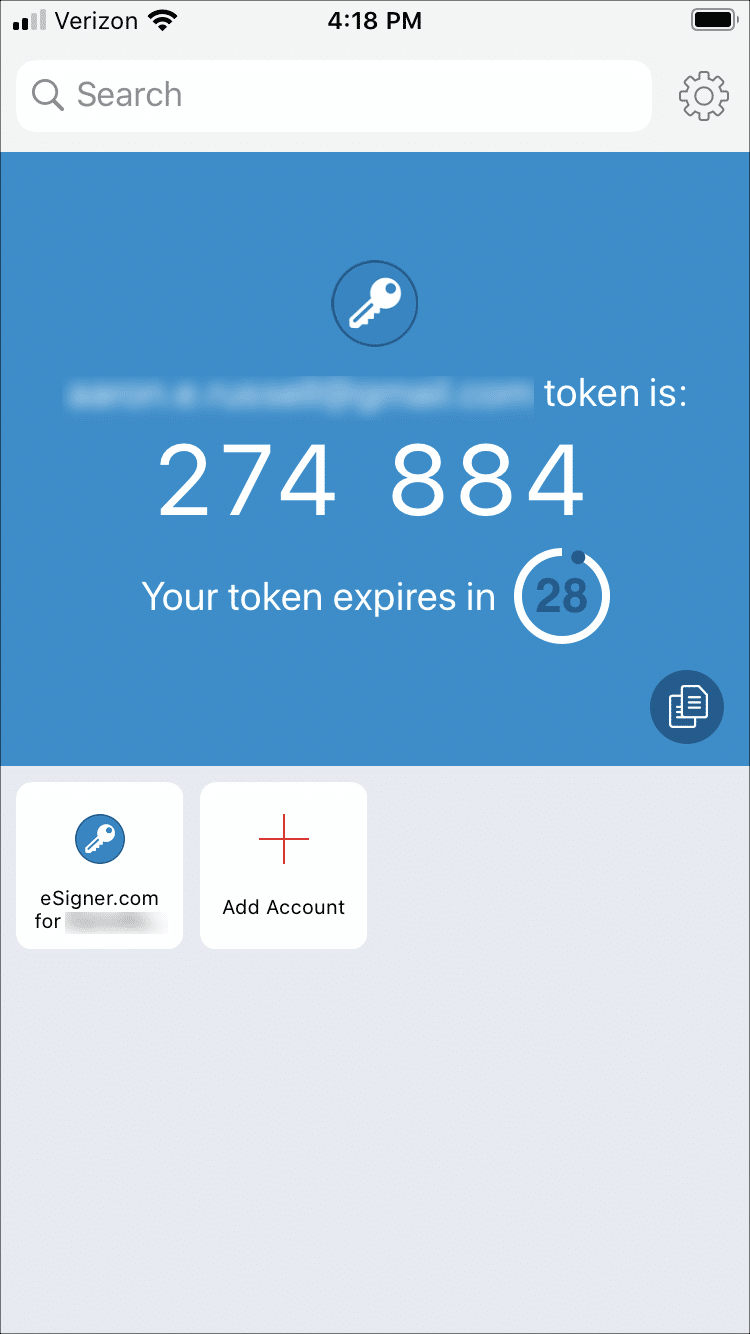
- Scan the code into a 2-factor authentication app on your mobile device, such as Google Authenticator or Authy. The app will provide you with one-time passwords (OTPs) for use when signing. Each OTP is valid for 30 seconds.

Install Postman and Import CSC API Collection
- Download and unzip the CSC API Postman collection (see https://www.postman.com/sslcom/workspace/public/collection/3420801-f2df0995-1293-45da-8719-73467c9f0ca7?ctx=documentation for the latest api endpoints or collection downloads).

- Download and install the Postman REST Client.

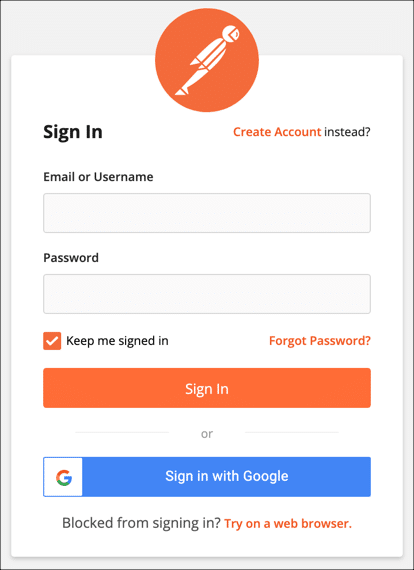
- Launch Postman, then create a new Postman account or sign into an existing one.

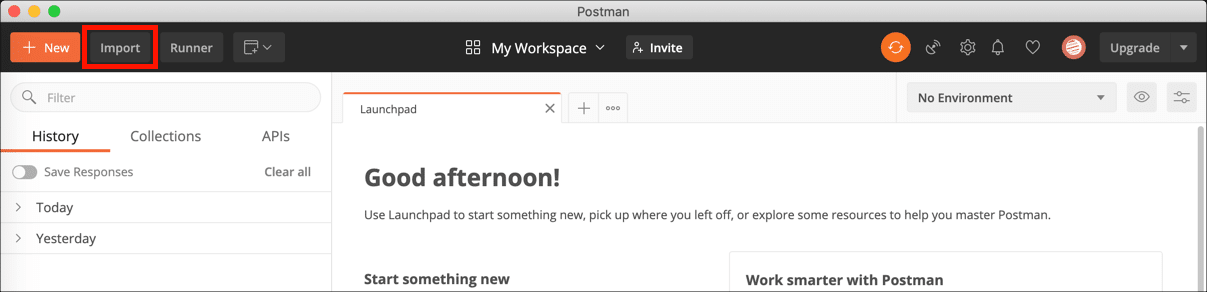
- Click the Import button.

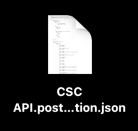
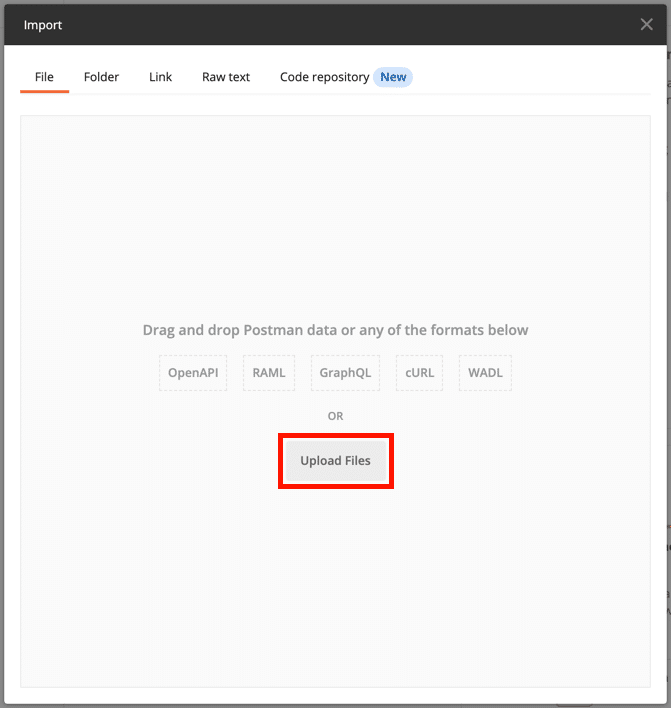
- Click the Upload Files button, navigate to the unzipped API collection file (
CSC-API.postman_collection.json), and open it.

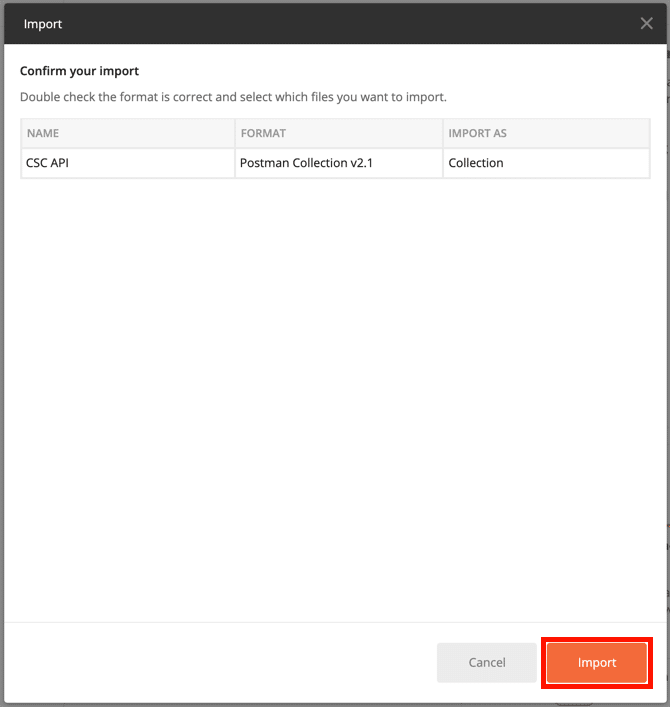
- Click the Import button.

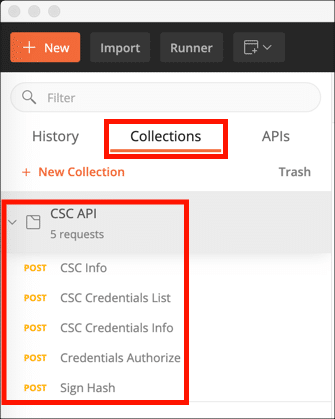
- Click the Collections tab in Postman and expand the CSC API collection to view the five POST requests you will be working with:
- CSC Info
- CSC Credentials List
- CSC Credentials Info
- Credentials Authorize
- Sign Hash

Retrieve Access Token
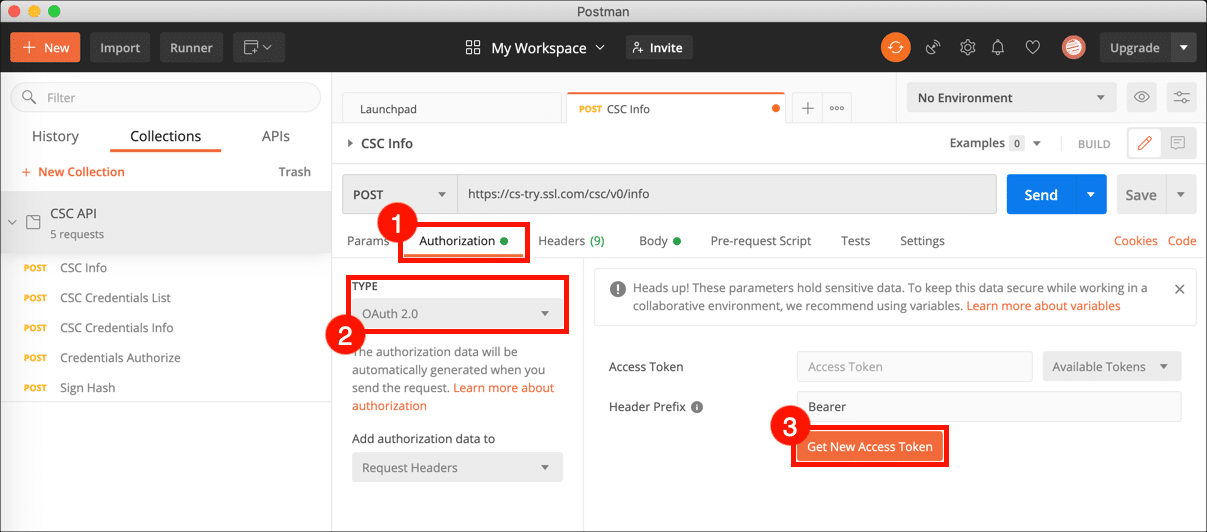
- The next step is to retrieve an access token from SSL.com. Before you request your access token, you will need a Client ID (also known as an Application ID. Please refer to this how-to for instructions on generating this credential).
- Select the Authorization tab, select OAuth 2.0 from the Type menu, and click the Get New Access Token button.

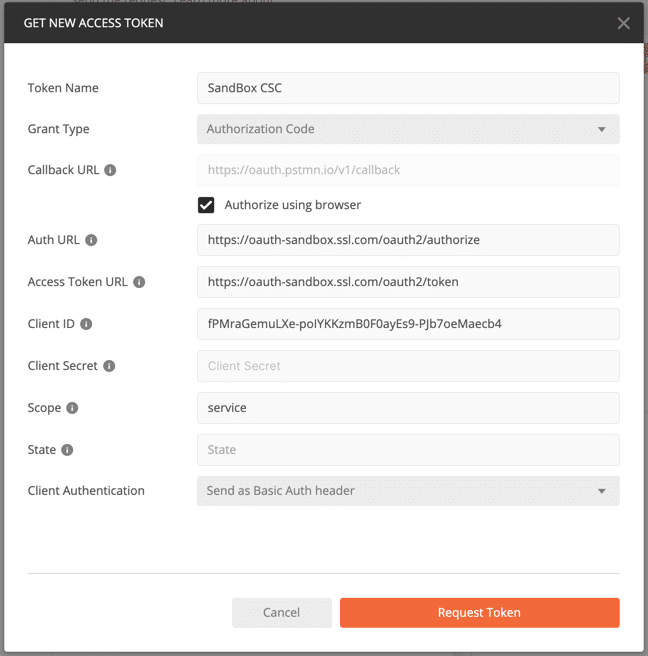
- Enter the following information into the form:
- Token Name: SandBox CSC (or any other easy-to-remember name that you prefer)
- Grant Type: Authorization Code
- Callback URL: [leave blank]
- Authorize using browser: checked
- Auth URL:
https://oauth-sandbox.ssl.com/oauth2/authorize - Access Token URL:
https://oauth-sandbox.ssl.com/oauth2/token - Client ID: [Your Client ID]
- Client Secret: [Your Client Secret]
- Scope: service
- State: [leave blank]
- Client Authentication: Send as Basic Auth header
When you are finished, click the Request Token button.

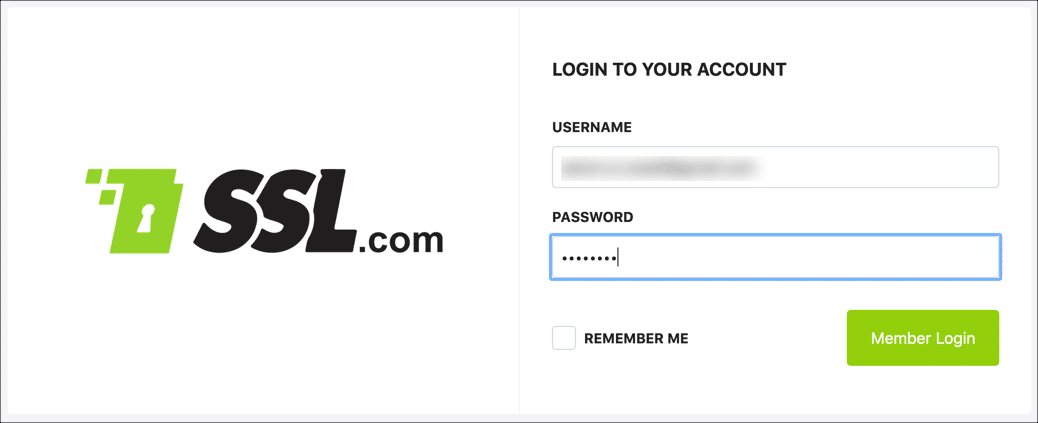
- A login form will appear in your web browser. Enter your SSL.com username and password, then click the Member Login button.

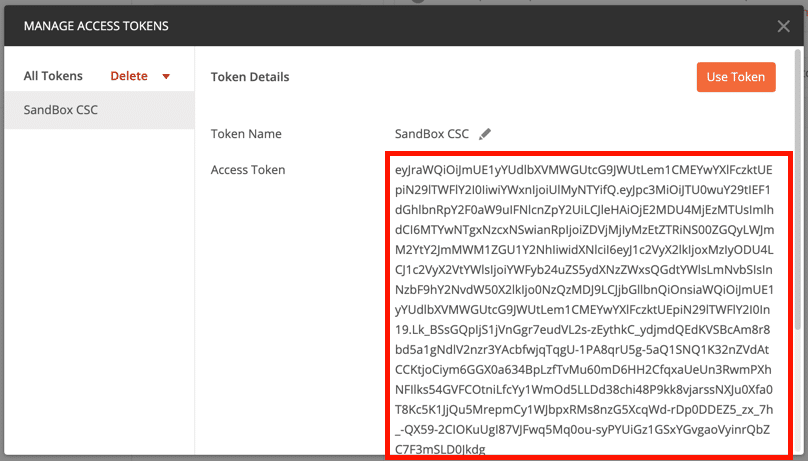
- Your new access token should appear in Postman. Select the access token text and copy it to the clipboard, then close the Manage Access Tokens dialog box. Paste your access token into a text editor where you can access it easily. Each access token will expire after one hour.
You can also save your token for re-use in Postman requests, but we have found that it is most reliable to copy and paste the token directly into each request.
Sign a Hash
Now that you have an access token, you can begin making API requests and creating signatures. This section will lead you through the five available requests in the Postman CSC collection, resulting in the creation of a digital signature from a document hash.
Get CSC Info (Optional)
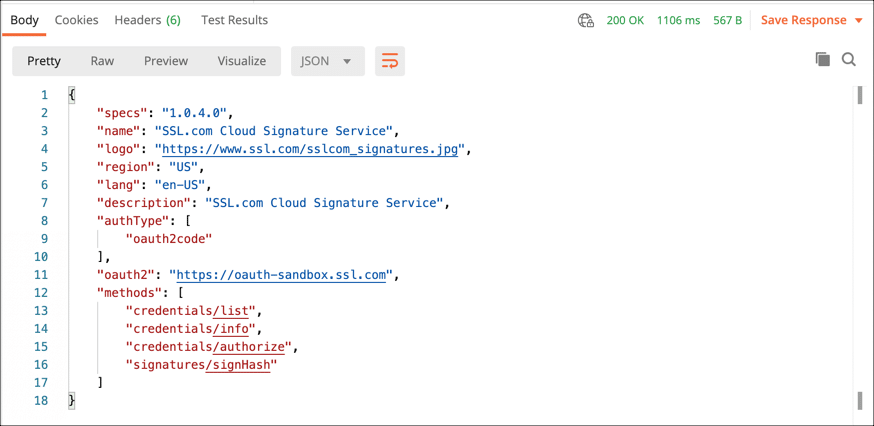
- You can use the CSC Info request to get information about SSL.com’s cloud signature service. Note that, unlike the others in the collection, this request does not require your access token. To send the request, select CSC Info from the CSC API collection, then click the Send button.
- Information about the cloud signature service will appear in a JSON object in Postman’s Response field.


cURL Command
curl --location --request POST "https://cs-try.ssl.com/csc/v0/info" \
--header "Content-Type: application/json" \
--data-raw "{}"
CSC Credentials List
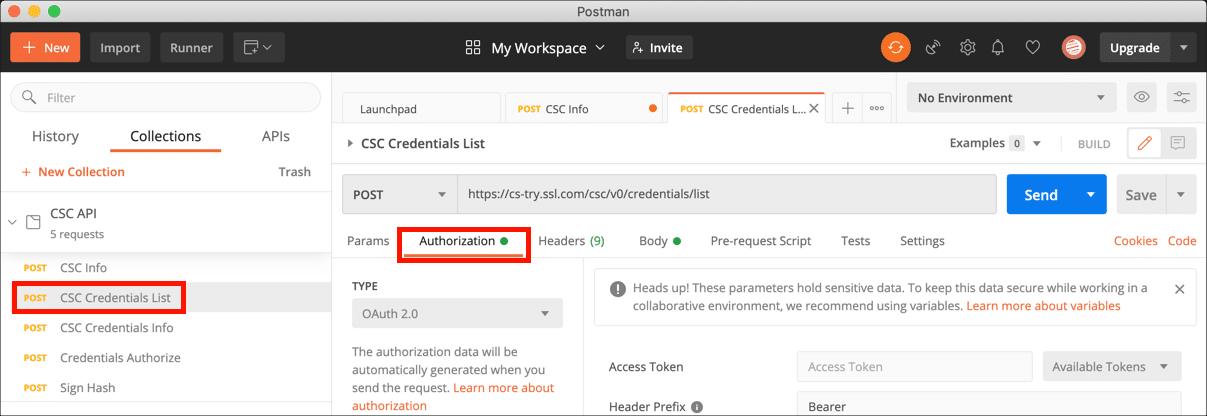
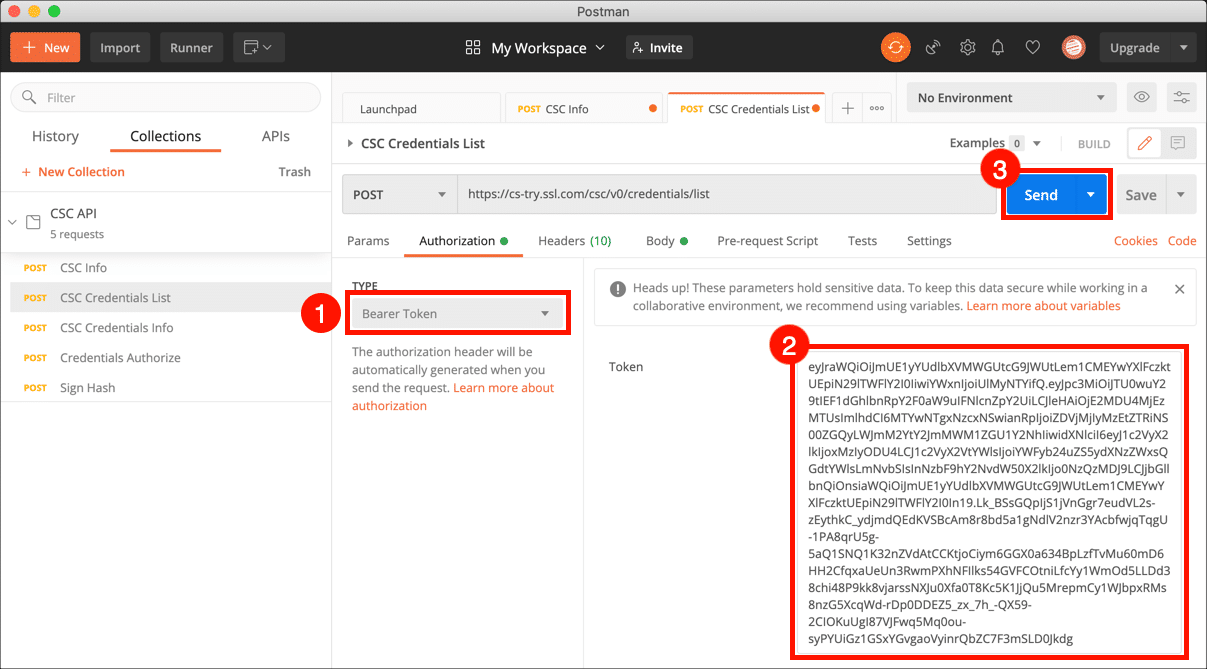
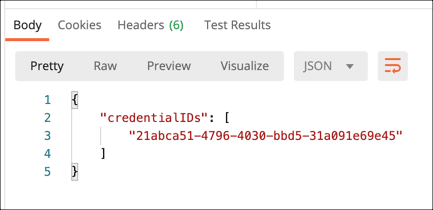
- The CSC Credentials List request will retrieve a credential you will use in later API requests. Select CSC Credentials List and click the Authorization tab.

- Choose Bearer Token from the Type menu, paste your access token into the Token field, then click the Send button.

- A JSON object with a list of credential IDs associated with the user will appear in the Response field. Your list will probably contain one value. Copy and paste your credential ID into a text editor for use in later requests.

cURL Command
Replace MY-ACCESS-TOKEN with your actual access token:
curl --location --request POST "https://cs-try.ssl.com/csc/v0/credentials/list" \
--header "Content-Type: application/json" \
--header "Authorization: Bearer MY-ACCESS-TOKEN" \
--data-raw "{}"
If using an eseal certificate (document signing certificate with only organization information; included with your free esigner.com account), then include “clientData”: “DS_ESEAL” (note: eseals do not require OTP authentication). Other options for “clientData” are “EVCS” for EV Code Signing and “DS” (default) for IV or IV+OV Document Signing :
curl --location --request POST "https://cs-try.ssl.com/csc/v0/credentials/list" \
--header "Content-Type: application/json" \
--header "Authorization: Bearer MY-ACCESS-TOKEN" \
--data-raw "{\"clientData\": \"DS_ESEAL\"}"
CSC Credentials Info (Optional)
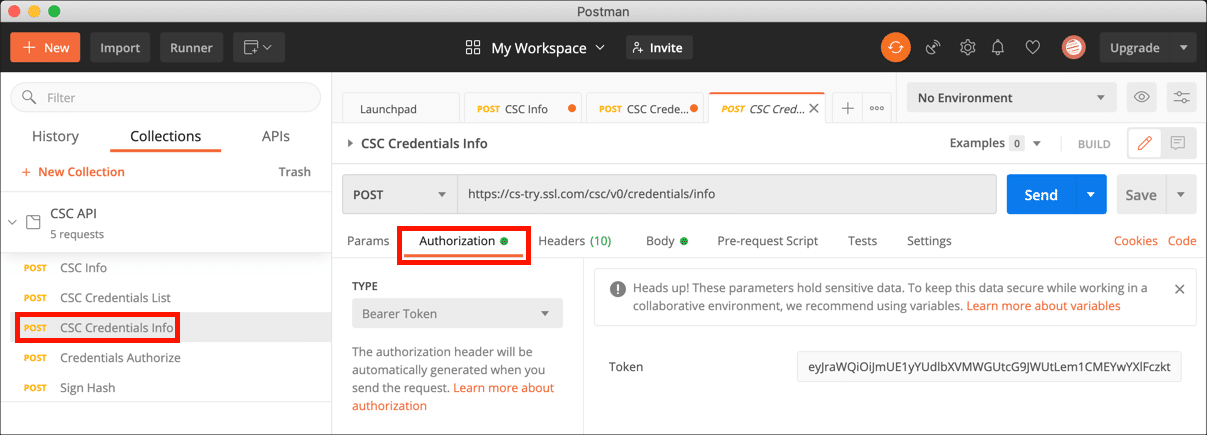
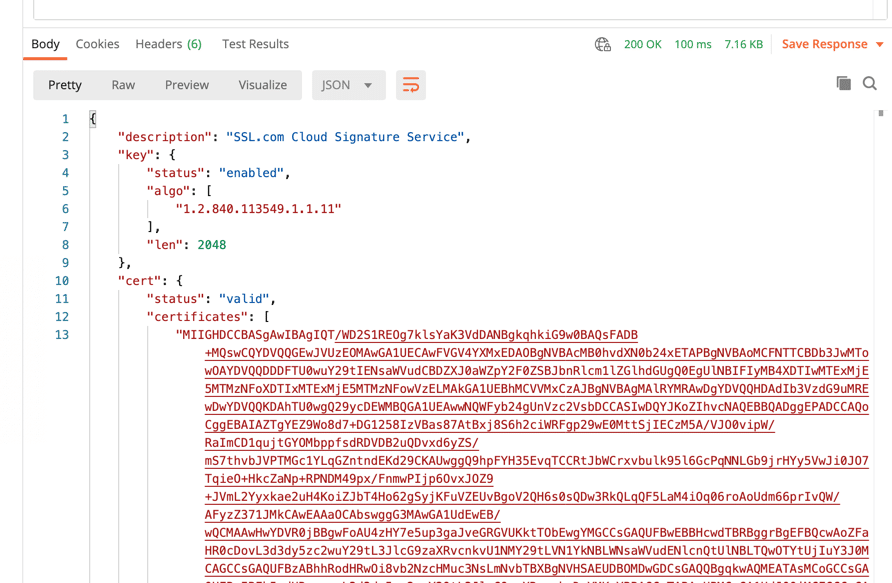
- The CSC Credentials Info request will return certificates and other information associated with a credential ID, and is not required for signing. To use this request, select CSC Credentials Info from the collection and click the Authorization tab.

- Choose Bearer Token from the Type menu, then paste your access token into the Token field.

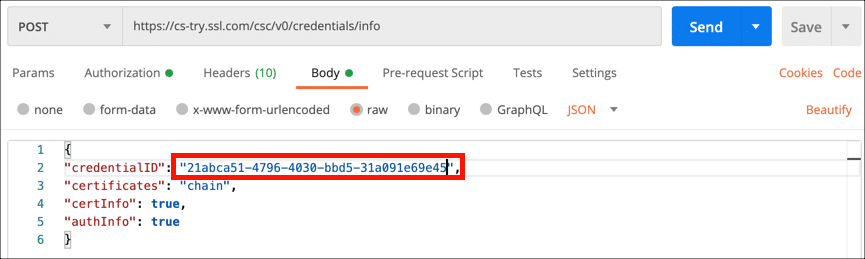
- Select the Body tab, then paste your credential ID as the value for
credentialID.

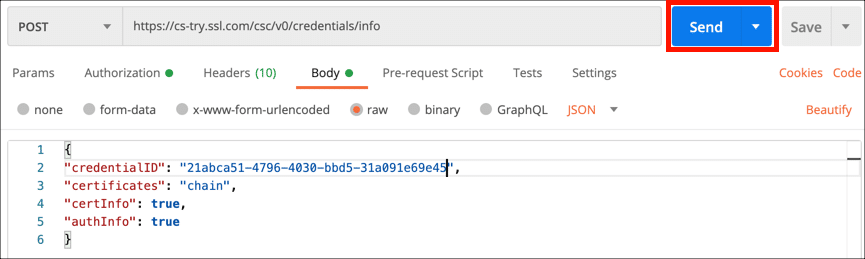
- Click the Send button.
- A JSON object with your signing certificate chain and other information will appear in the Response field.


cURL Command
Replace MY-ACCESS-TOKEN and MY-CREDENTIAL-ID with your actual information:
curl --location --request POST "https://cs-try.ssl.com/csc/v0/credentials/info" \
--header "Content-Type: application/json" \
--header "Authorization: Bearer MY-ACCESS-TOKEN" \
--data-raw "{
\"credentialID\": \"MY-CREDENTIAL-ID\",
\"certificates\": \"chain\",
\"certInfo\": true,
\"authInfo\": true
}"
Credentials Authorize
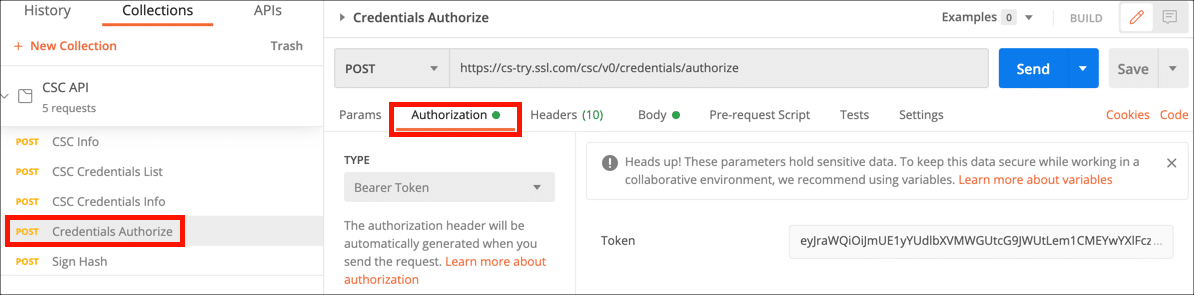
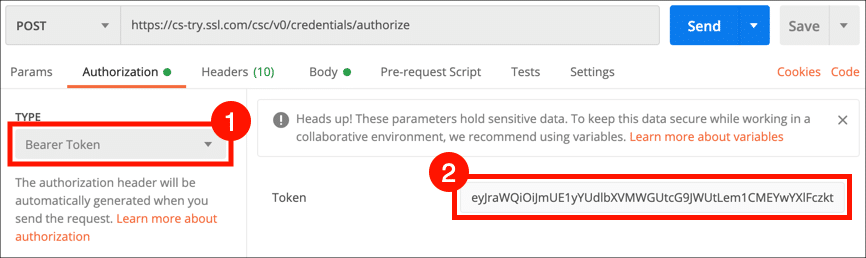
- The Credentials Authorize request will retrieve authorization for signing a hash. Begin by selecting Credentials Authorize from the collection and clicking the Authorization tab.

- Choose Bearer Token from the Type menu, then paste your access token into the Token field.
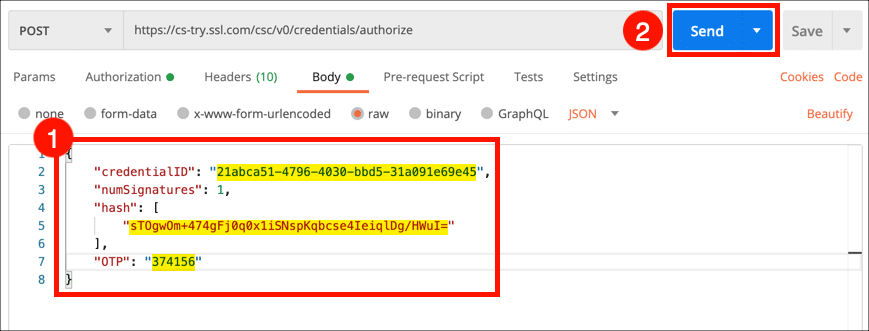
- Select the Body tab. Paste your credential ID as the
credentialIDvalue and a hash of the document you wish to sign as thehashvalue. Retrieve and enter an OTP from your authentication app and enter it as the value forOTP, then click the Send button.

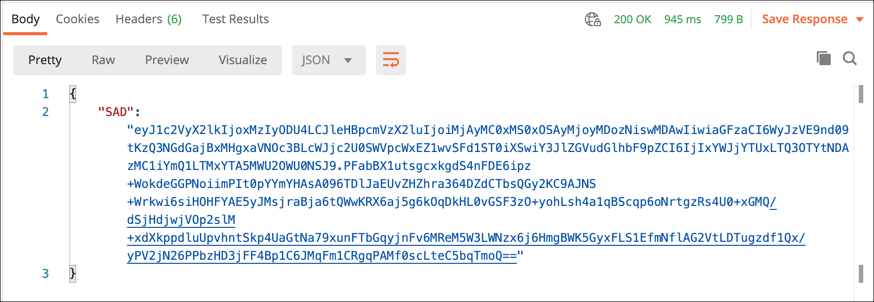
- A JSON object with your Signature Activation Data (SAD) will appear in the Response field. Copy and paste this value into a text editor for use in the hash signing request.

cURL Command
Replace MY-ACCESS-TOKEN, MY-CREDENTIAL-ID, MY-HASH, and MY-OTP with your actual information:
curl --location --request POST "https://cs-try.ssl.com/csc/v0/credentials/authorize" \
--header "Content-Type: application/json" \
--header "Authorization: Bearer MY-ACCESS-TOKEN" \
--data-raw "{
    \"credentialID\": \"MY-CREDENTIAL-ID\",
    \"numSignatures\": 1,
    \"hash\": [
        \"MY-HASH\"
    ],
    \"OTP\": \"MY-OTP\"
}"
Sign Hash
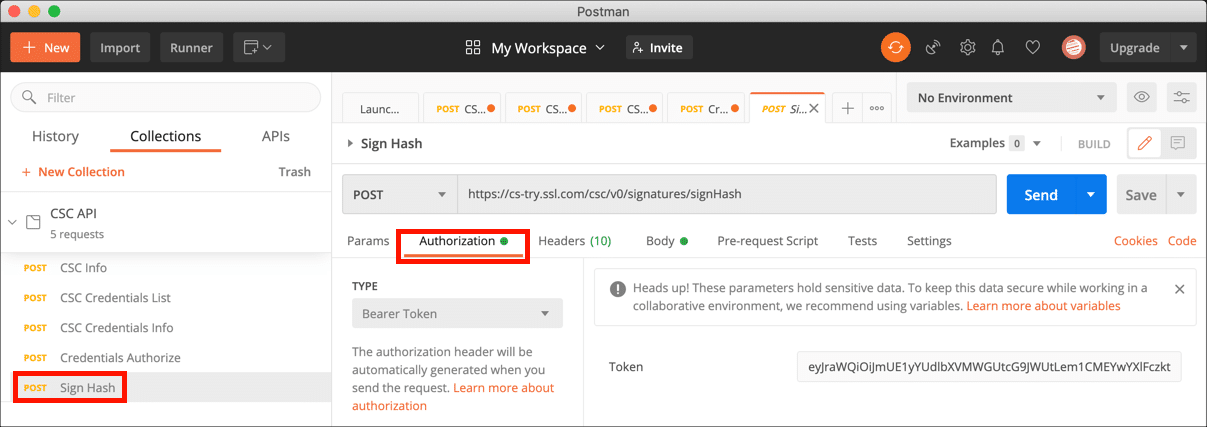
- Now we’re ready to sign the document hash. Select Sign Hash from the collection, then select the Authorization tab.

- Choose Bearer Token from the Type menu, then paste your access token into the Token field.
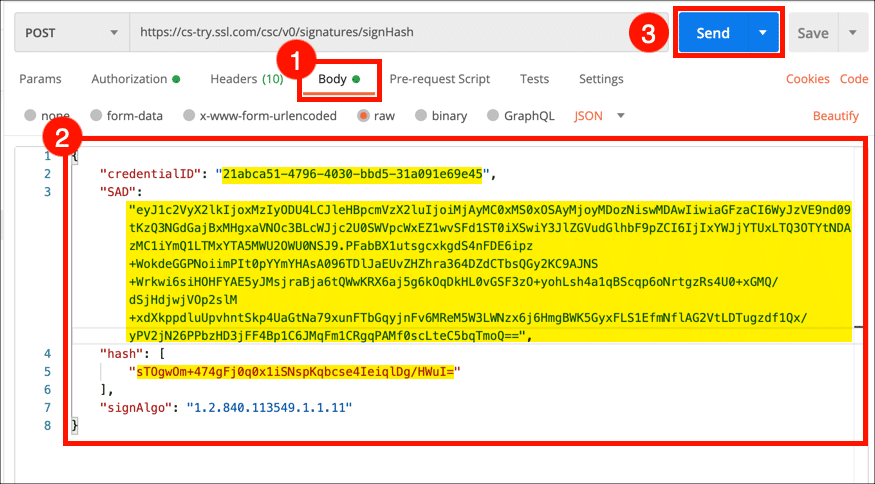
- Select the Body tab. Paste your credential ID as the
credentialIDvalue, your Signature Activation Data as theSADvalue, and a hash of the document you wish to sign as thehashvalue, then click the Send button.

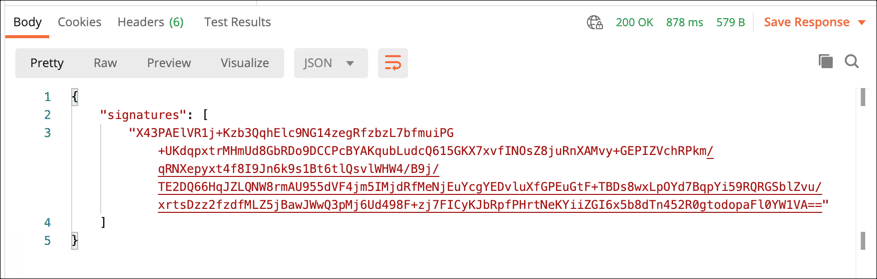
- A JSON object with your signature will appear in the Response field.


cURL Command
Replace MY-ACCESS-TOKEN, MY-CREDENTIAL-ID, MY-SAD, and MY-HASH with your actual information:
Note: If your signing key is ECDSA, replacethe value of the signAlgo parameter with: 1.2.840.10045.4.3.2
curl --location --request POST "https://cs-try.ssl.com/csc/v0/signatures/signHash" \
--header "Content-Type: application/json" \
--header "Authorization: Bearer MY-ACCESS-TOKEN" \
--data-raw "{
    \"credentialID\": \"MY-CREDENTIAL-ID\",
    \"SAD\": \"MY-SAD\",
    \"hash\": [
        \"MY-HASH\"
    ],
    \"signAlgo\": \"1.2.840.113549.1.1.11\"
}"
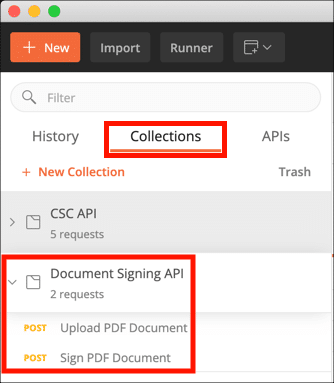
Sign a PDF
In addition to signing document hashes, you can also upload and sign a PDF file. Begin by downloading and importing the Document Signing API Postman collection (see https://www.postman.com/sslcom/workspace/public/collection/3454644-277d8427-f749-4a94-93bf-c3478b79b999?ctx=documentation for the latest api endpoints and collection downloads), following the same installation steps you followed above for the CSC API collection.
- Upload PDF Document
- Sign PDF Document
You can re-use the credential you retrieved above with the CSC Credentials List request. You will probably also need to retrieve a new access token.
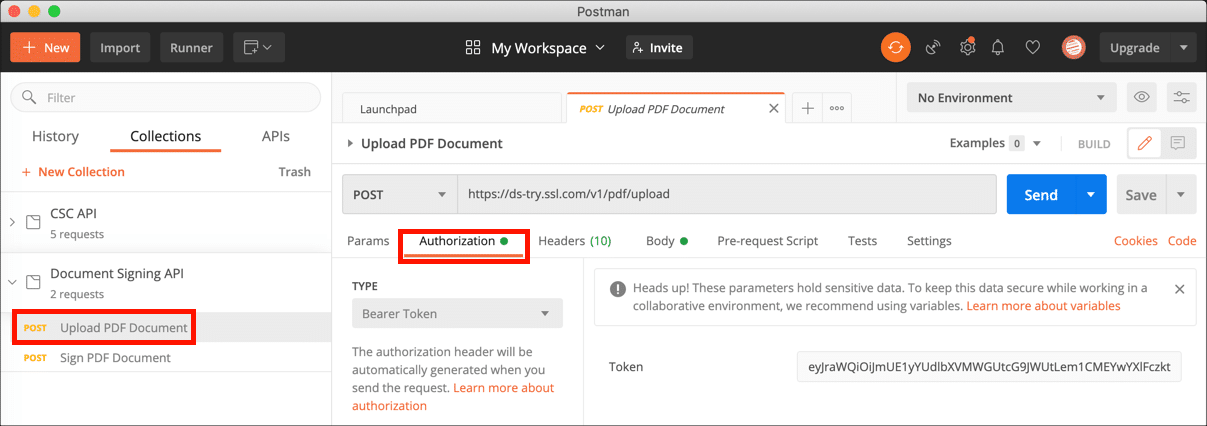
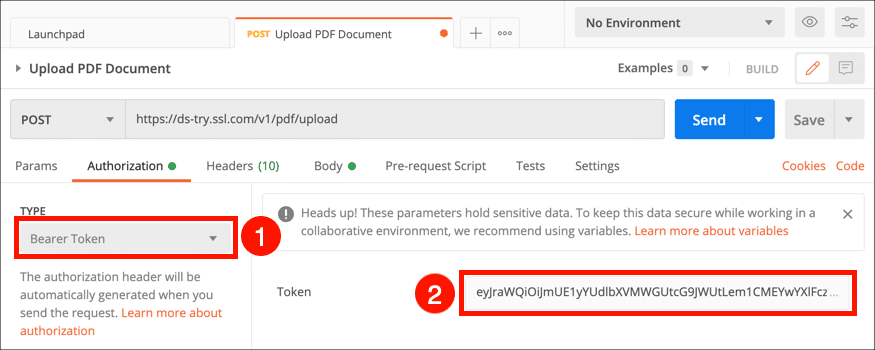
Upload PDF Document
- Select the Upload PDF Document request and click the Authorization tab.

- Choose Bearer Token from the Type menu, then paste your access token into the Token field.

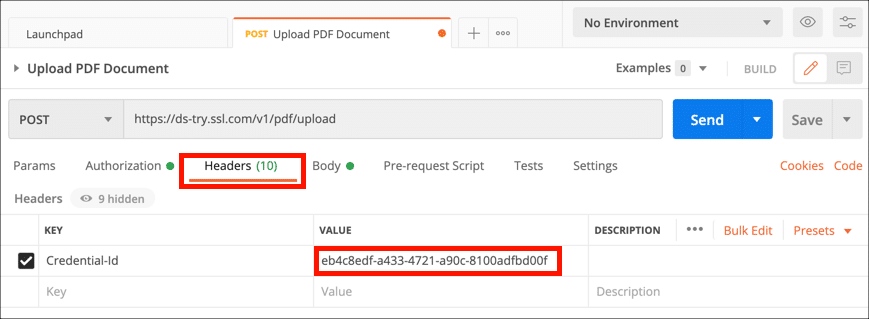
- Select the Headers tab and paste your credential ID in the Value column.

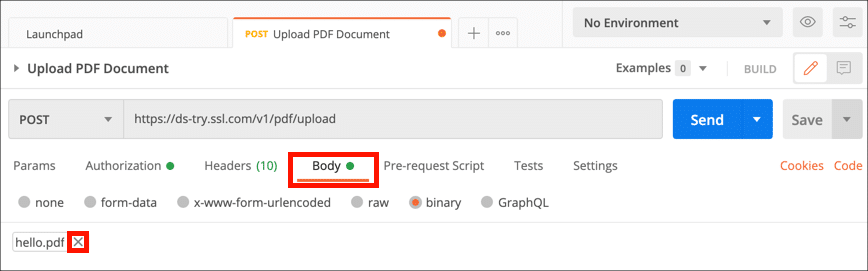
- Select the Body tab and click the × next to
hello.pdfto remove this placeholder filename.

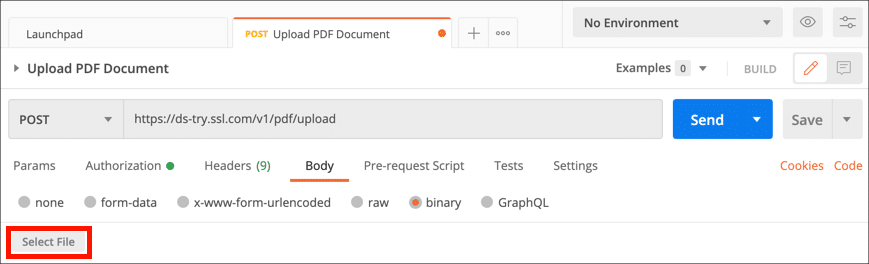
- Click the Select File button, then navigate to the file you want to upload.

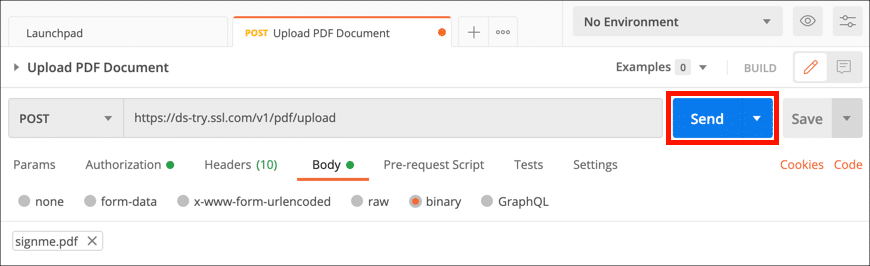
- Click the Send button.

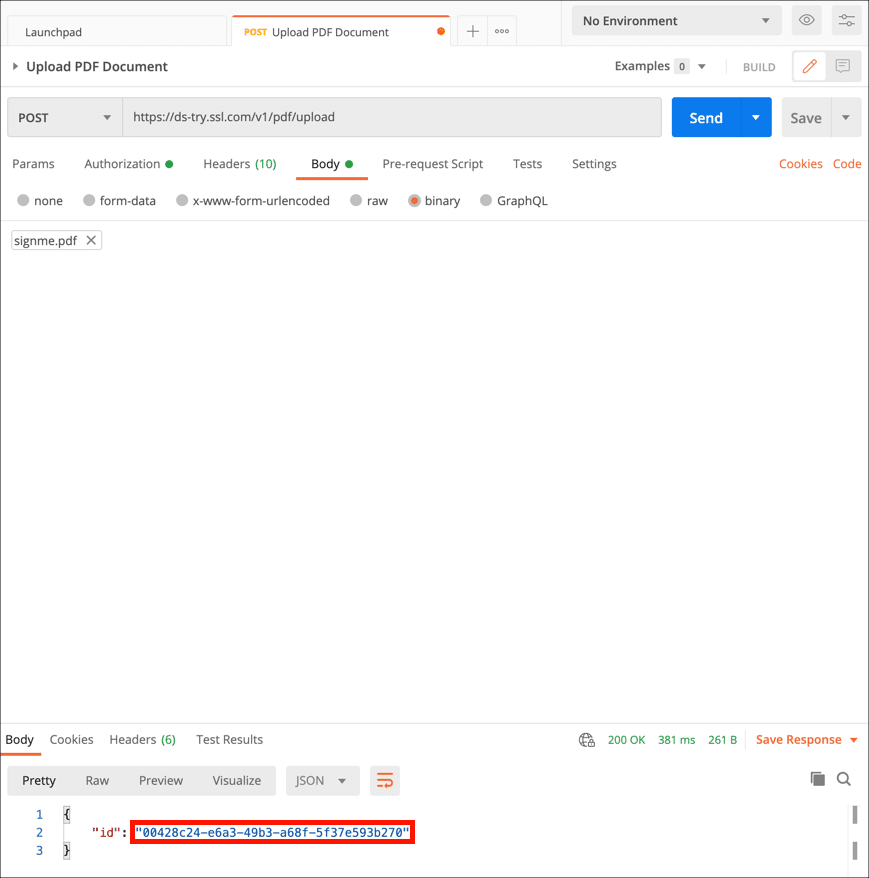
- Select and copy the
idvalue in the response to use in the next request.

cURL command
Replace MY-CREDENTIAL-ID, MY-ACCESS-TOKEN, and /PATH/TO/FILE.pdf with your actual information:
curl --location --request POST "https://ds-try.ssl.com/v1/pdf/upload" \
--header "Credential-Id: MY-CREDENTIAL-ID" \
--header "Authorization: Bearer MY-ACCESS-TOKEN" \
--header "Content-Type: application/pdf" \
--data-binary "@/PATH/TO/FILE.pdf"
Note: For visible signatures, please refer to the following HTTP Request Headers (/v1/pdf/upload):
|
Credential-Id |
Unique Credential ID assigned to the key – Mandatory |
|
Signing-Reason |
Add signing reason to add in signature appearance and also in signature dictionary – Optional e.g. I approve this document |
|
Signing-Location |
Add signing location in signature dictionary – Optional e.g. Houston, Texas |
|
Contact-Info |
Add contact information in signature dictionary – Optional e.g. Phone number |
|
Signature-Field-Position |
Signature field position where visual signature displays. The format is “x,y,width,height“ – Optional |
|
Page-Number |
Page number where to draw signature – Optional |
|
Hand-Signature |
Base64 encoded PNG image of hand signature – Optional |
Sign PDF Document
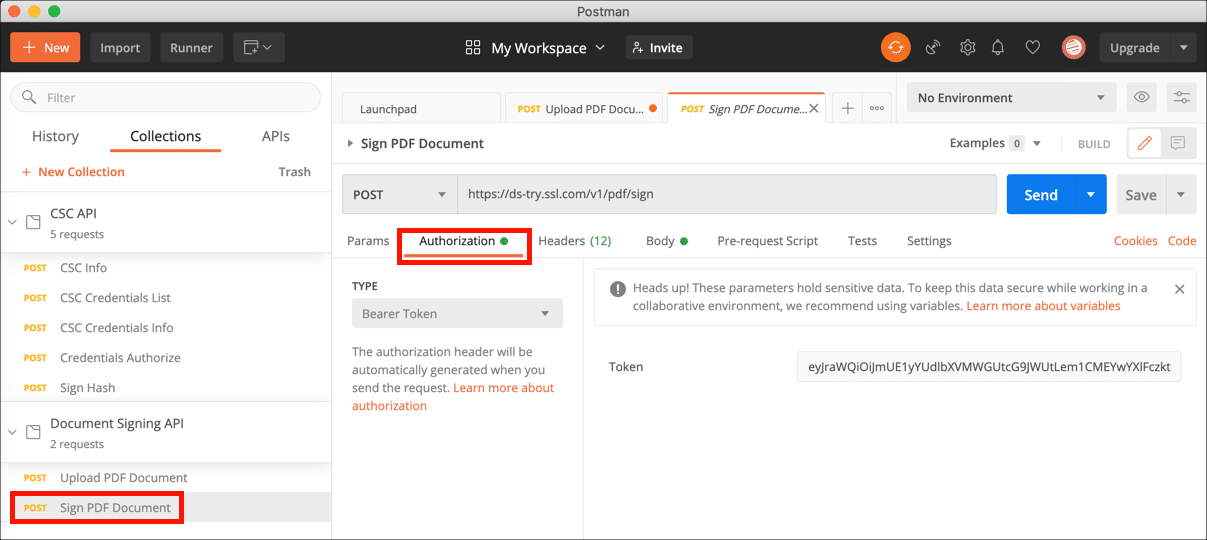
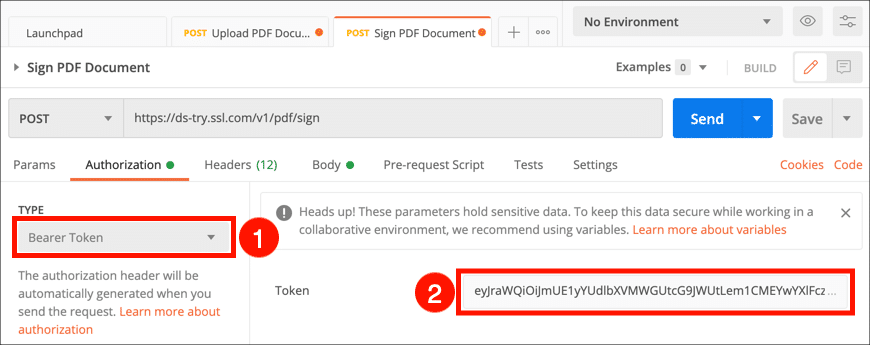
- Now you can sign the PDF. Select the Upload PDF Document request and click the Authorization tab.

- Choose Bearer Token from the Type menu, then paste your access token into the Token field.

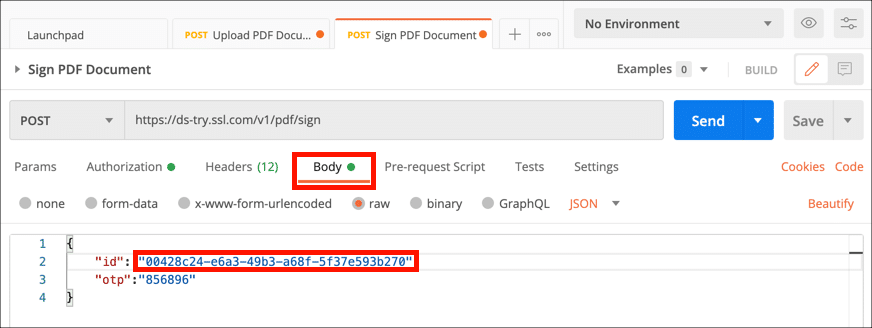
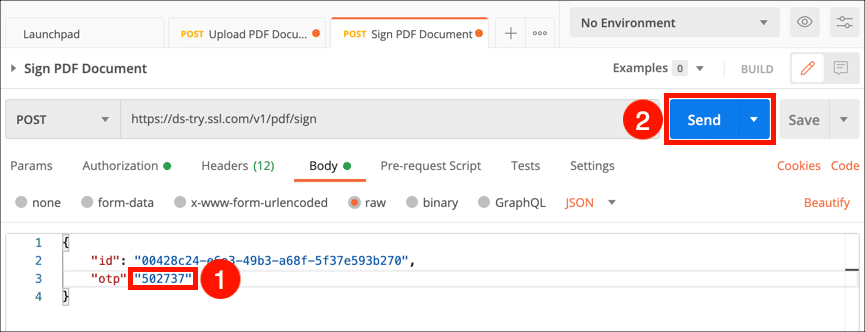
- Select the Body tab, and paste in the
idvalue from the previous step.

- Enter an OTP from your authentication app and click the Send button.

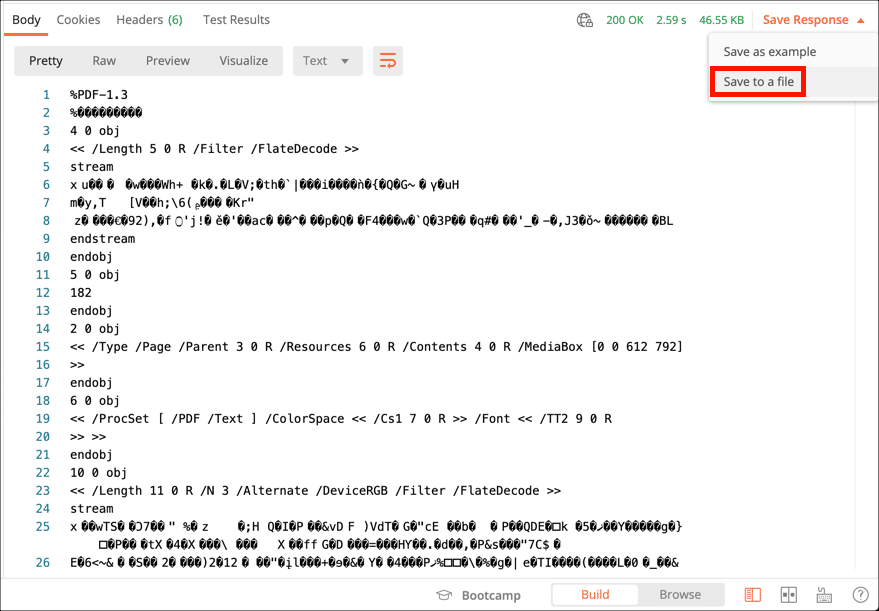
- The PDF data will appear below in the Response field. Choose Save to a File from the Save Response menu, then give the file a name.

- Open the file in Acrobat to confirm that the file has been signed. (Note that in the screenshot below, SSL.com’s RSA Development root has been manually trusted in Acrobat.)


cURL Command
Replace MY-CREDENTIAL-ID, MY-FILE-ID, and MY-OTP with your actual information:
curl --location --request POST "https://ds-try.ssl.com/v1/pdf/sign" \
--header "Content-Transfer-Encoding: application/json" \
--header "Content-Type: application/json" \
--header "Authorization: Bearer MY-ACCESS-TOKEN" \
--data-raw "{
    \"id\": \"MY-FILE-ID\",
    \"otp\":\"MY-OTP\"
}"
Going Live With Production
To go live, you need to remove “-try” from the subdomain. For instance, to go live with ds-try.ssl.com, remove “-try” so the subdomain will become ds.ssl.com.