This how-to will walk you through ordering and installing a Personal Basic Email and ClientAuth certificate from SSL.com. These affordable certificates offer S/MIME email protection and client authentication for as little as $20 per year, and are a great way to prevent phishing while also providing a secure authentication factor for company web portals and other applications.
BUY PERSONAL BASIC CERTIFICATES
Ordering
-
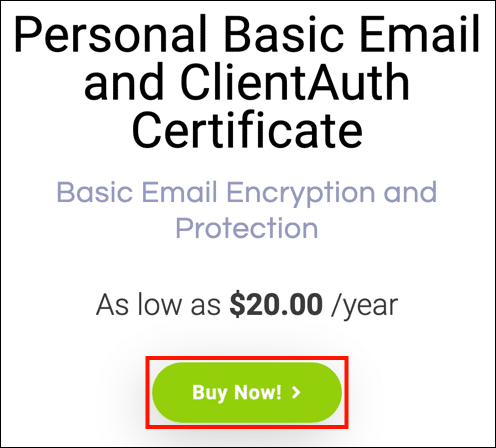
Go to the product page for Personal Basic Email and ClientAuth certificates and click the Buy Now button.

-
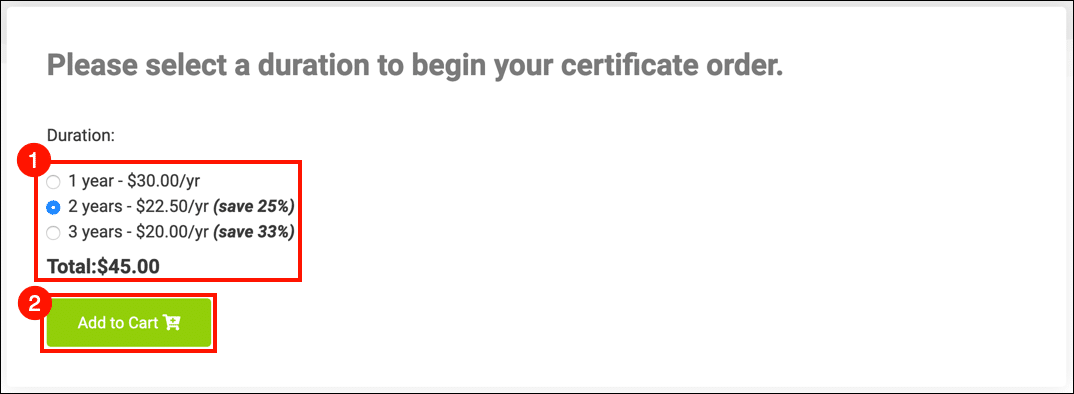
Choose a duration for your certificate and click the Add to Cart button to add the certificate to your shopping cart. Note that even though the maximum lifespan of any S/MIME certificate issued by SSL.com is two years, customers can save money by ordering bundles of up to three years. For three-year Personal Basic orders, we issue free replacement certificates upon expiration and re-validation for the final year of the order.

-
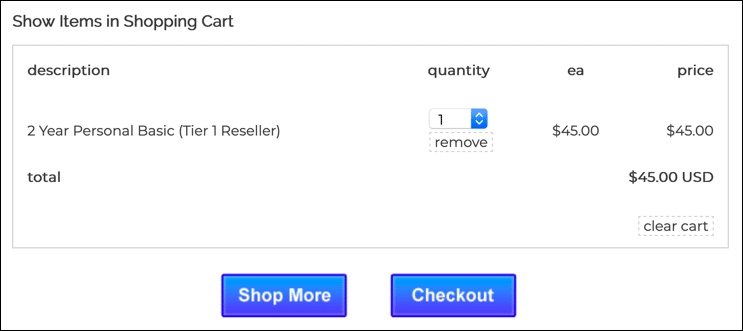
In the shopping cart, you can change the quantity of certificates, remove them from your cart, or return to shopping with the Shop More button. When your order is complete and correct, click Checkout.

-
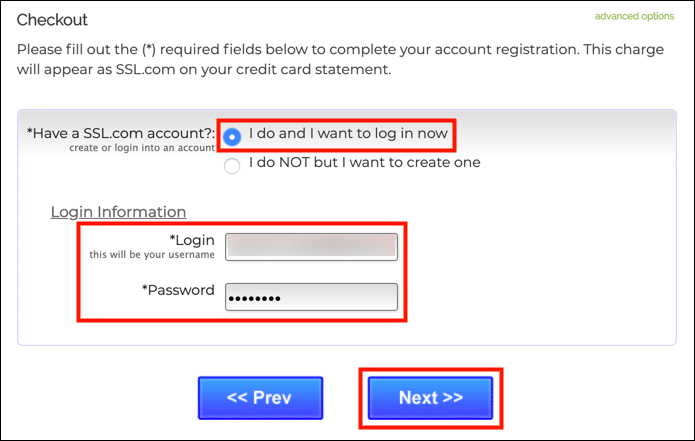
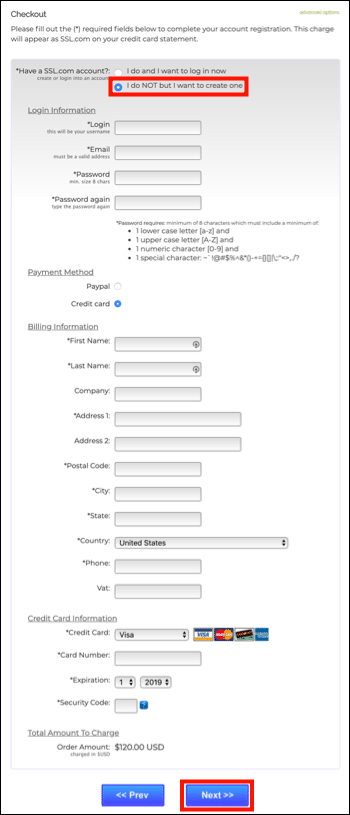
If you are not already logged into your SSL.com account or do not have an account yet, you will be prompted to login or create a new account at the Checkout screen. If you have an account, select I do and I want to log in now, enter your username and password, then click the Next >> button.

-
If you do not have an SSL.com account, select I do NOT but I want to create one, fill in the requested information (username, email address, password, and billing information), then click the Next >> button.

-
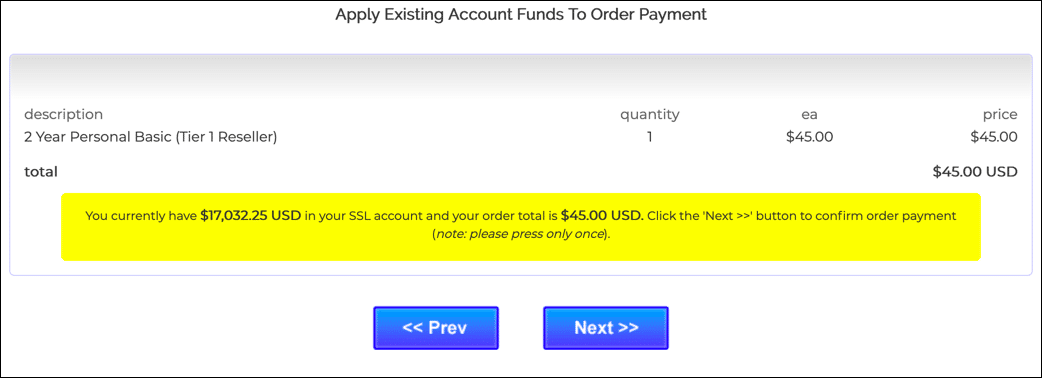
If your account contains existing funds, they will be applied to your purchase. If your account does not contain sufficient funds, you will be prompted to add more. Click the Next >> button when your account has sufficient funds to complete the transaction.

-
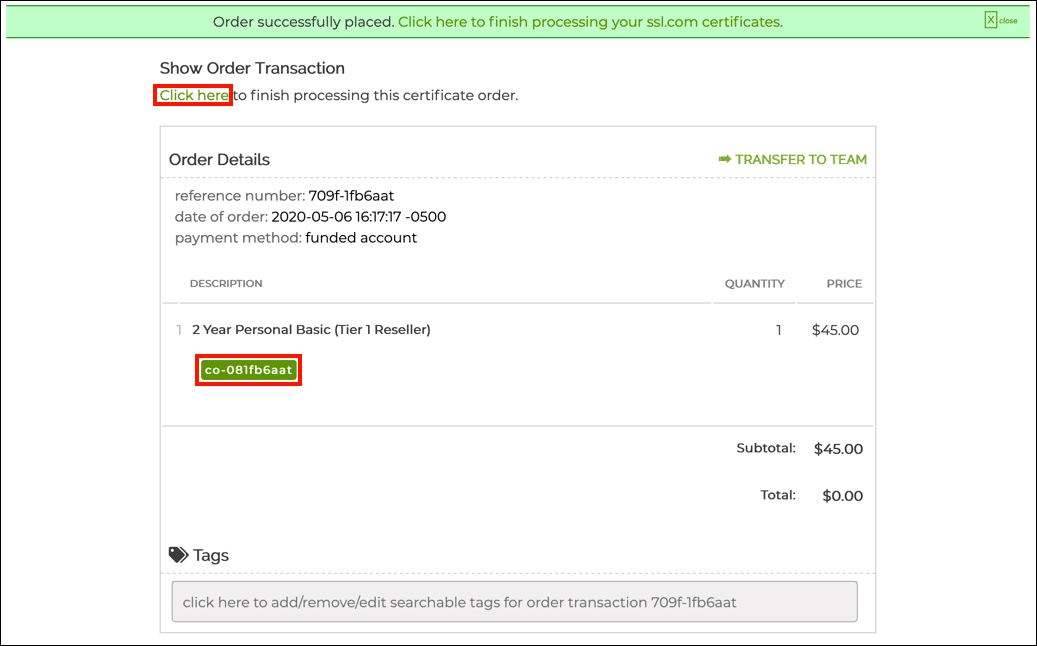
If your order has been successfully placed, you will see a green alert near the top of the browser window, reading “Order successfully placed…” Click the Click here link under Show Order Transaction or the green order number beginning with “co-” in the order details.

-
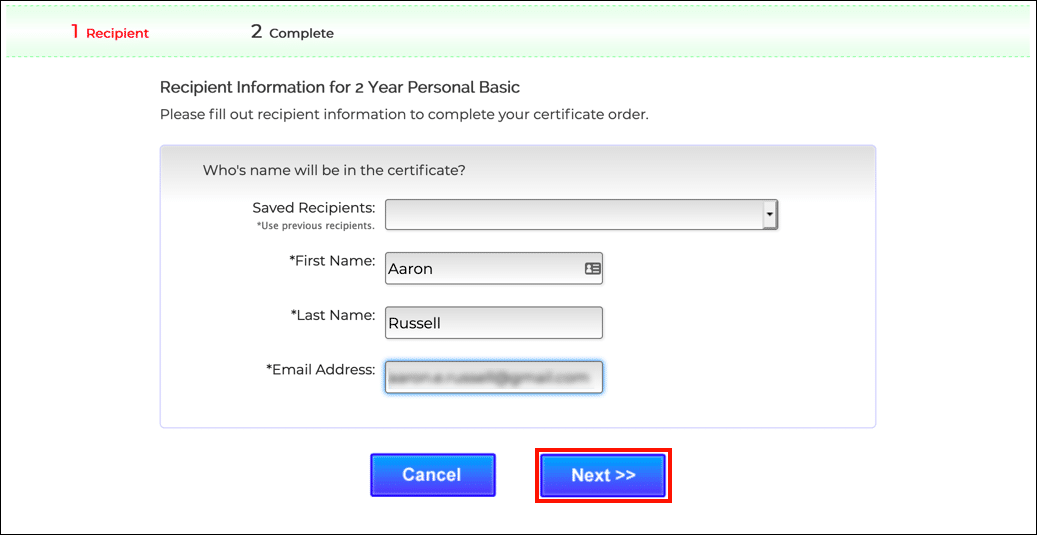
Enter recipient information (First Name, Last Name, and Email Address), then click Next>>. You can also choose previously-saved information by using the Saved Recipients drop-down menu.

-
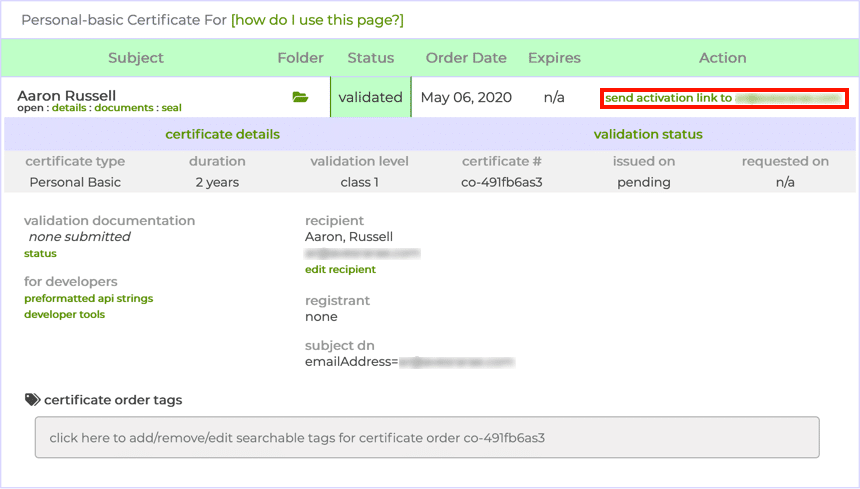
You will be returned to a page with information about the certificate order. Click send activation link.

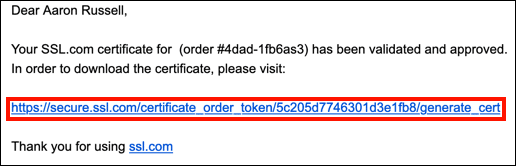
- Check your email for a new message with your activation link. (If you have multiple addresses, be sure to check the one you are ordering the Personal Basic certificate for.) Click the link.

-
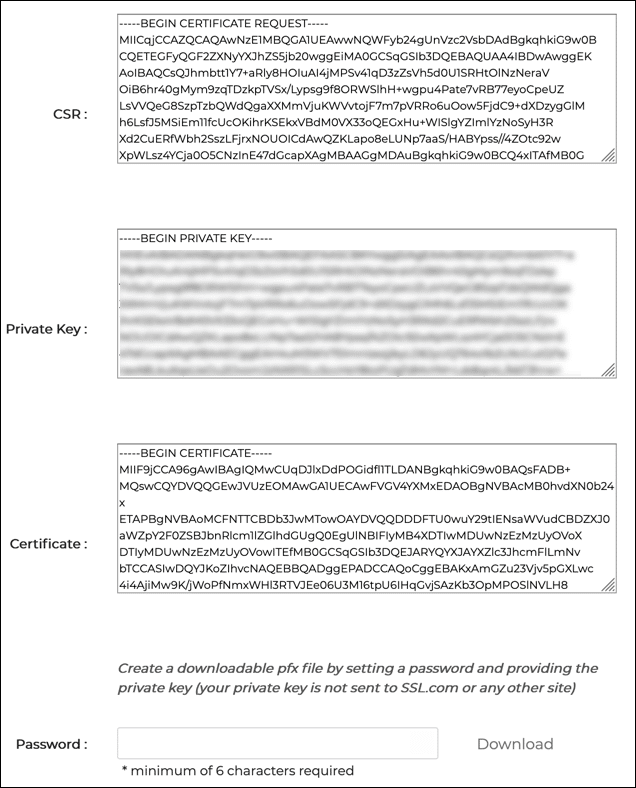
Click the Generate Certificate button to generate a new certificate signing request (CSR), certificate, and private key.
 Note: If you want to specify the algorithm, you can choose between RSA and ECDSA with the Algorithm drop-down menu. You can also click the Show Advanced Options button, which will reveal a drop-down menu for choosing the key size.
 - Text fields containing the new CSR, private key, and certificate will appear.

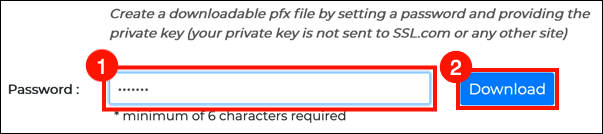
- To download a PFX file containing your new certificate and private key to your computer, create a password of 6 characters or more, then click the Download button. Remember this password. You will need it when you install the certificate and key on your computer. Also, it is very important that you keep your private key secure and do not lose it. SSL.com does not ever see or handle your private keys and cannot help you recover a lost key (it will be generated in your browser, on your own computer). Without your private key you will not be able to digitally sign email or read email that has been encrypted with your public key. Even worse, anyone with your private key will be able to assume your identity for signing email messages and client authentication.


Installation
For most applications supporting S/MIME or Client Authentication, you can simply follow the instructions below to install your downloaded PFX file in the OS certificate store and your email client or web browser will be able to access the certificate. However, Mozilla Thunderbird and Firefox require additional configuration steps:
- Configure Mozilla Thunderbird for S/MIME (Windows)
- Configure Mozilla Firefox for Client Authentication
Windows
These procedures were documented on Windows 10 Enterprise version 1809.
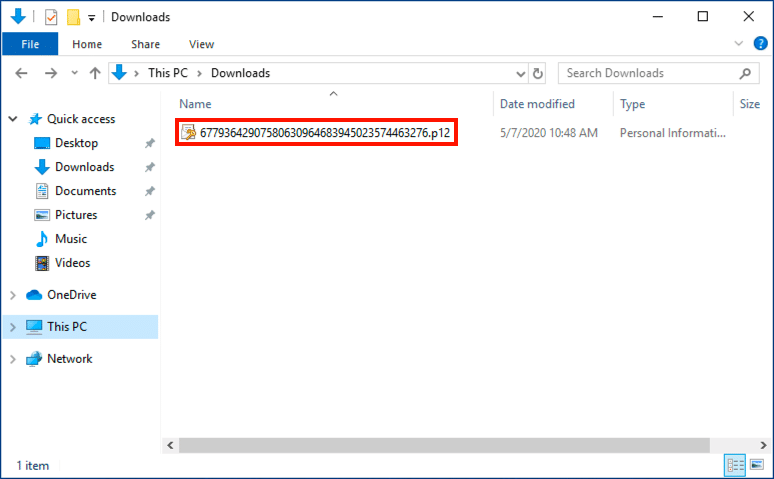
- Double-click the PFX file you downloaded to open it. The filename will end with
.p12
- The Certificate Import Wizard will open. Select Current User, then click the Next button.

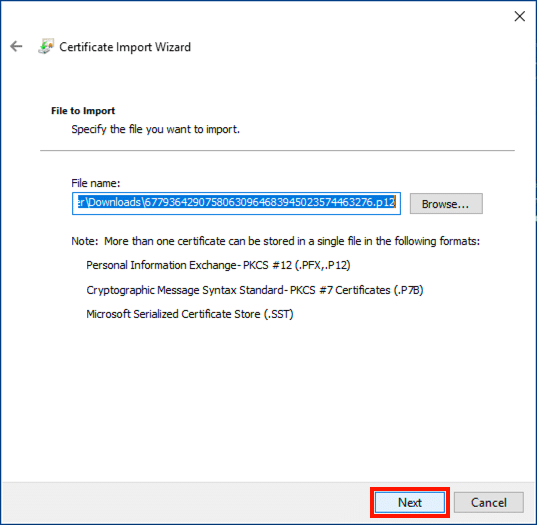
- The next window will ask you to specify a file to import. The file you double-clicked in step 1 should already be selected, so click the Next button to continue.
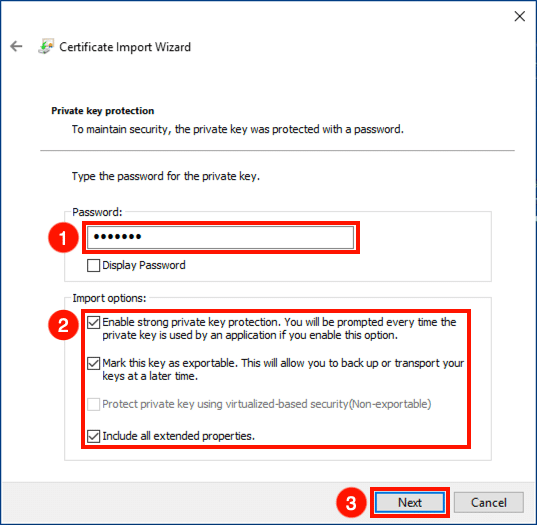
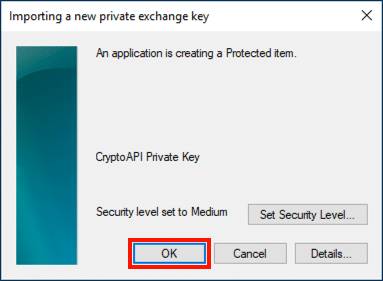
- Enter the password you created when you downloaded the PFX file from SSL.com. Under Import Options, make sure that Include all extended properties is checked. If you want to be prompted for your PFX password every time the private key is used (e.g. for signing), check Enable strong private key protection. If you would like to be able to export a PFX containing the private key at a later date, check Mark this key as exportable. When you are done selecting options, click the Next button.
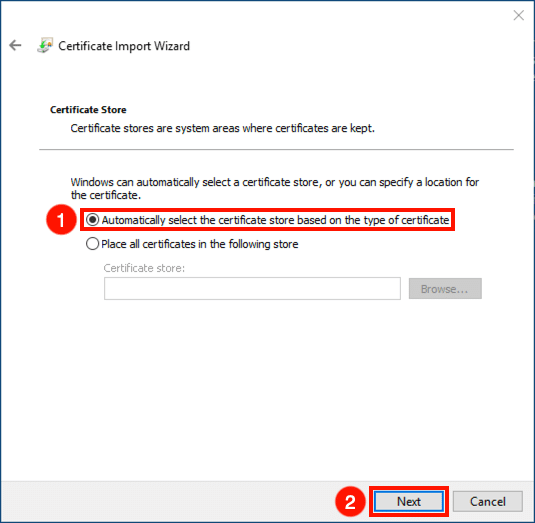
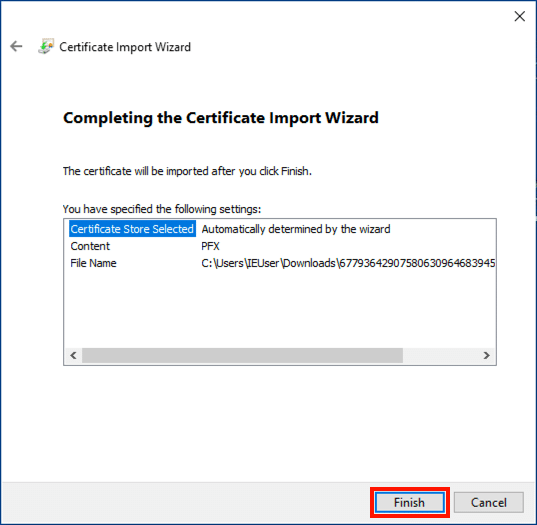
- Make sure that Automatically select the certificate store based on the type of certificate is checked, then click the Next button.

- Click the Finish button.
- If you selected Enable Strong Private Key Protection in step 4, then the Importing a new private exchange key dialog box will appear. Click the OK button to continue.

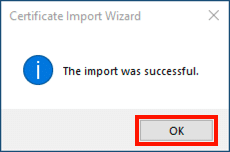
- You’re all finished! Click the OK button to exit the wizard.


macOS
These procedures were documented on macOS 10.14.6 (Mojave).
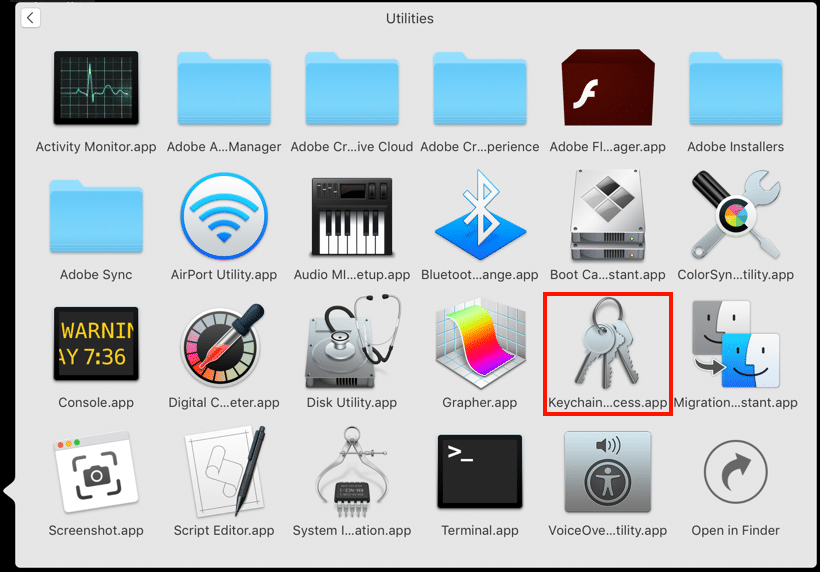
- Open Keychain Access.app, located in Applications > Utilities.

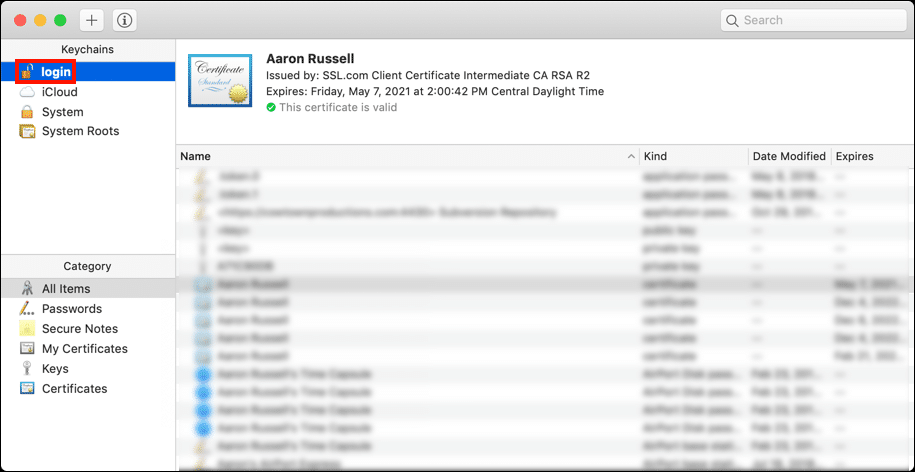
- Select the login keychain.

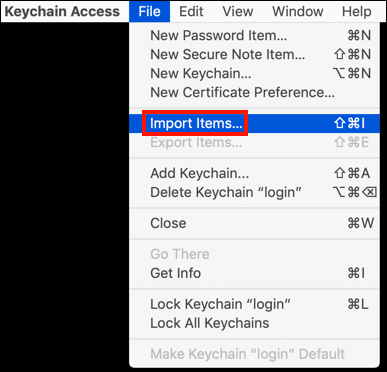
- Select File > Import Items from the menu.

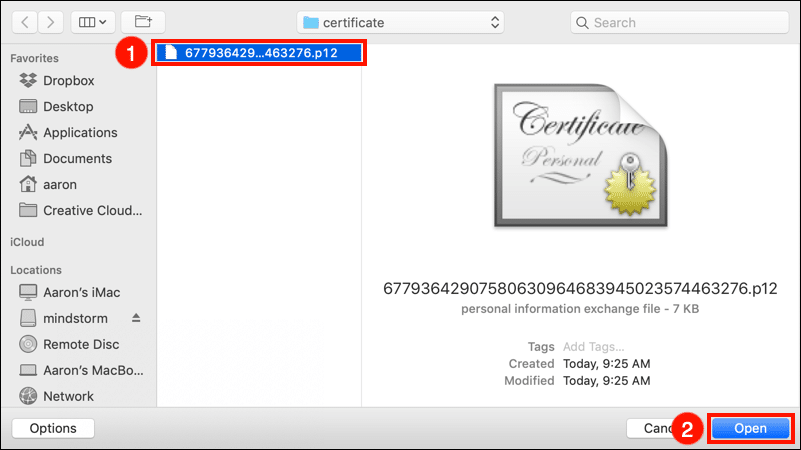
- Navigate to the PFX file you downloaded from SSL.com, then click the Open button. Note that the filename will end with
.p12.
- Enter the password you created when downloading the PFX file and click the OK button.

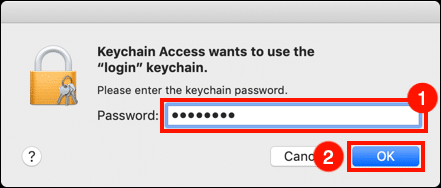
- If prompted, enter your login password and click the OK button to unlock the Login keychain.

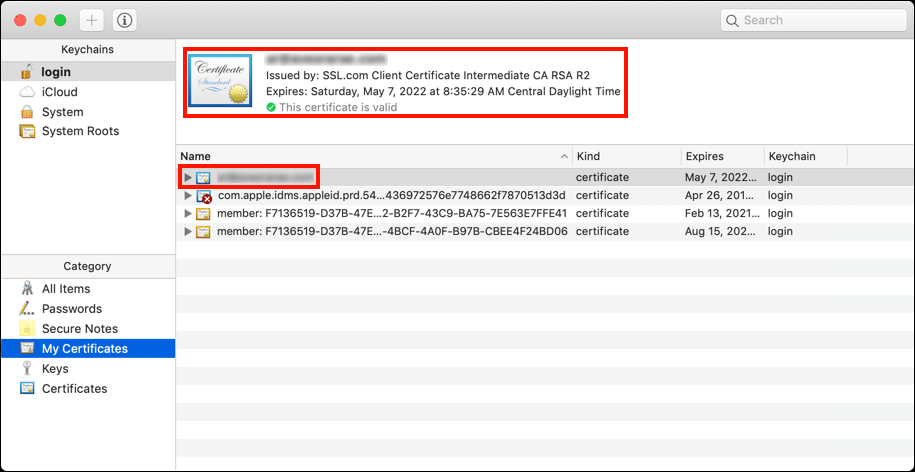
- The certificate and private key are now installed on the computer.