This how-to will walk you through using your SSL.com OV or EV code signing certificate with Microsoft’s SignTool and SSL.com’s SSL Manager.
These instructions assume that your OV code signing certificate has been installed, or that you have an EV certificate on a hardware token. For cloud-based EV Code Signing using the esigner platform, please refer to the overview page and this enrollment guide.
Remember that for hardware-based EV code signing certificates the private key only exists on the YubiKey FIPS USB token that was sent to you and that the token must be attached to the computer that is being used to sign the application. Windows users with YubiKey FIPS tokens should also download and install the YubiKey Smart Card Minidriver before using their token.
Signing an Executable with SignTool
Install Windows SDK and SignTool
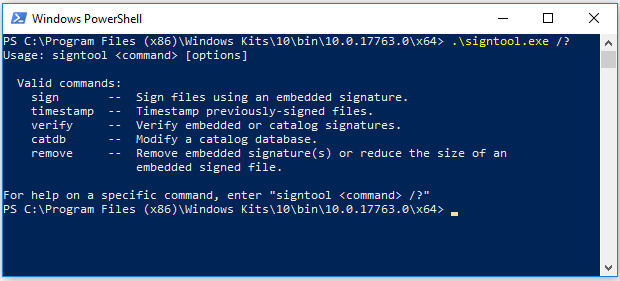
SignTool is included with Windows 10 SDK. After installation, SignTool will be located under:
C:\Program Files (x86)\Windows Kits\10\bin\<SDK VERSION>\x64\signtool.exe
Access SignTool via Powershell or Command Prompt
Accessing SignTool is the first part of the commands both in signing your file and verifying the digital signature. Both Powershell and Command Prompt can be used to access SignTool.
Depending on the Windows OS version and Windows SDK version you are using, accessing SignTool will vary. One of the following options will be included as the first part of the command:
- .\signtool.exe
- .\signtool
- signtool
- signtool.exe
- “C:\Program Files (x86)\Windows Kits\10\bin\10.0.26100.0\x86\signtool.exe”
Start Powershell
Start a Powershell command window by searching for “Powershell” in the Start menu and clicking on the desktop application.
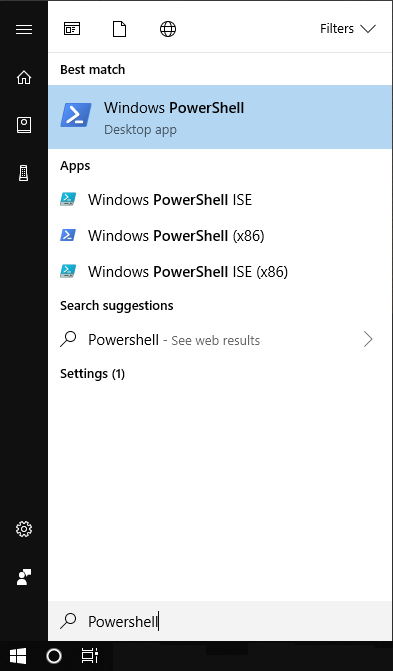
Powershell is a command line interface to Windows’ core services. You can use it to execute SignTool and sign your code.
For EV code signing, attach your USB token to your computer (if you haven’t done so already). If using eSigner, install eSigner Cloud Key Adapter
Remember that the private key only exists on the USB token that was sent to you and that the token must be attached to computer that is being used to sign the application. This step should be skipped if you are using an OV code signing certificate.
Sign Executable
You can sign an executable by issuing the following command in the Powershell window. If using eSigner cloud signing with signtool.exe, be sure to install eSigner CKA
.\signtool.exe sign /fd sha256 /a "C:\path\to\MyExecutable.exe"
- The
/fdoption selects the digest algorithm to be used when signing. Windows 10 SDK, HLK, WDK, and ADK builds 20236 and above require require this option to be set when signing. SHA256 is recommended over SHA1 for security. - The
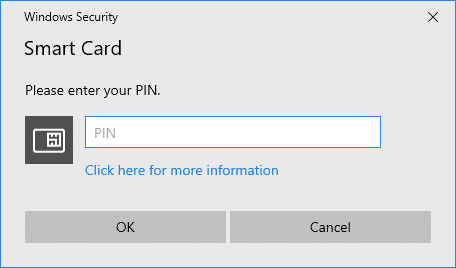
/aoption instructs SignTool to automatically find an appropriate code signing certificate for your executable. - If you are using an EV code signing certificate you will be prompted for your USB token’s PIN. If you need help finding your PIN, please refer to this how-to.

Selecting a Signing Certificate
Specify Subject Name
If you have more than one code signing USB tokens or certificates installed, you can specify the certificate you want to use by including its Subject Name via the /n option.
You can find your EV CS certificate’s Subject Name using Microsoft’s certificate management tool certmgr. Open the tool from the Start menu and look for your EV CS certificate in the “Personal” folder, under “Certificates”, as shown in the image below. The Subject Name is the “Issued To” field in certmgr.
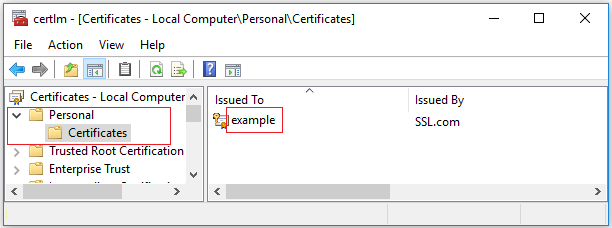
In the above image the certificate’s Subject Name is example. You can specify this value in SignTool with the following command.
.\signtool.exe sign /fd sha256 /n "example" "C:\path\to\MyExecutable.exe"
Specify SHA1 Hash
If you have multiple certificates with the same Subject Name, you can also use the SHA1 hash (or “thumbprint”) of a certificate to select it for signing. You can find this value by following these instructions:
Open the User Certificate store by typing certmgr.msc in the Windows search bar. Once the Certificate Manager window appears, navigate to the Personal folder on the left panel and select the Certificates subfolder on the right to find your code signing certificate.
Double-click on the certificate, go to the Details tab, and scroll down to locate the Thumbprint. Copy the Thumbprint and include it in your command when signing code.
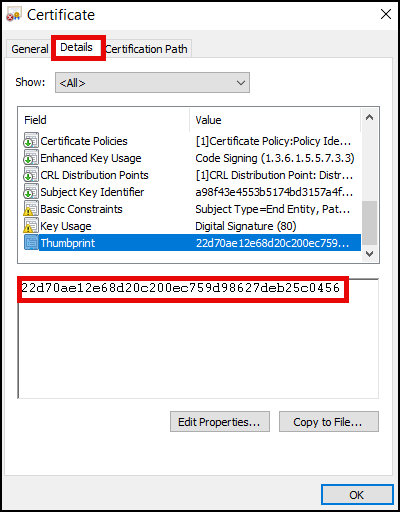
.\signtool.exe sign /fd sha256 /sha1 THUMBPRINT "C:\path\to\MyExecutable.exe"
Note: There can be cases where multiple code signing certificates with the same name appear in the store because a user owns multiple USB tokens. If you’re not sure which one to pick, choose the one with the serial number that matches what is indicated in your SSL.com order details page. Likely, you will want to choose the certificate with the latest expiration date.
To fully verify the certificate you should be using, follow these instructions:
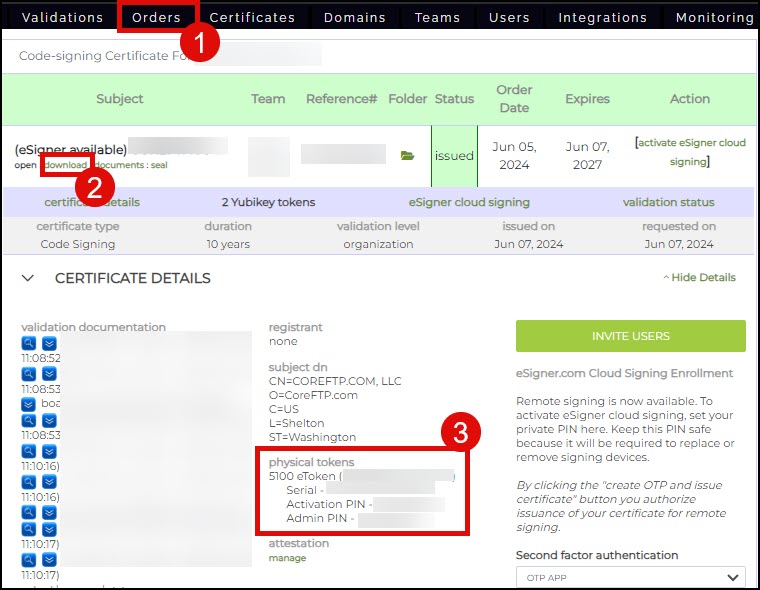
- Login to your SSL.com account and click the Orders tab. Locate your certificate order and click the download link to display the details of your certificate.

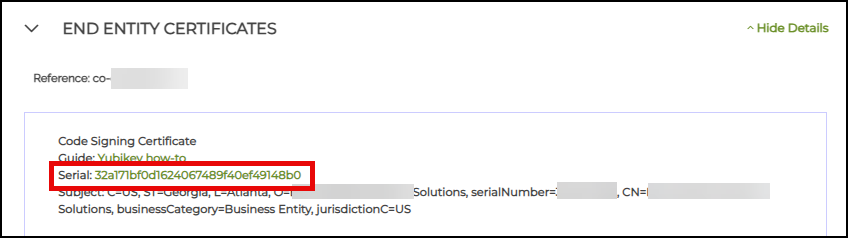
- Scroll down and click the END ENTITY CERTIFICATES section. Under the Code Signing Certificate subsection, you will see the serial number of your certificate.

- Perform a cross-check. Double-click the certificate in your computer’s Certificate Manager. Click Details. Check if the serial numbers match.


Use a PKCS#12/PFX File
If you have a code signing certificate and private key in a PKCS#12 file (also known as a PFX or P12 file), you can specify the file and its password on the command line:
.\signtool.exe sign /fd sha256 /f "C:\path\to\MyCertificate.pfx" /p password "C:\path\to\MyExecutable.exe"
Timestamping
Timestamping your code will allow it to be trusted after your code signing certificate expires. If you want to add a timestamp in the signed binary file, you can do so using SignTool’s /tr option, which should be followed by setting the timestamp digest algorithm with /td. The command in the snippet below includes a timestamp from SSL.com‘s timestamp service while signing an executable.
.\signtool.exe sign /fd sha256 /tr http://ts.ssl.com /td sha256 /a "C:\path\to\MyExecutable.exe"
/tr option (specify URL of RFC 3161 time stamp server), not /t (URL of time stamp server), which is incompatible with SSL.com’s timestamp server./td option must follow the /tr option. If the time stamp digest algorithm is specified before the time stamp server, the default SHA-1 algorithm will be used. Windows 10 SDK, HLK, WDK, and ADK builds 20236 and above require use of /tr when timestamping. SHA256 is recommended over SHA1 for security.Other Options
Other important SignTool options are:
/d: Add a description of the signed code. For example,/d "test code"./du: Add a URL with an expanded description of the signed code. For example,/du https://your_website.tld/project/description.
Using all of the above options (but omitting /a, /sha1, or /f because we are specifying the certificate’s Subject Name with /n, our command line looks like:
signtool.exe sign /n "example" /fd sha256 /tr http://ts.ssl.com /td sha256 /d "test code" /du https://your_website.tld/project/description "C:\path\to\MyExecutable.exe"
Verify Signature
Use this command to verify your signed code (note that the /pa option must be present in the command):
.\signtool.exe verify /pa "C:\path\to\MyExecutable.exe"
If your file has been signed successfully, you should see output like this:
File: C:\path\to\MyExecutable.exe
Index  Algorithm  Timestamp
========================================
0      sha256     RFC3161

Successfully verified: C:\path\to\MyExecutable.exe
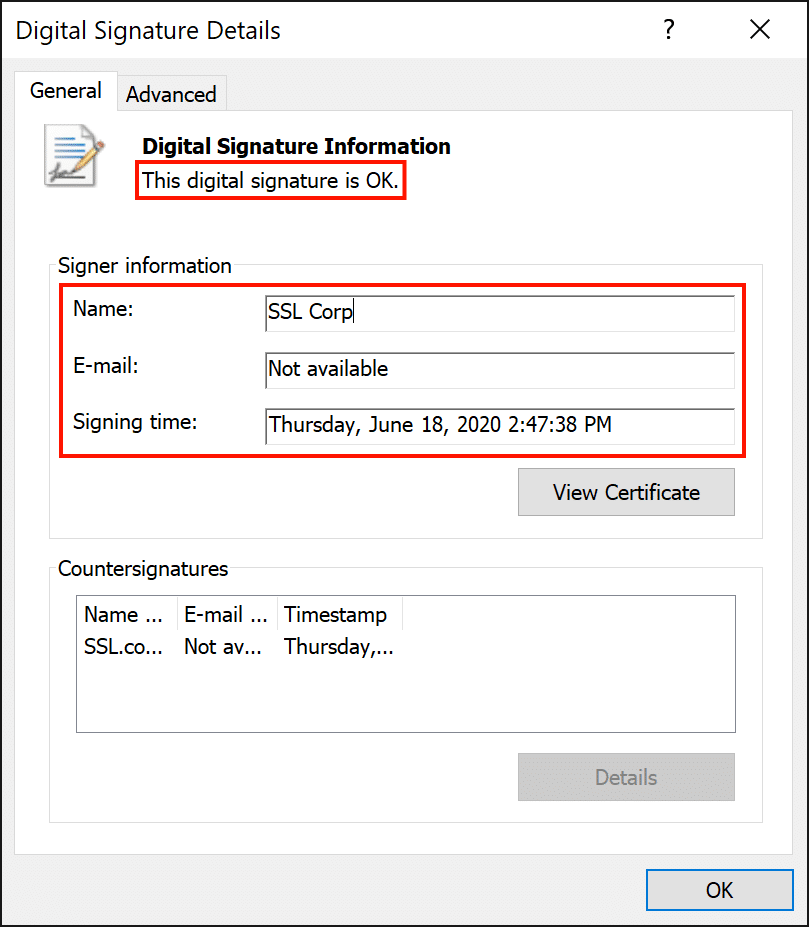
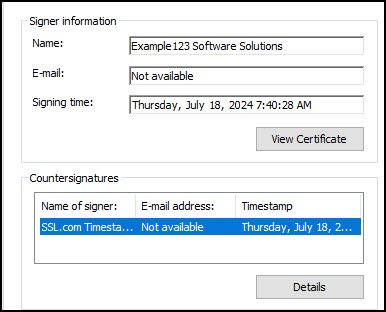
You can also verify that a file has been signed by right-clicking its icon and selecting Properties from the menu, then selecting the Digital Signatures tab. View details about a signature by selecting it and clicking the Details button.
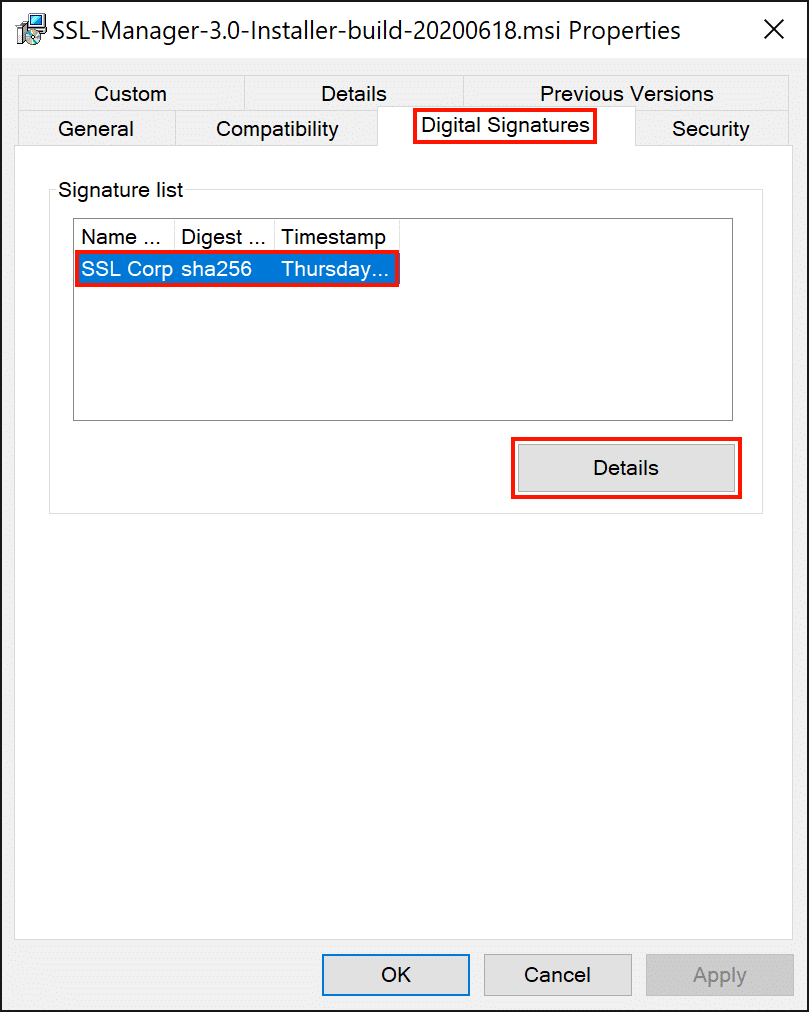
Here we can see that the file contains a valid digital signature, created by SSL Corp on June 28, 2020.
Signing an Executable with SSL Manager
If you prefer a more graphics-based approach you can use SSL.com‘s in-house software, SSL Manager, to sign your files. Many customers prefer to use SSL Manager because it offers the additional benefit of having easy access to all your certificates in one unified interface. For instructions on downloading and installing SSL Manager, please refer to our installation guide.
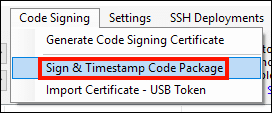
To sign an executable, start by selecting Code Signing > Sign & Timestamp Code Package from SSL Manager’s menu.
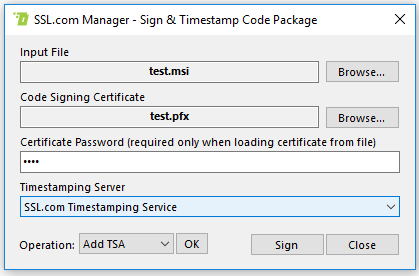
In the code signing form, you may select the executable and the code signing certificate (either from a file or a certificate store) and one of the available timestamp servers. When you are done, click the Sign button to sign your code. If you are loading a certificate from a PFX file, you will have to enter the file’s password. If you are using an EV code signing certificate, you will be prompted for your USB token’s PIN.
Besides code signing, SSL Manager offers many powerful features. For more details, please refer to SSL Manager’s documentation, especially the Code Signing menu.
Code Signing with a Thales SafeNet (Gemalto) USB token
This section demonstrates how to sign code using SSL.com’s code signing certificate, Thales SafeNet (Gemalto) USB token, and Safenet Authentication Client.
The Thales SafeNet token can store all types of SSL.com code signing certificates and their private keys. These include Personal Identity code signing certificates, Organization Validation code signing certificates, and Extended Validation code signing certificates.
SafeNet Authentication Client is a middleware solution that handles Thales’ comprehensive SafeNet portfolio of certificate-based authenticators. This includes eTokens, SafeNet IDPrime smart cards, SafeNet IDPrime Virtual, and devices that combine PKI with FIDO capabilities.
Requirements
- Windows Development Kit installed on your computer
- Safenet Authentication Client installed on your computer.
- A Thales token containing an SSL.com pre-installed code signing certificate. The Thales token must be activated following these steps:
- Locate the serial number of your Thales token. This is a series of letters and numbers that is printed on the surface of your token.
- Sign in to your SSL.com account.
- Click the Orders tab, followed by the download link of your certificate order to display its details. On the physical tokens section, activate your Thales token by placing its serial number on the allotted field. Upon activation of your Thales token, the physical tokens section will display your Activation PIN and Admin PIN. The Admin PIN is also known as the Token Password and you will be prompted to enter this when signing your file.

Steps to Sign Code
- Connect your Thales SafeNet token to your computer.
- Open Safenet Authentication Client
- Configure the command for signing your code:
signtool sign /tr http://ts.ssl.com /td sha256 /fd sha256 /a "PATH_OF_FILE_TO_BE_SIGNED"
Legend:
/fd sha256selects the digest algorithm to be used when signing.
/trhttp://ts.ssl.comspecifies the timestamp server address
/td sha256specifies the timestamp digest algorithm
/ainstructs SignTool to automatically find an appropriate code signing certificate for your file.
signable file path: The path of your file should be enclosed in double quotation marks. Take note to include the name of your signable file in the path. Example: /test file.dll
Note: Some users might experience this error with the sign command: ‘Signtool’ Is Not Recognized as an Internal or External Command, Operable Program or Batch File. The solution to this error is to remove the text signtool from the command and replace it with the path for signtool.exe. The path should be enclosed in double quotation marks. Example:[/su_note]
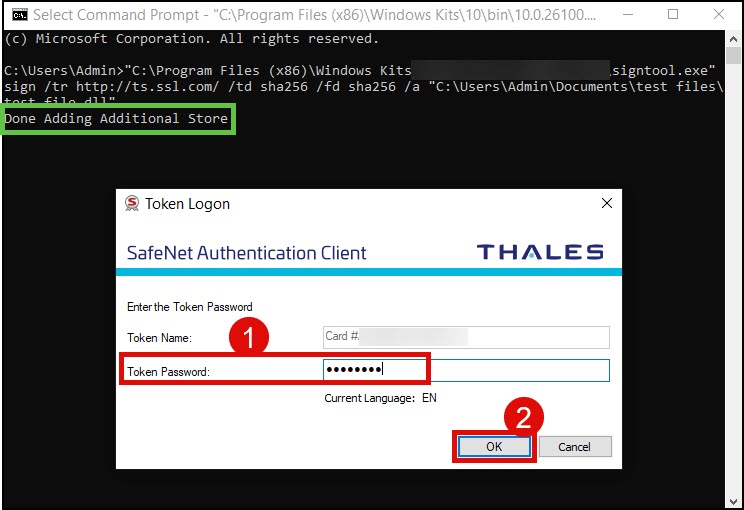
“C:\Program Files (x86)\Windows Kits\10\folder\folder\x86\signtool.exe” sign /tr http://ts.ssl.com/ /td sha256 /fd sha256 /a "C:\Users\Admin\Documents\test files\test file.dll"
- Run Command Prompt as administrator and place the sign command. Afterwards, press Enter.

- You will see the message Done Adding Additional Store. Shortly after, you will be prompted to place your Token Password. As stated in the Requirements section above, the Token Password is the same as the Admin PIN and this can be viewed through your SSL.com certificate order page. Click the OK button to finalize the code signing.

- Success! Your file is now signed. Command Prompt will notify you of the successful signing.


Options for Signing Code
Specify the Subject Name of the Certificate
If you possess multiple code signing USB tokens or certificates, you can select which specific certificate to use by incorporating its Subject Name through the /n option.
You can view the Subject Name of your certificate by clicking the gear icon in SafeNet Authentication Client to allow for an Advanced view. Next, click the arrow for User certificates. Copy the name of the certificate that you want to use.

The sign command using the /n option looks like the following. The Subject Name of your certificate should be enclosed in double quotation marks.
“PATH OF SIGNTOOL.EXE” sign /tr http://ts.ssl.com/ /td sha256 /fd sha256 /n "SUBJECT NAME OF CERTIFICATE" “PATH_OF_FILE_TO_BE_SIGNED”
Specify the Certificate Thumbprint
If you possess several certificates bearing identical Subject Names, you can distinguish and select one for signing by using its SHA1 hash, commonly referred to as the “thumbprint.” To do this, substitute THUMBPRINT in the following command with the actual SHA1 hash of your certificate.
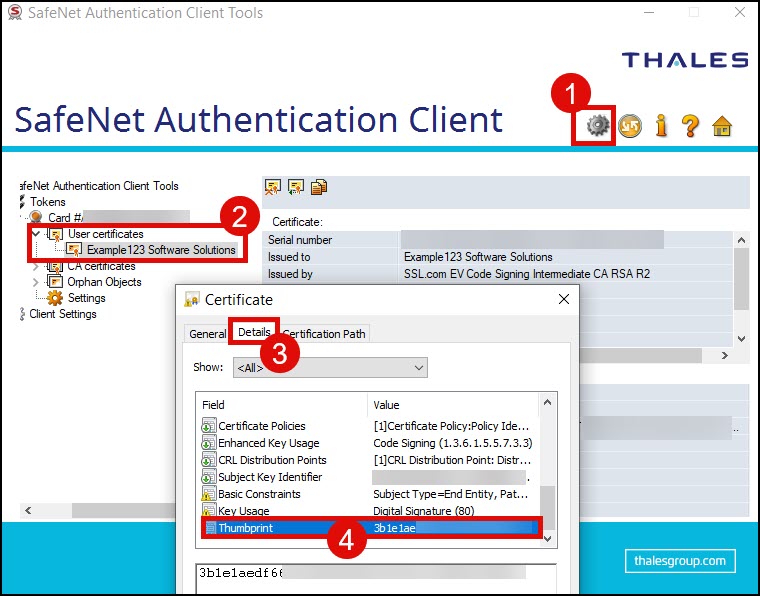
You can view the thumbprint value of your certificate by clicking the gear icon in SafeNet Authentication Client to allow for an Advanced view. Next, click the arrow for User certificates. Double-click the certificate you want to use. Click the Details tab. Finally, scroll down to the Thumbprint field.
In the sign command, replace the text THUMBPRINT with the actual value of your certificate thumbprint.
“PATH OF SIGNTOOL.EXE” sign /tr http://ts.ssl.com/ /td sha256 /fd sha256 /SHA1 THUMBPRINT “PATH_OF_FILE_TO_BE_SIGNED”
Verify the Signature
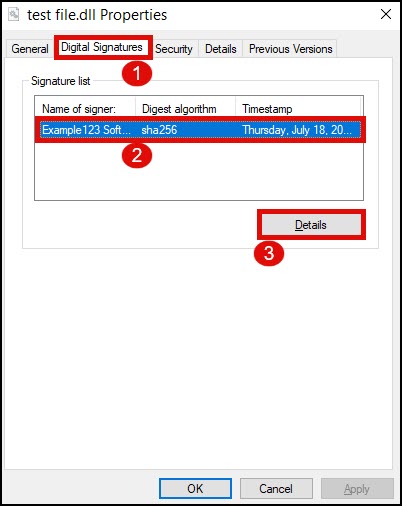
You can check the applied digital signature by right-clicking the signed file to see its properties.
- Click the Digital Signatures tab. Hover your mouse to the Signature list box and click the displayed name of your certificate to highlight it. Click the Details box to proceed.

- You will be able to see the name of the certificate that was used to sign the file as well as the date and time when it was signed and timestamped.

Troubleshooting Signing Errors
- For Yubikey users, install the Yubikey Smart Card Minidriver
- Use the SHA1 Hash option when selecting your certificate.
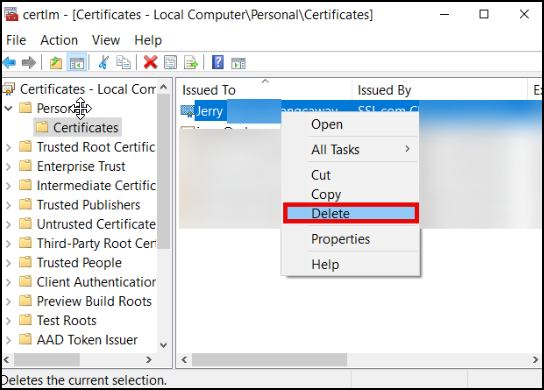
- If you are a customer who replaced an expired or revoked certificate in your Yubikey, you will also need to delete the copy of the expired cert that is still in the Windows certificate store. To do this, type certmgr on the Windows search bar of your computer. Next, click Manage computer certificates. Click the Personal folder, locate the expired signing certificate, right-click it with your mouse, and choose Delete.