eSigner CKA (Cloud Key Adapter) is a Windows application that uses the CNG interface (KSP Key Service Provider) to enable certutil.exe and signtool.exe to perform code signing operations via the eSigner CSC API.
Functioning as a virtual USB token, it securely loads code signing certificates into the Windows certificate store without requiring physical hardware. As a cloud-based signing method, eSigner CKA eliminates the cost, logistical challenges, and security risks of USB tokens while providing enterprise-grade signing capabilities without the complexity of networked HSMs. This makes it a scalable, secure, and cost-effective solution for modern code signing workflows.
This guide covers manual and automated code signing on Windows using SignTool with production or test certificates. Unlike physical tokens, eSigner CKA supports advanced automation, enabling seamless integration with CI/CD tools such as GitHub Actions, GitLab CI, CircleCI, and Travis CI. If you are using a CI/CD tool, see this related guide: How to Integrate eSigner CKA with CI/CD Tools for Automated Code Signing.
Requirements
- A Code Signing certificate issued by SSLcom.
- Code Signing certificate must be currently enrolled on eSigner. Refer to this guide: Enroll with eSigner for Remote Document and Code Signing
- Install eSigner CKA on your computer and configure the mode of signing (manual or automated ) and the type of signing (production or test). Refer to this article for installation instructions: How to Install SSL.com eSigner Cloud Key Adapter (CKA).
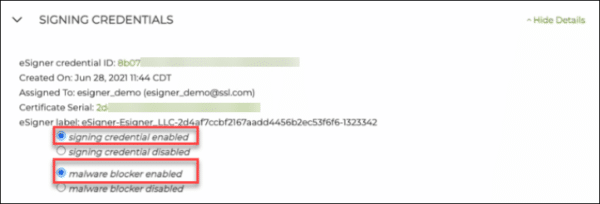
Optional Procedure: Use Pre-Signing Malware Scan
Malware Scan is a crucial service from SSL.com that ensures software is free of malware before it is signed with a code signing certificate. By integrating Malware Scan, developers add a robust layer of security, automatically halting the signing process if malware is detected and alerting the developer to take necessary actions.
Instructions: Parameters:
For both manual and automated code signing, the command contains:
Over-all the command should look like the following:
“C:\Program Files (x86)\Windows Kits\10\bin\10.0.22000.0\x86\signtool.exe” sign /fd sha256 /tr http://ts.ssl.com /td sha256 /sha1 certificate thumbprint “SIGNABLE FILE PATH”.
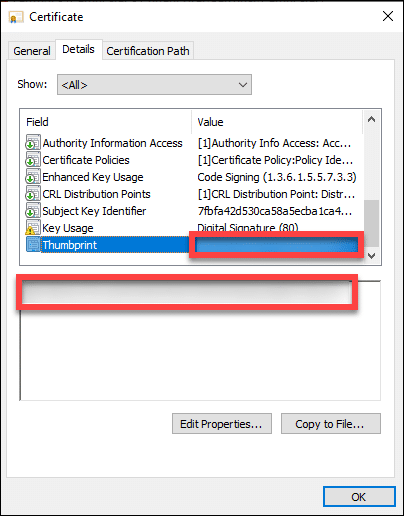
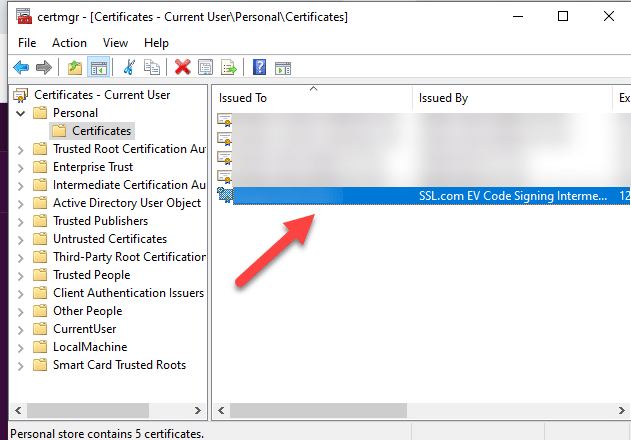
Later, upon installing eSigner CKA and adding your EV Code Signing certificate to the User Certificate store, you will be able to check your EV Code Signing certificate thumbprint by pressing Windows key + R and then type in certmgr.msc to access the User Certificate store. When the certificate manager window pops up, click the Personal folder on the left panel and then select the Certificates subfolder on the right to locate your EV Code Signing certificate.
Double click the certificate. Select the Details tab and then scroll down to reveal the Thumbprint. Copy the Thumbprint and include it into your command when you are signing code.
To recall, the command for code signing looks like the following:
“C:\Program Files (x86)\Windows Kits\10\bin\10.0.22000.0\x86\signtool.exe” sign /fd sha256 /tr http://ts.ssl.com /td sha256 /sha1 certificate thumbprint “SIGNABLE FILE PATH”
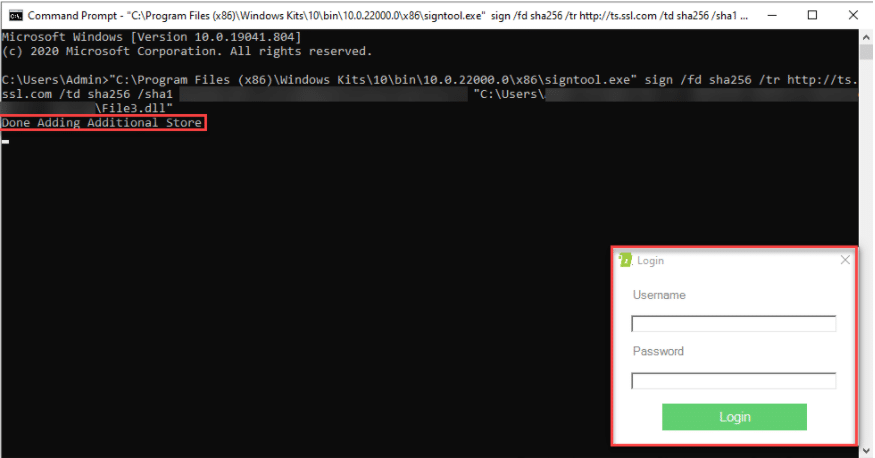
Upon writing the command and pressing Enter, you will see the message Done Adding Additional Store. A window will then pop-up requiring you to place your SSL.com account username and password.
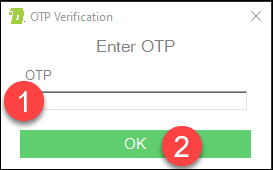
A One Time Password (OTP) for your eSigner-enrolled EV Code Signing Certificate will be sent to your Authenticator app. Upon successful input, Command Prompt will indicate that your file has been successfully signed.
Success! Your code is now signed.
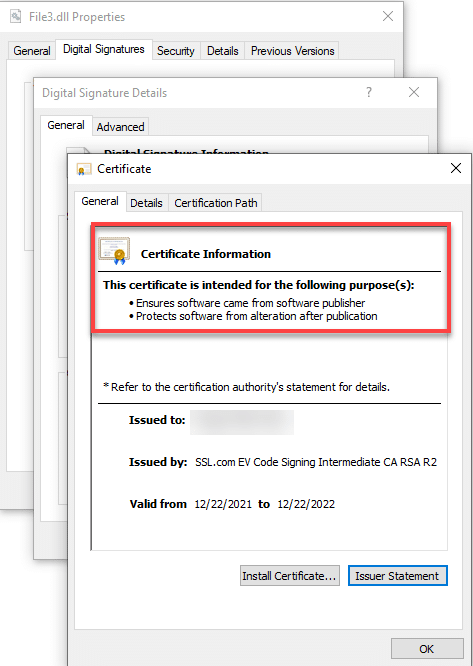
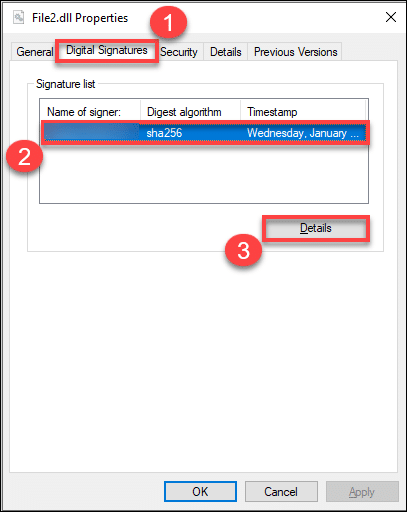
After successful code signing, you can now check the details of the digital signature on the file. Right-click the signed file, click Properties, followed by the Digital Signatures Tab. Here you will see the name of the Signer, the digest algorithm used, and the timestamp of the signature. Click the Details button to get more information about the signed code.
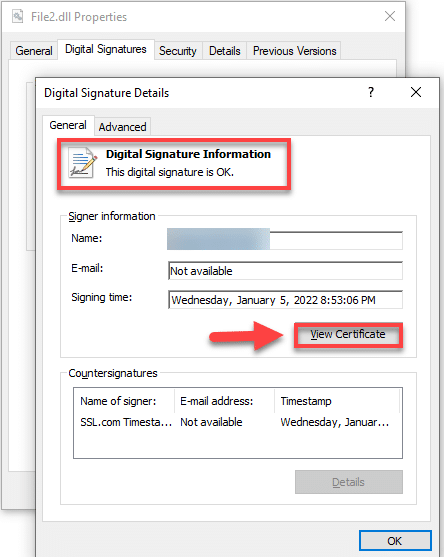
You will be able to read the information stating This digital signature is OK. Proceed to click the View Certificate button.
After clicking the View Certificate button, you will read information indicating that the Digital Certificate issued for the signed file ensures that it came from the publisher and protects it from alteration after publication.
To recall, the command for code signing looks like the following:
C:\Program Files (x86)\Windows Kits\10\bin\10.0.22000.0\x86\signtool.exe” sign /fd sha256 /tr http://ts.ssl.com /td sha256 /sha1 certificate thumbprint “SIGNABLE FILE PATH”
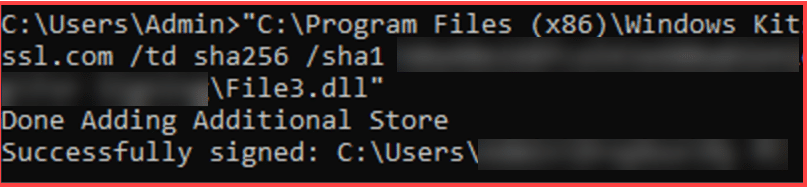
Open Command Prompt and place the command. After pressing enter, you will see the notice saying Done Adding Additional Store.
After a few seconds, you will see the notice Successfully signed. This indicates that your file has been signed in an automated manner, without the additional need for OTPs.
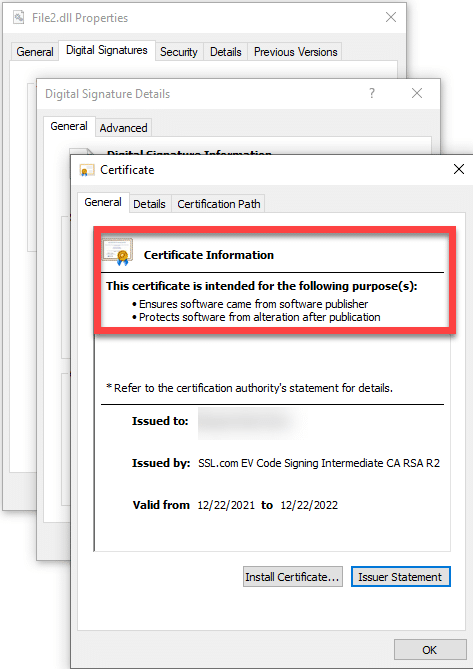
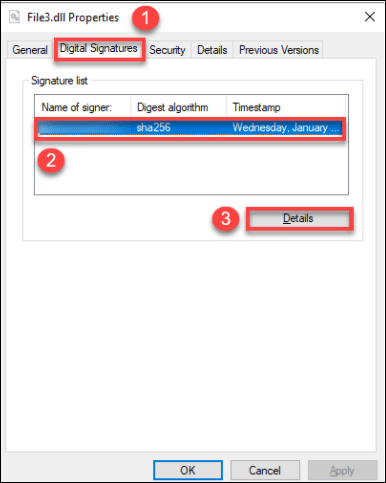
Open the folder location of your signed file. Right-click it and then click Properties. Click on the tab Digital Signatures and here you will see the secure hash algorithm used has 256 bits. Click the immediate space showing the name of the signer, digest algorithm, and Timestamp. After it gets highlighted, proceed to click the Details button.
A pop-up window will then show stating that the digital signature on the file is valid as well as indicating the specific time when it was signed. Click the View Certificate button to see more information about the EV Code Signing digital certificate that was issued.
You will see information about the EV Code Signing certificate stating that it validates you as the creator of the executable and protects your file from being tampered with.
scan_code [-hV] -input_file_path=<inputFilePath> -password=<PASSWORD> [-program_name=<programName>] -username=<USERNAME>scan_code -username=<USERNAME> -password=<PASSWORD> -credential_id=<eSigner Credential ID> -input_file_path=<inputFilePath>
-input_file_path=<PATH>: Path of code object to be signed.-username=<USERNAME>: SSL.com account username-password=<PASSWORD>: SSL.com account password.-program_name=<PROGRAM_NAME>: Name of program-credential_id=<CREDENTIAL_ID>: Credential ID for signing certificate. Your eSigner Credential ID is located in your SSL.com certificate order page.Formulate the Command for Signing Code
Components of the Comand
Note: Location of SignTool will depend on the version of the SDK downloaded and the architecture being used.
If you encounter this error: The timestamp certificate does not meet a minimum public key length requirement, you should contact your software vendor to permit timestamps from ECDSA keys.
If there is no way for your software vendor to allow for the normal endpoint to be used, you can use this legacy endpoint http://ts.ssl.com/legacy to get a timestamp from an RSA Timestamping Unit.Locating your Certificate Thumbprint
Manual Code Signing
Install eSigner CKA
Access SignTool via the Command Line
Enter the One Time Password (OTP)
Check the Digital Signature on the File

Automated Code Signing
Access SignTool via the Command


Check the presence of the digital signature on your file
Related Code Signing Guides using eSigner CKA
Need more information on Cloud-Based Signing?