These instructions detail how to install an S/MIME certificate in macOS and use it to send secure email messages with Apple Mail.
Testing was done in Mail version 12.2 on macOS Mojave (10.14), but these general instructions should apply to any recent version of Apple’s software. Please contact Apple’s macOS Support about any issues or specific instructions concerning earlier versions of macOS and Mail.
Download and install your certificate
This section assumes you will be installing a Personal Basic or Personal Pro certificate in Keychain Access. If you have a Business Identity certificate shipped on a YubiKey FIPS, please read and follow these instructions for installing an S/MIME certificate on your YubiKey, then skip ahead to Send Secure Mail in Mail.
-
Download a PKCS#12 file with your certificate from your SSL.com account by clicking the link supplied in your Certificate Activation Link email and following the on-screen instructions in your web browser. You will be prompted to enter a password before downloading the file.
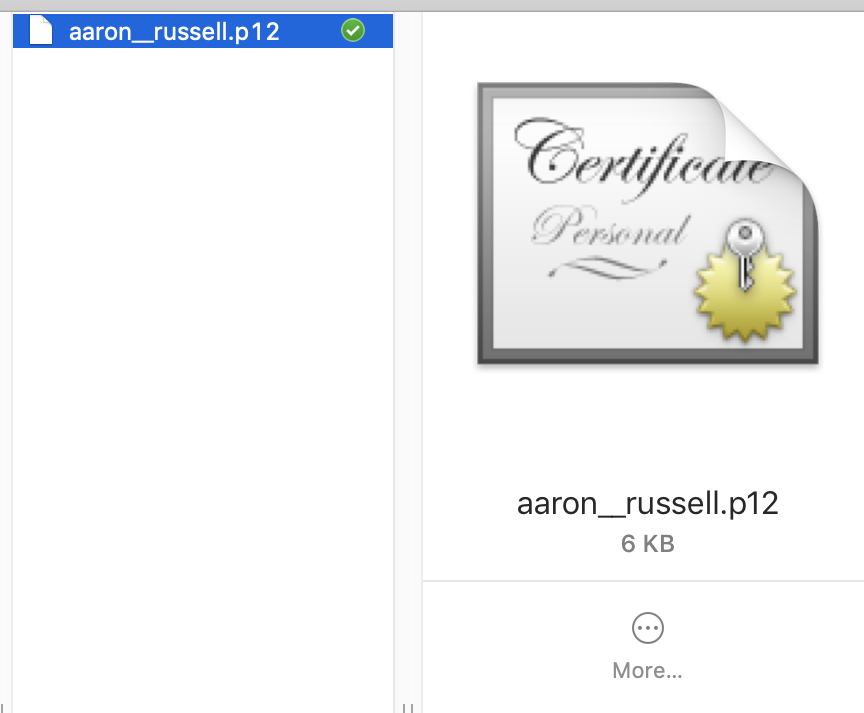
Note: when downloading your certificate it is possible to choose between the RSA and ECDSA algorithms via the Algorithm drop-down menu. However, ECDSA keys cannot be used for email encryption, so it’s best to leave this set to RSA. - In the Finder, double-click the PKCS#12 file to open the Keychain Access application (The filename extension is
.p12). Alternately, you can drag the file to Keychain Access, located at/Applications/Utilities/Keychain Access.app, or open Keychain Access, select File >> Import Items… from the drop-down menus, then navigate to the file.
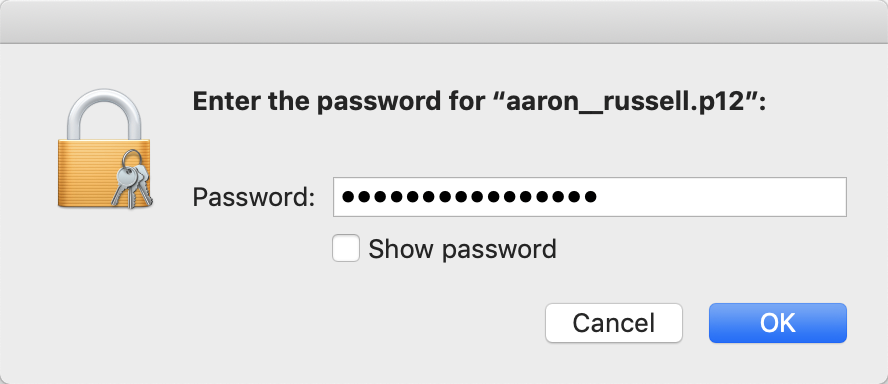
- When prompted, enter the password you used when retrieving the PKCS#12 file from SSL.com.

- The certificate is now installed on your computer and is available for use by Apple Mail and other applications.


Send secure email in Mail
- Open Mail. If Mail was already open when you installed the certificate, restart it. If you are using an S/MIME certificate installed on a YubiKey USB token, insert the key before launching Mail.
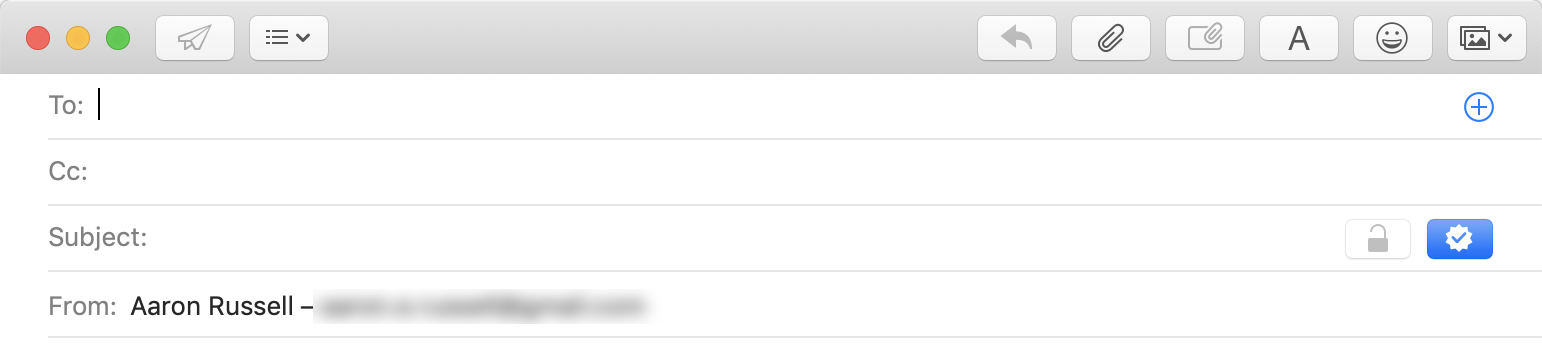
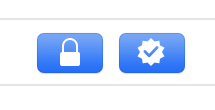
- Create a new email message. If you have multiple email addresses configured in Mail, make sure you have selected the address that your certificate was issued for in the “From” line. If the certificate has been installed correctly, a blue button with a checkmark should be present at the right margin of the “Subject” line, indicating that the message is signed. If you don’t want to sign the message, you can click the button to un-check it.

- If you have your recipient’s public key, the button to the left of the checkmark will be shown in blue with a closed lock, indicating that your message will be encrypted. If you do not want to encrypt the email for some reason, click the lock button to show a white button with an open lock.

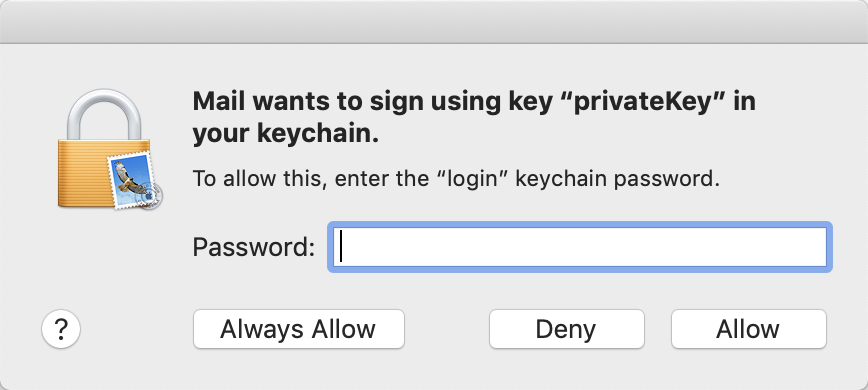
- When prompted, enter your Mac login password, giving Mail permission to use your private key to sign the message. Then, click the Allow or Always Allow button. If you are using a certificate installed on a YubiKey, you will be prompted for your PIN instead of the login password.

- The email is sent! If you clicked Always Allow in the previous step, you will not be prompted for a password the next time you sign an email message with your certificate.
For more detailed information about S/MIME email, please see our article, Sending Secure Email with S/MIME.
Compare Email, Client, And Document signing certificates from SSL.com, starting at just $20.00 per year.