This how-to will demonstrate how to install an SSL/TLS certificate on macOS 10.14 Mojave. Two scenarios are provided:
- Install an SSL/TLS certificate for system-wide use in Keychain Access
- Install an SSL/TLS certificate for use with the Apache server included with macOS
Depending on your situation, you may want to do one or both of these things; for example, if you are setting up a local development environment and want the certificate available to both Apache and client software such as web browsers, you would do both. In both cases we’ll begin by assuming that you generated your certificate signing request (CSR) in Keychain Access, as shown in our how-to. In this case, your private key will already be installed in Keychain Access. We’re also going to assume that validation is complete and your certificate is ready for download. For information on ordering and retrieving certificates, please see our how-to, Ordering and Retrieving SSL/TLS Certificates.
First Steps
-
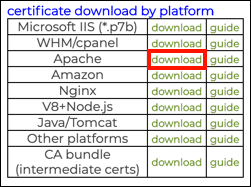
Download the certificate bundle from your user account, using the Apache download link.

-
Unzip the file. It should contain contain your certificate (the filename will be based on the common name in your CSR and end with
.crt) and the CA bundle (ca-bundle-client.crt).

Installing the Certificate in Keychain Access
-
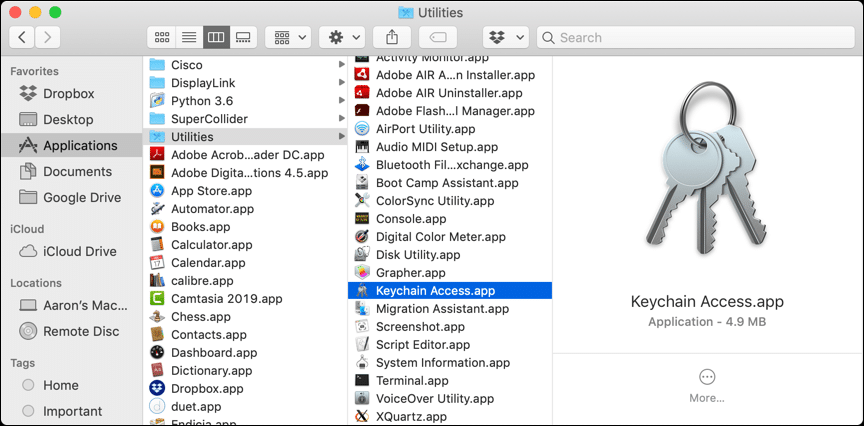
Open Keychain Access.app, located in /Applications/Utilities.

-
Select the keychain where your keypair is installed. In this case it’s the System keychain.

-
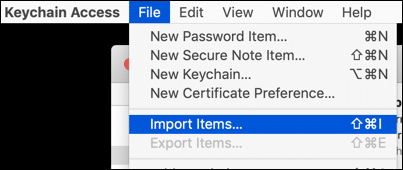
Navigate to File > Import Items…

-
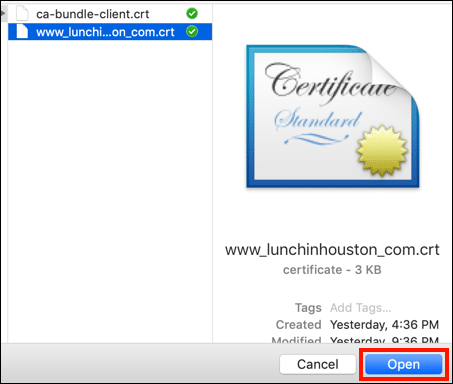
Navigate to your new certificate, select it, and click Open.

-
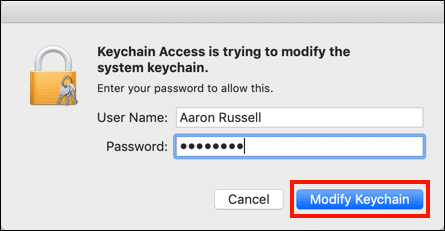
Enter your password and click Modify Keychain.

- Repeat steps 3-5 above with
ca-bundle-client.crtto install the intermediate certificate chain. -
You can confirm that the certificates have been installed by selecting Certificates from the left sidebar menu.

Install the Certificate for Apache
-
If you generated your CSR in Keychain Access, you will need to export your private key as a file for use with Apache. Open Keychain Access.app, located in /Applications/Utilities. (If you generated the CSR with OpenSSL or with SSL.com’s CSR Manager you can skip to step 9 below.)
-
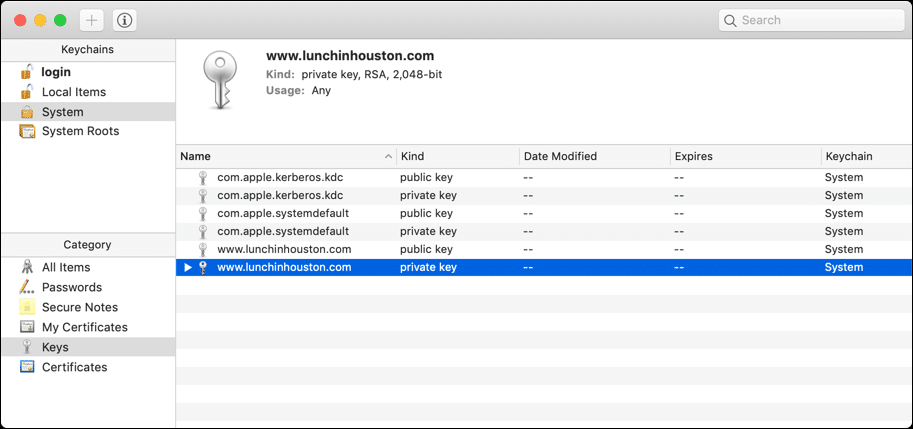
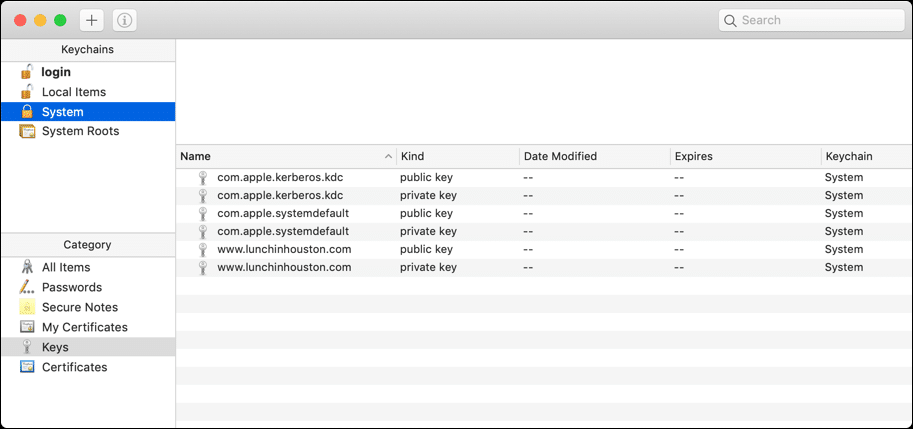
Using the left sidebar menu to narrow your choices, find and select the private key you wish to export. In this case we are going to export the private key for
www.lunchinhouston.com, located in theSystemkeychain. -
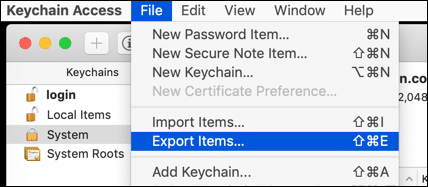
Choose File > Export Items… from the menu.

-
Make sure that the file format selected is Personal Information Exchange (.p12) and save the file to a place where you will be able to find it.

-
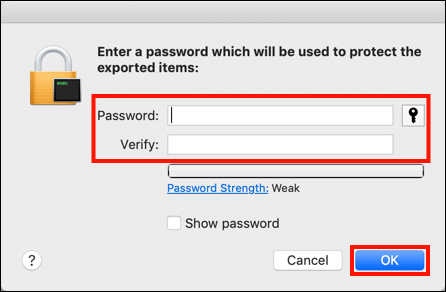
Enter your password to unlock the keychain (if prompted), then create a password for the .p12 file and click OK.

-
Open
Terminal.app, located in the/Applications/Utilities/folder, and navigate to the folder where you stored the .p12 file from step 5.
-
Use
opensslto extract the private key from the .p12 file. (Note: substitute the filenames shown here for the name of your .p12 file and and the filename you wish to use for the key). You will be first be prompted to enter the password you created in step 5, then prompted to create and verify a password to protect the private key.$ openssl pkcs12 -nocerts -in Certificates.p12 -out privkey.key
-
Next, you will need to decrypt the private key. Enter the following command, substituting the names of the input and output files as desired (using the same name as shown below will overwrite the encrypted file). You will be prompted to enter the password you created in step 7.
$ openssl rsa -in privkey.key -out privkey.key
- Put the private key, certificate, and intermediate bundle files in a secure directory where Apache can read them. For this how-to we will use
/private/etc/apache2/. Depending on the location chosen you may need to usesudoto move the files. -
Open Apache’s main configuration file,
httpd.conf, in a text editor. On Mojave standard Apache installation, this file is located in the/private/etc/apache2/directory. To open the file for editing withnano, execute the following command:$ sudo nano /private/etc/apache2/httpd.conf
Note: Because you are usingsudoto temporarily assume sufficient privileges to edit this file, you will be prompted to enter your password before continuing. -
Find these lines in
httpd.confand uncomment them by removing the#character at the beginning of each line:LoadModule socache_shmcb_module libexec/apache2/mod_socache_shmcb.so ... LoadModule ssl_module libexec/apache2/mod_ssl.so ... Include /private/etc/apache2/extra/httpd-vhosts.conf ... Include /private/etc/apache2/extra/httpd-ssl.conf
Note: if you are usingnanoto edithttpd.conf, you can search for text strings withCtrl-W - Save
httpd.confand exit the text editor (Ctrl-O, followed byCtrl-Xinnano). -
Next, open
httpd-ssl.conffor editing:$ sudo nano /private/etc/apache2/extra/httpd-ssl.conf
-
Look for the following lines and make sure that Apache is listening on port
443. If the port is set to8443or some other value, change it to443.# # When we also provide SSL we have to listen to the # standard HTTP port (see above) and to the HTTPS port # Listen 443
- Search for a line beginning with the string
<VirtualHost _default_:(the port number may vary) and comment out or remove all lines between that and</virtualhost>. - Save
httpd-ssl.confand exit the text editor. -
Next, open
httpd-vhosts.conffor editing:$ sudo nano /private/etc/apache2/extra/httpd-vhosts.conf
-
Create a VirtualHost entry for the site you wish to protect (use the actual values for your website and server rather than the placeholder ones shown here), then save the file and exit the text editor.
<VirtualHost *:443> DocumentRoot "/PATH/TO/WEBSITE" ServerName SERVERNAME SSLEngine on SSLCertificateFile "/private/etc/apache2/server.crt" SSLCertificateKeyFile "/private/etc/apache2/server.key" SSLCertificateChainFile "/private/etc/apache2/ca-bundle-client.crt" </VirtualHost> -
Check your Apache configuration with the following command:
$ sudo apachectl configtest
-
If all is well, restart Apache:
$ sudo apachectl restart
-
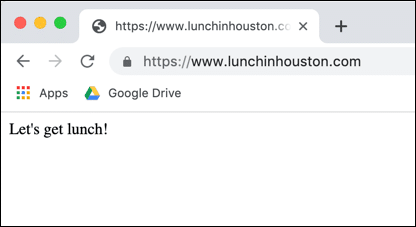
If everything went correctly, you’re done! You should be able to navigate to your HTTPS website in a web browser.