This how-to will show you how to enable HTTPS, generate a certificate signing request (CSR), and install an SSL/TLS certificate in Synology NAS (Network Attached Storage), via Synology’s web-based DiskStation Manager (DSM) operating system.
SSL.com provides a wide variety of SSL/TLS server certificates for HTTPS websites, including:
Enable HTTPS
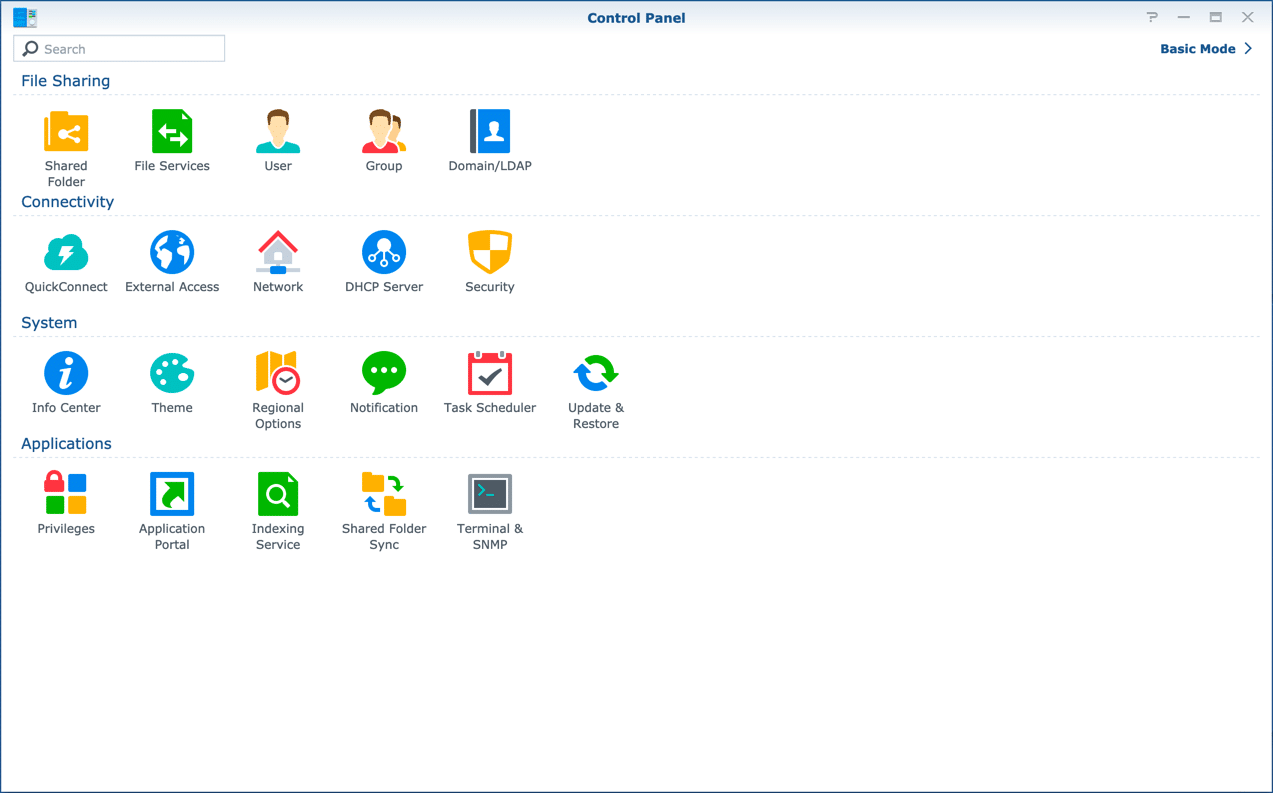
- Before you generate a CSR, you should enable HTTPS. Begin by signing into DSM with an account in the Administrators group, then launching the Control Panel.
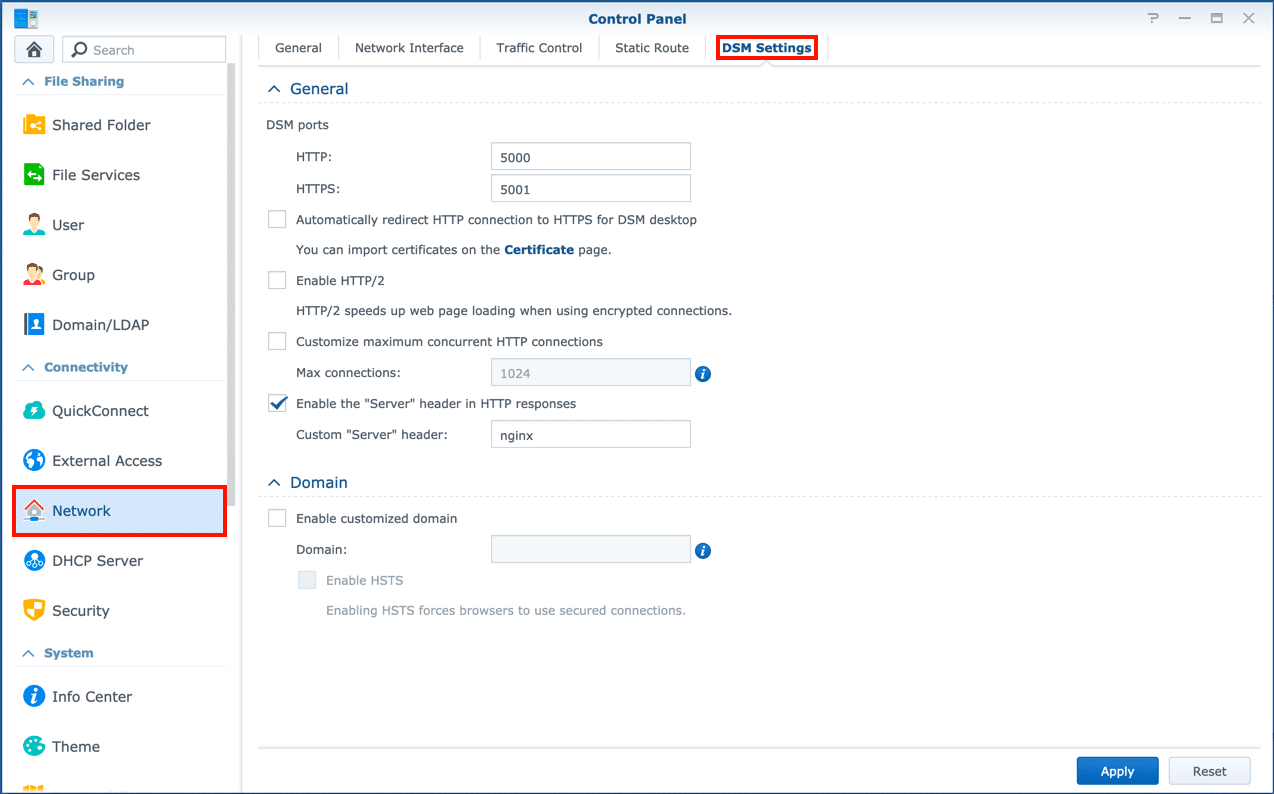
- Navigate to Network > DSM Settings.
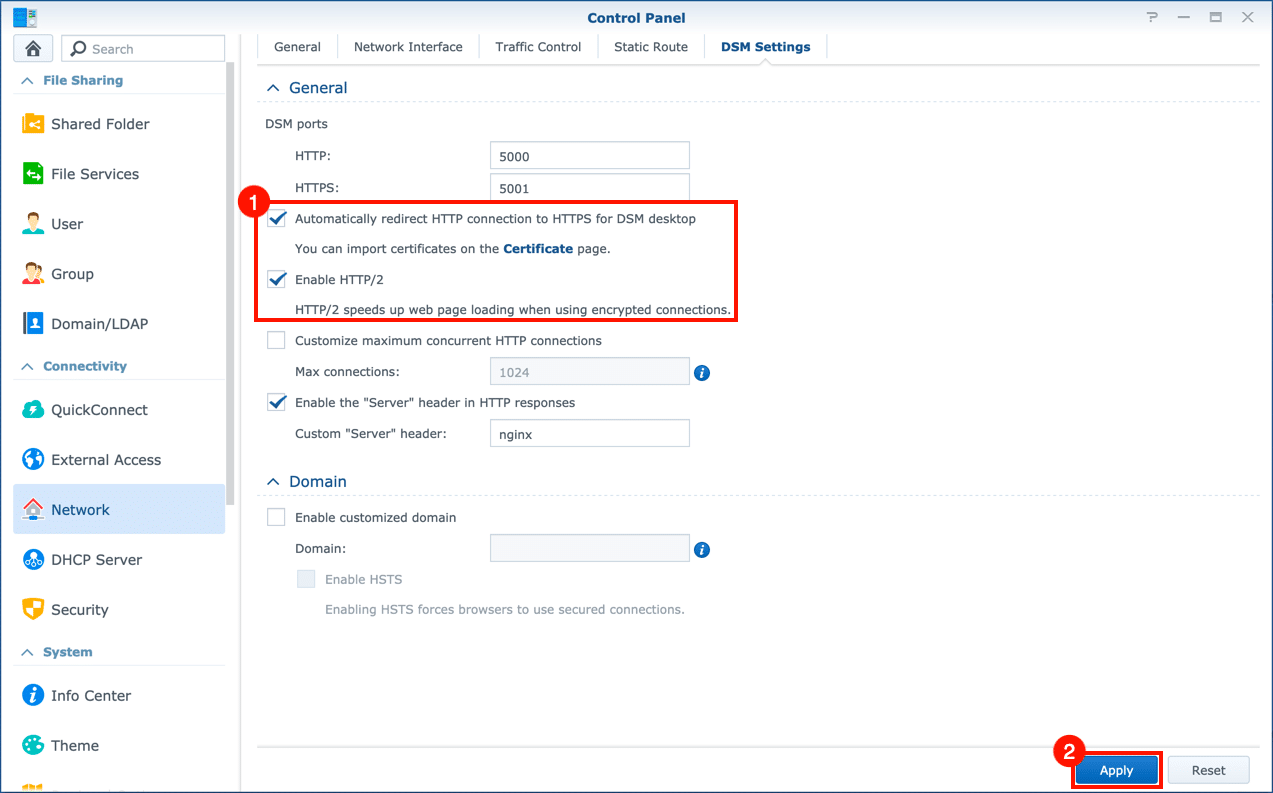
- Check Automatically redirect HTTP connections to HTTPS for DSM desktop and Enable HTTP/2, then click the Apply button.

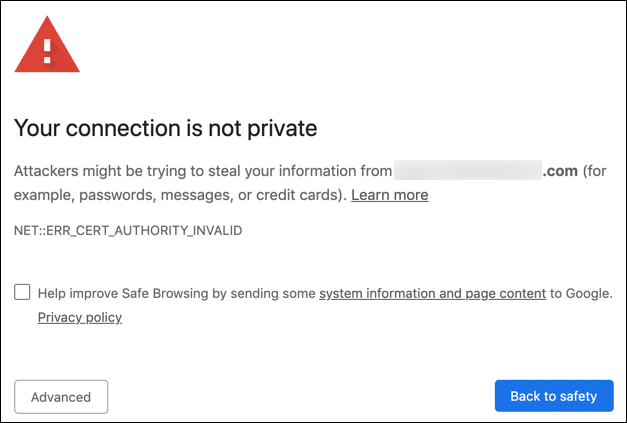
- The web server will restart. You can now connect to your Synology NAS via HTTPS at
https://your.domain.name:5001. Note that until you install a certificate signed by a publicly trusted CA (such as SSL.com), you will probably have to navigate browser trust warnings like the one shown below from Google Chrome.
Generate CSR
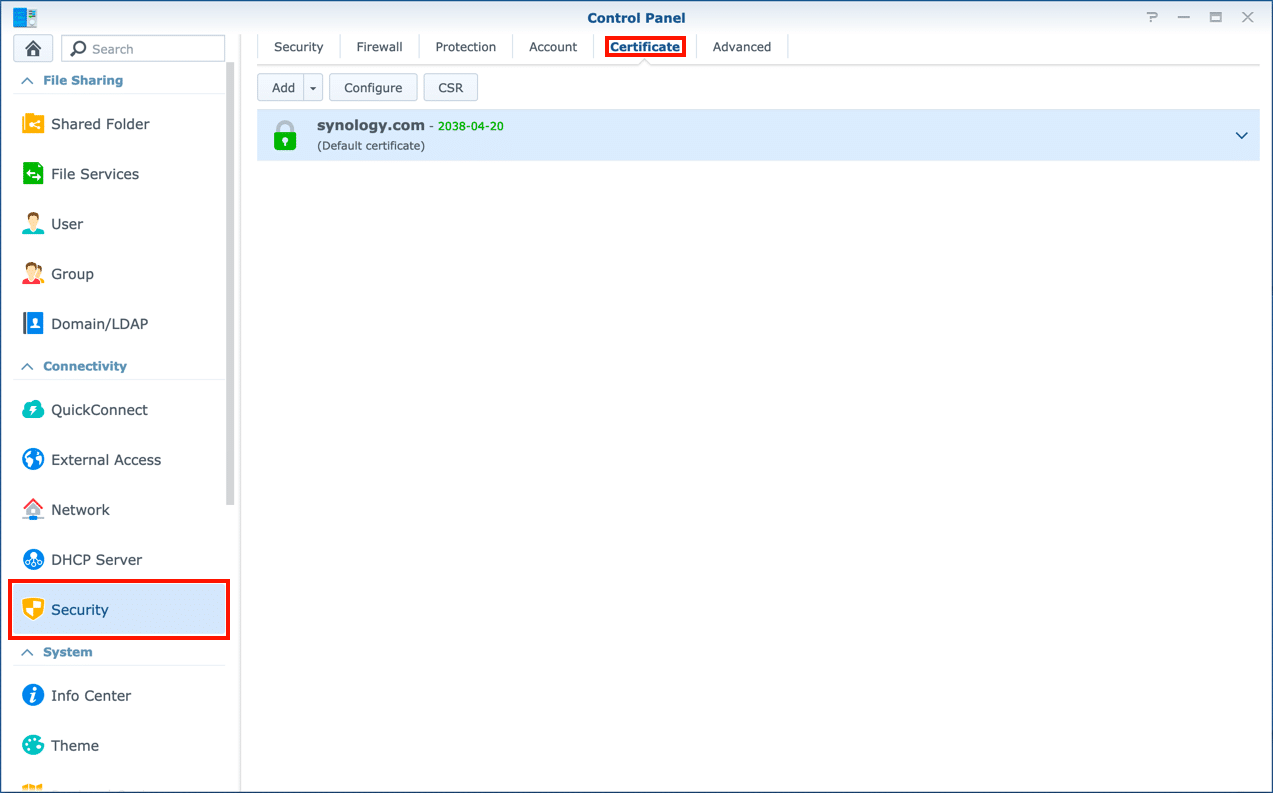
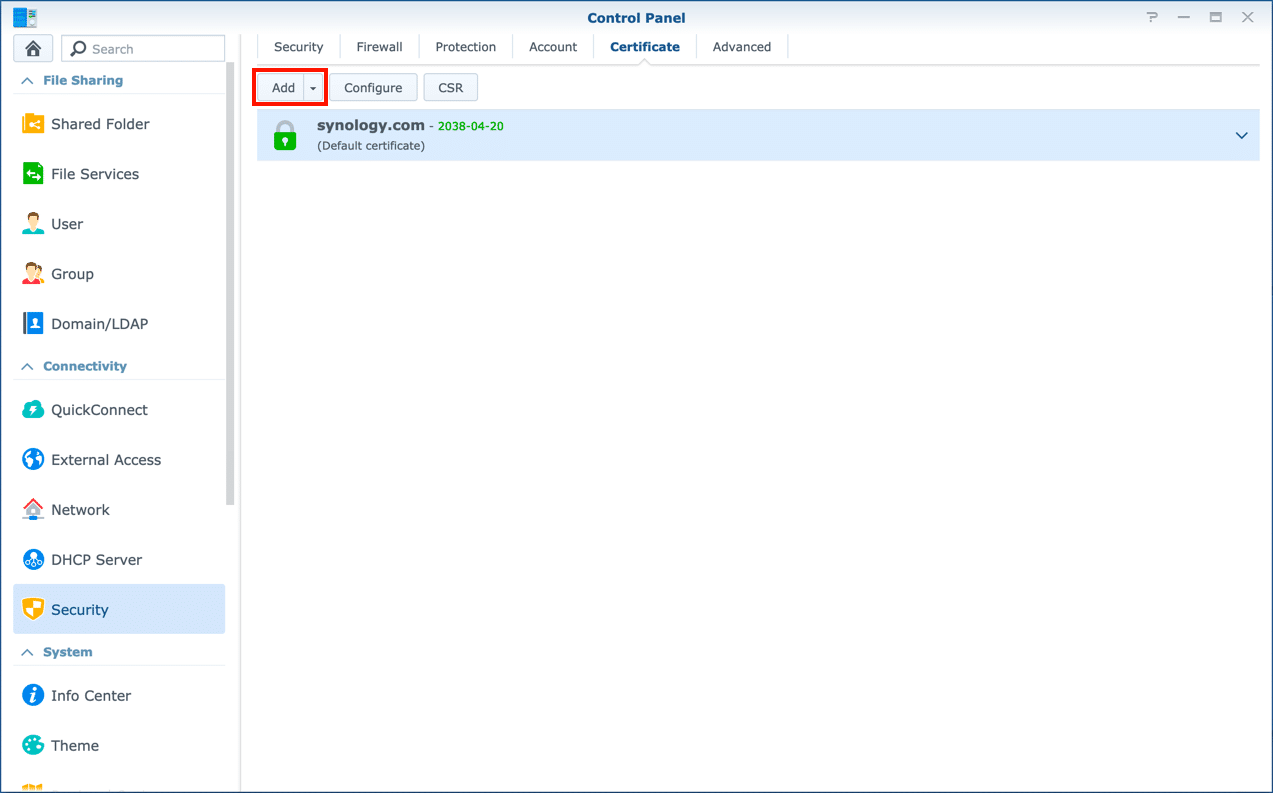
- Go to Control Panel > Security > Certificate.
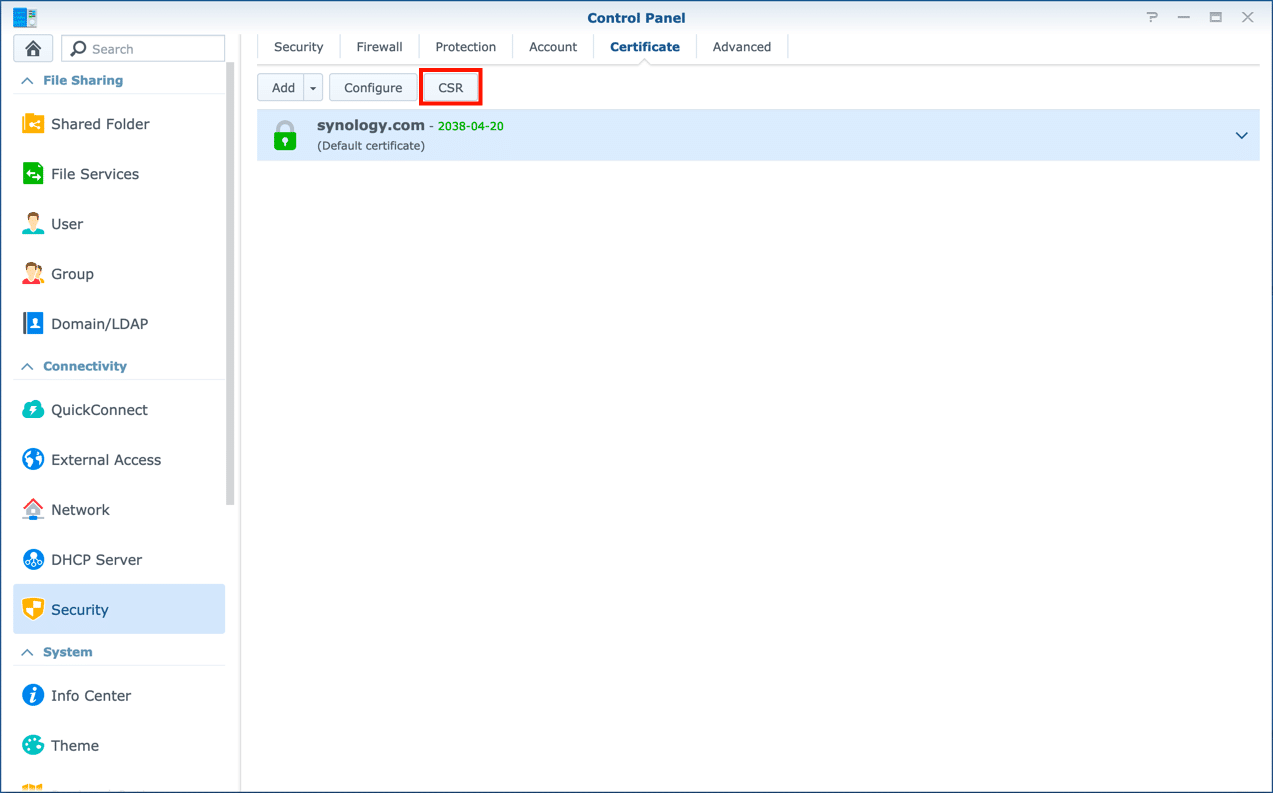
- Click the CSR button.
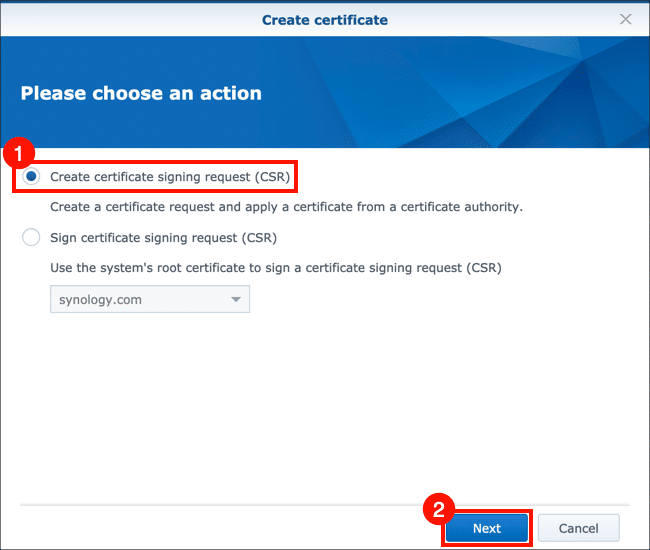
- Select Create certificate signing request (CSR), then click the Next button.

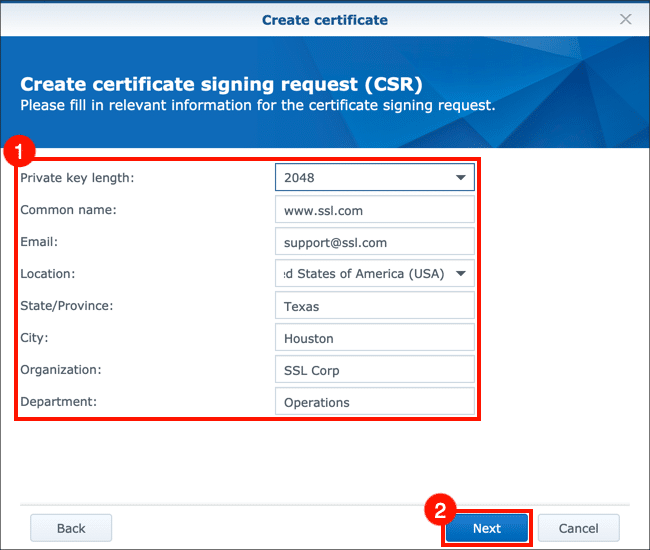
- Enter the information that will be included in your CSR. All of these fields are required by the Synology Control Panel.
- Choose a key length from the Private key drop-down menu.
- In the Common name field, enter the domain name of your Synology NAS.
- Enter your email address in the Email field.
- Choose your country from the Location drop-down menu.
- Enter your city in the City field.
- Enter your company or organization’s name in the Organization field.
- Enter your section or department in the Department field.
- When you are finished entering information, click the Next button.
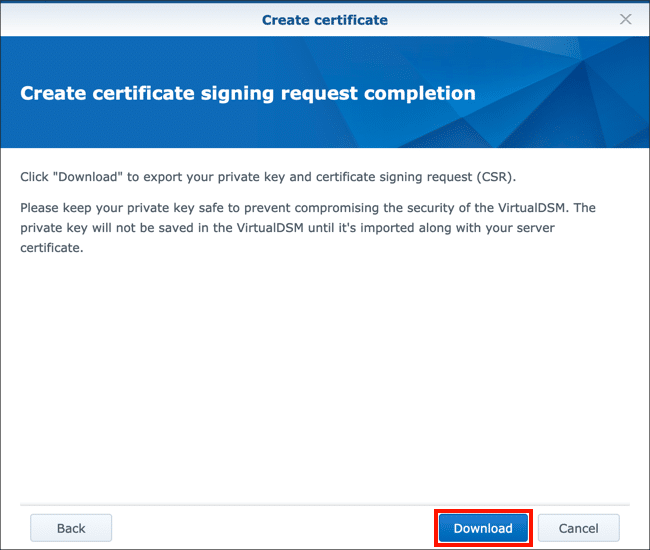
- Click the Download button.
- A file named
archive.zipwill be downloaded to your computer. It contains your new CSR (server.csr) and private key (server.key). Keep these in a secure location.
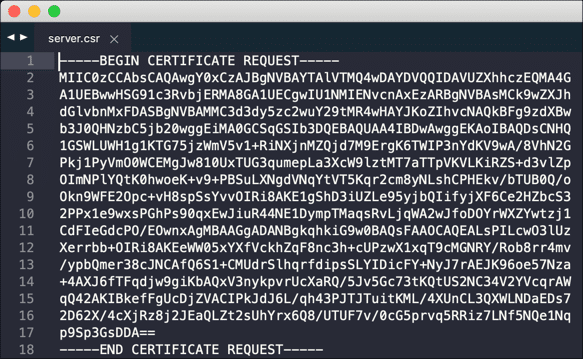
- When you are ready to order your SSL/TLS certificate from SSL.com, open
server.csrin a text editor to cut and paste into your web browser.

Install SSL/TLS Certificate
- When you have received your certificate from SSL.com and are ready to install it, navigate to Control Panel > Security > Certificate.
- Click the Add button.
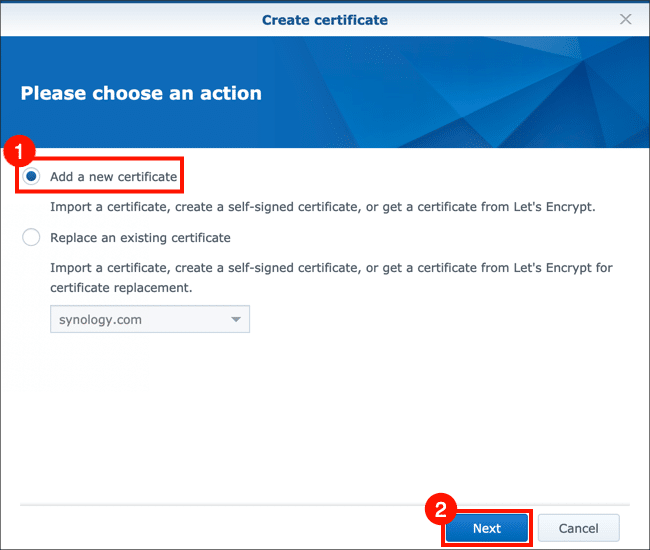
- Select Add a new certificate, then click the Next button.
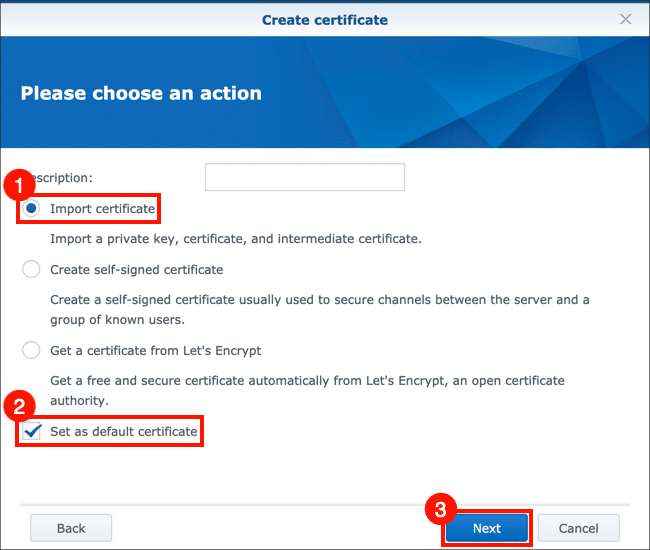
- Select Import certificate, check Set as default certificate, then click the Next button.
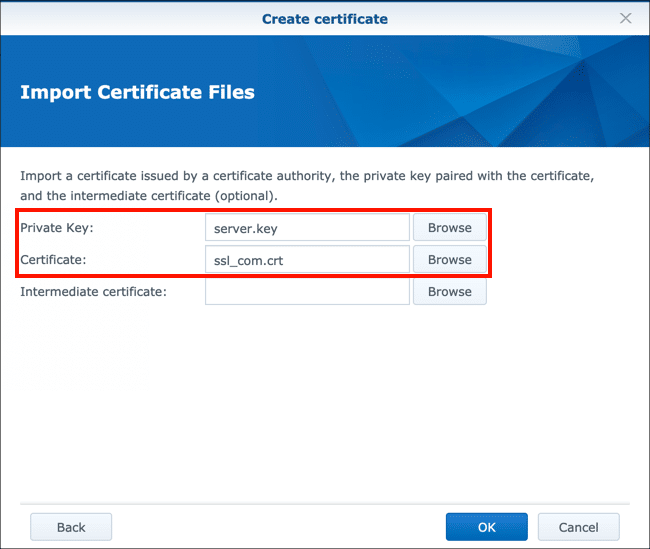
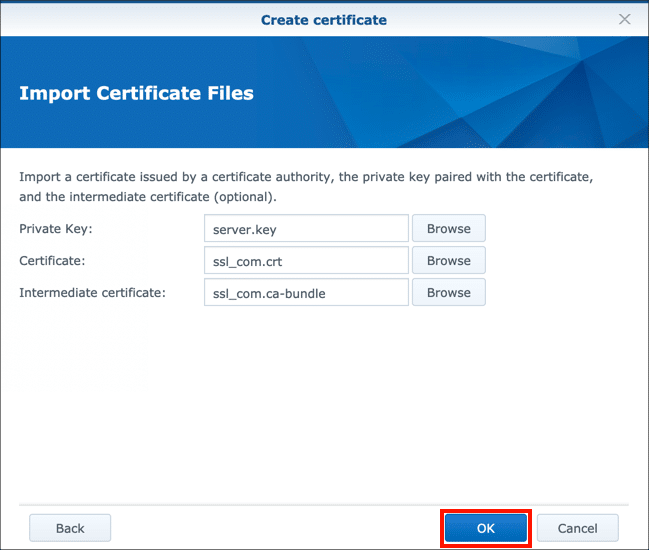
- Use the Browse buttons to select the Private Key you downloaded in the previous section (named
server.key) and your signed Certificate from SSL.com.
- For the Intermediate certificate, upload an SSL.com CA bundle file. If this file was not included in your certificate download, you can retrieve it from the order in your SSL.com account. The filename should end with
.ca-bundle.
- Click the OK button to import the certificate, CA bundle, and private key.

Thank you for choosing SSL.com! If you have any questions, please contact us by email at Support@SSL.com, call 1-877-SSL-SECURE, or just click the chat link at the bottom right of this page. You can also find answers to many common support questions in our knowledgebase.