This article will show you how to combine a private key with a .p7b certificate file to create a .pfx file on Windows Internet Information Server (IIS).
These instructions presume that you have already used “Create Certificate Request” from within IIS to generate a private key and CSR on the server/laptop you are using. The instructions also presume that the CSR has been submitted, validated, and a signed SSL Certificate has been issued to you and that you have also installed the certificate to your server/laptop.
For information on how to create a .pfx/.p12 certificate using OpenSSL, check out our article here.
To create a PFX file, you will:
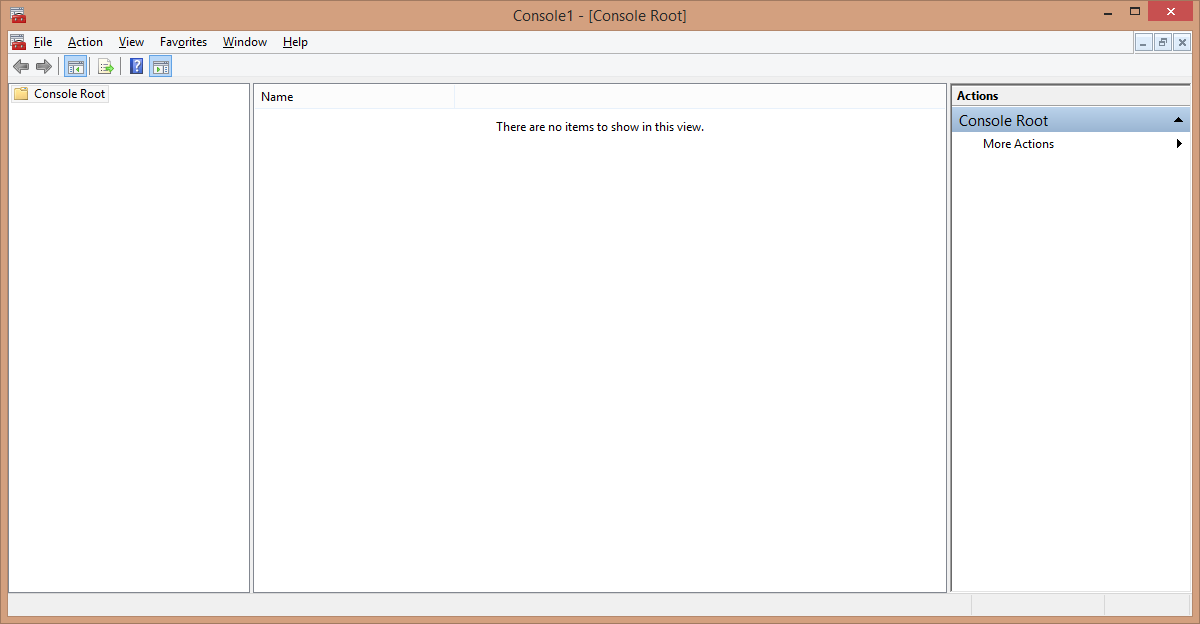
Locate the Certificate with MMC
- Open MMC on your computer (you can locate this program by typing “mmc” in your Windows search bar).

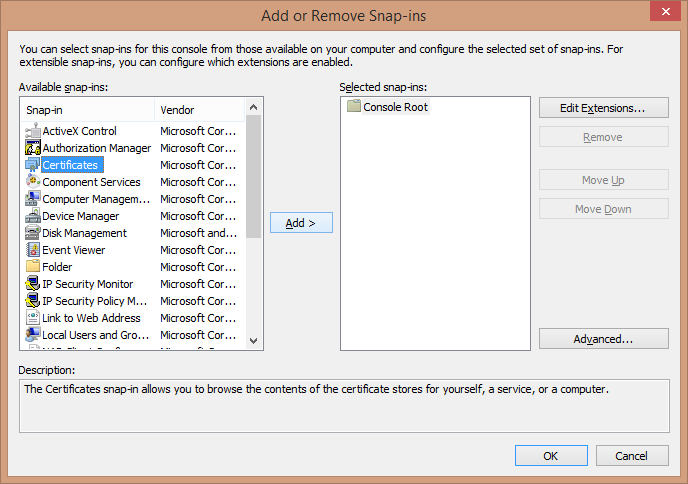
- Select File > Add/Remove Snap-in (or type Control-M). Select Certificates and click the Add button.

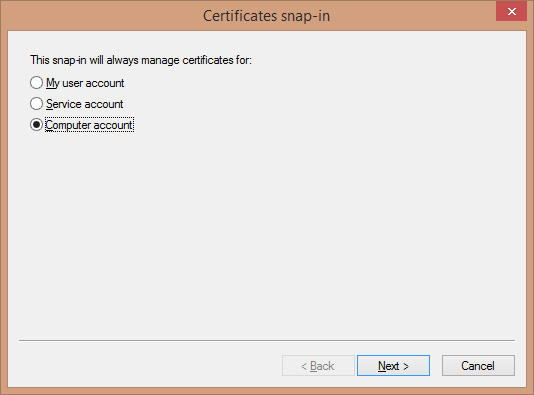
- Select “Computer account” and click Next…

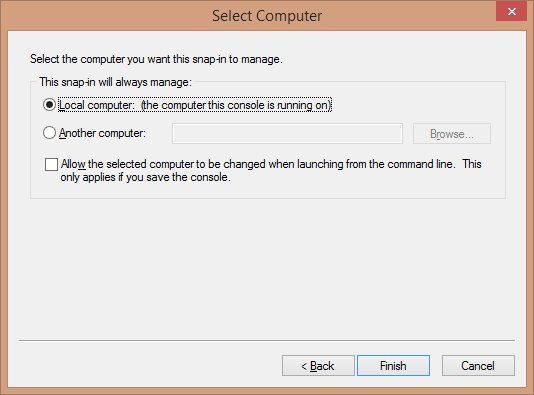
- Direct the snap-in to manage the Local computer and click Finish.
- Click OK to add the snap-in.
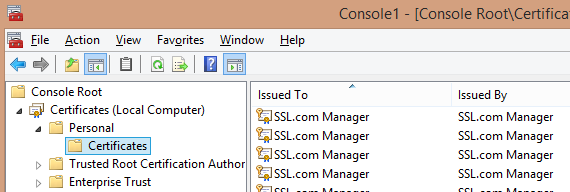
- Next, navigate to the “Certificates (Local Computer) > Personal > Certificates” folder.

Export the Corrected Certificate
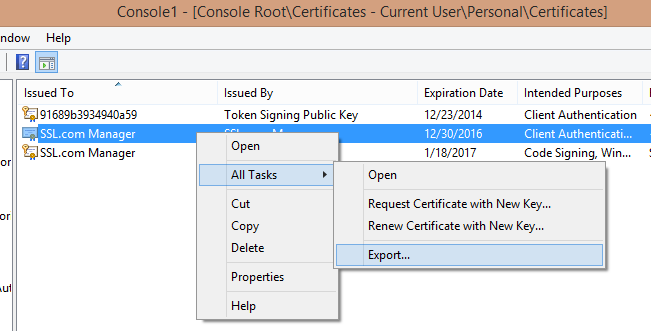
Before attempting to export the certificate as a .pfx file, you’ll need the correct key symbol.
- Right-click the certificate and select “All tasks > Export” to open the Certificate Export Wizard.

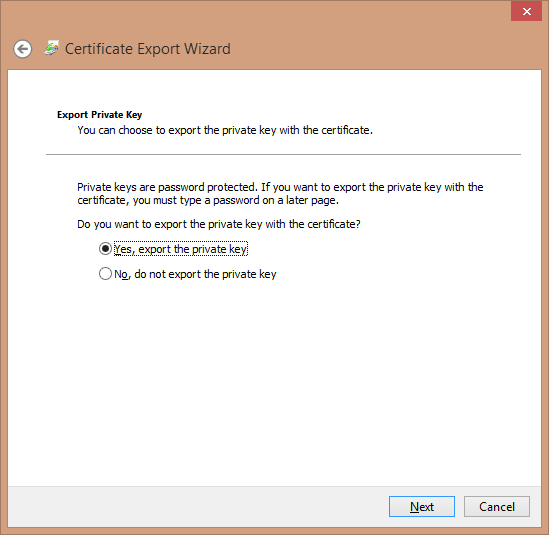
- After clicking through the Wizard’s welcome page, make sure that the option is set to “Yes, export the private key” and click Next.

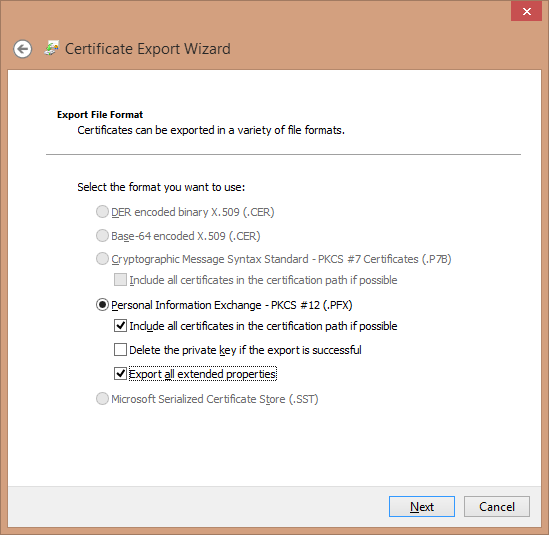
- Choose the format for the exported certificate (here, a PKCS # 12 -encoded, or .PFX file). Make sure to check the boxes to include all certificates in the path and to export all extended properties, then click Next.
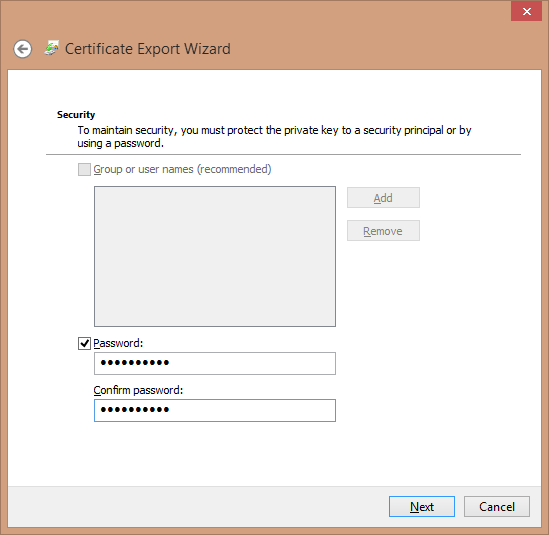
- You will be prompted for a password to protect this certificate bundle (a good idea, since it incorporates your private key). Create and confirm your password, then click Next.
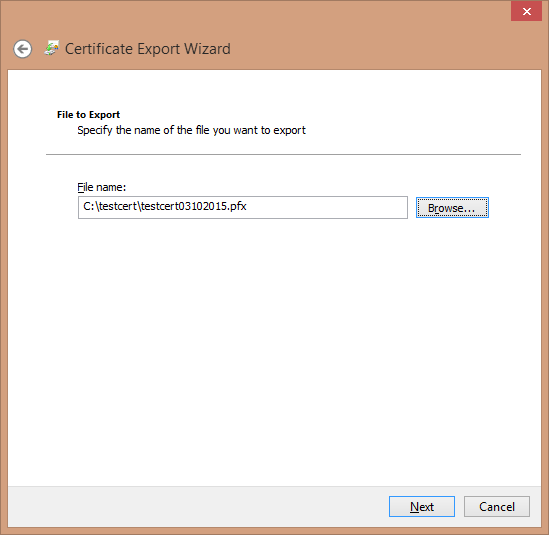
- Select the name and location of the file you are exporting. You may browse to a location you prefer – make sure to save the file with the .pfx extension.Note: Including the date is a good way to differentiate this certificate file from other ones.
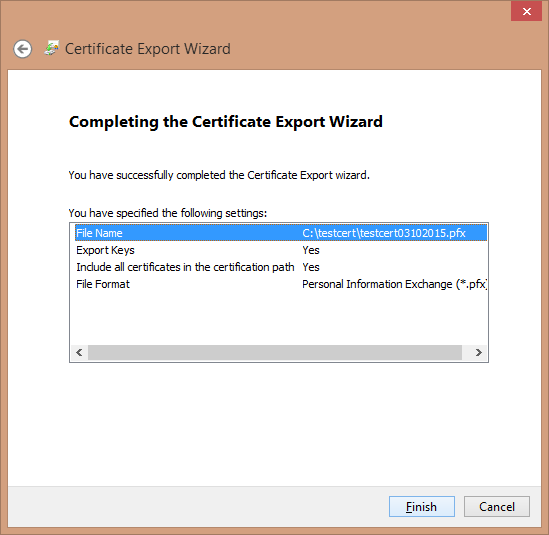
- Review the information. If this all looks correct, click Finish.
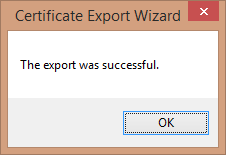
- You will receive confirmation that the export was successful.

Thank you for choosing SSL.com! If you have any questions, please contact us by email at Support@SSL.com, call 1-877-SSL-SECURE, or just click the chat link at the bottom right of this page.