


Understanding Mark Certificates
BIMI (Brand Indicators for Message Identification) is an email authentication standard designed to boost brand recognition and credibility by displaying verified logos within email clients. To prevent fraudulent use of brand logos, BIMI includes security protocols that ensure only authorized logo owners can participate. A key element of this framework is the Mark Certificate, which validates that a logo belongs to the legitimate organization.
There are two main categories of these marks:
- Verified Marks: These are logos registered with a recognized Trademark Office (Registered Mark) or established through government authorization (Government Mark).
- Common Marks: These include logos that meet the criteria for inclusion in a Mark Certificate, such as Prior Use Marks. A Prior Use Mark is an unregistered trademark, also known as a common law mark. These marks typically use the “TM” or “SM” symbols.
At SSL.com, we currently provide two types of Mark Certificates:
- Verified Mark Certificates (VMCs) – Issued for Registered Marks.
- Common Mark Certificates (CMCs) – Issued for Prior Use Marks.
Both VMCs and CMCs strengthen email security and trust by verifying the legitimacy of a brand’s logo through BIMI and Domain-based Message Authentication, Reporting, and Conformance (DMARC). When an email passes DMARC authentication checks, these certificates ensure that the sender’s domain is not being spoofed, allowing the brand’s logo to be displayed within supported email clients.
This guide details how to obtain a Verified Mark Certificate and a Common Mark Certificate.
Who Can Get a Mark Certificate?
Mark Certificates can only be issued to the following entity types:
- Private Organizations: Legally registered businesses such as LLC, Ltd, GmbH, OOO, SL, Sp. z o.o., and similar incorporated entities.
- Government Entities: Public institutions like government departments, state schools, or local authorities.
- Business Entities: Unincorporated businesses officially registered with a government body. Some sole proprietors may qualify.
- Non-Commercial Entities: International organizations not affiliated with a single country, such as the UN or NATO.
Basic Requirements for a Mark Certificate
For Verified Mark Certificates (VMCs) with Registered Marks:
- The trademark must be registered with an office listed in WIPO’s directory: WIPO Directory.
- The trademark must not expire within 397 days of verification.
For Common Mark Certificates (Prior Use Marks):
- The submitted mark must appear on the applicant’s website.
- The website domain must match the one in the application.
- The mark must have been publicly visible on that domain for at least 12 months.
Step 1: Getting Ready for Your Verified Mark Certificate: DMARC Compliance Made Simple
Before obtaining a Mark Certificate, your domain must comply with DMARC (Domain-based Message Authentication, Reporting & Conformance). DMARC enhances email security by verifying messages and dictating how to handle those that fail authentication—either by quarantining or rejecting them. This ensures that only legitimate emails are delivered under your domain name.
For this section, you will need access to your domain’s DNS records. If you are not the one managing your DNS, contact your server administrator.
Check Your DMARC Status
- Configure SPF (Sender Policy Framework) – SPF prevents email spoofing by specifying which servers are allowed to send email on your behalf.
- Compile the IP addresses of all mail servers used to send email, including web servers and third-party services.
- Create an SPF record for each domain using a text editor. Example:
v=spf1 ip4:1.2.3.4 ip4:2.3.4.5 include:thirdparty.com -all - Publish your SPF record as a TXT entry in your DNS settings.
- Validate your SPF record using an SPF check tool.
- Set Up DKIM (DomainKeys Identified Mail) – DKIM is an email authentication protocol that is used to digitally sign emails and verify their authenticity. Your email service provider may offer a DKIM setup tool to help you complete this process.
- Choose a DKIM selector (e.g., “standard._domainkey.example.com” = host name).
- Generate a public-private key pair:
- Windows: Use PuTTYGen.
- Linux/Mac: Use ssh-keygen.
- Publish the public key in a TXT record in your DNS. Example:
v=DKIM1; p=YourPublicKey - Store the private key securely as required by your email provider.
- Set Up DMARC Monitoring.
The most critical — and time-consuming — step is configuring DMARC to monitor your email traffic. This helps establish a baseline of approved senders before enforcing DMARC policies. If you don’t manage DNS, ask your provider to add the record.
- Add a DMARC record in your DNS settings.
- Use a TXT record named like: _dmarc.your_domain.com
Example value:
v=DMARC1; p=none; rua=mailto:dmarcreports@your_domain.com
- Set the policy to p=none to begin in monitoring mode.
- Use a DMARC check tool to validate the setup. Note: changes may take 24–48 hours to propagate.
- Start reviewing DMARC reports to see which emails pass or fail SPF and DKIM. DMARC reports are in XML format and can be hard to read. Use a DMARC report processor to simplify the data review process.
- Pay close attention to senders not included in your SPF record.
- Update your SPF as needed to cover all legitimate sources.
-
Enable DMARC Enforcement
Once you’ve monitored your email traffic and addressed any authorized senders being flagged, it’s time to move from monitoring to enforcement.
DMARC offers two enforcement options:
- Quarantine: Suspicious messages go to spam.
- Reject: Unauthorized messages are blocked entirely (most secure).
Both levels meet Mark Certificate requirements, but it’s best to gradually ease into enforcement.
- Access your DNS settings and locate your DMARC record.
- Change the policy from p=none to p=quarantine.
Example:
v=DMARC1; p=quarantine; pct=10; rua=mailto:dmarcreports@your_domain.com - Use the pct tag to control enforcement gradually.
Increase steadily until reaching 100%. - When ready for full enforcement, simply update p=quarantine to p=reject.
Step 2: Use an Official Logo
With your email configuration successfully set up, the next step is preparing your logo for BIMI compliance. For VMCs, a key requirement is that your logo must be trademarked. This is essential because a federally or internationally registered trademark strengthens security by making it significantly more difficult for malicious actors to spoof.
To be eligible for BIMI, your logo must be designed for clear brand recognition, ensuring it remains sharp and identifiable at different resolutions.
The logo must be square and saved in the Scaled Vector Graphics (SVG) format. More specifically, it must adhere to the SVG Tiny Portable/Secure (SVG P/S) profile established by the BIMI Working Group.
Logo Guidelines
- If the registered logo includes color, the same color must be provided in the file
- Use a square aspect ratio (1:1).
- Center the logo to ensure it displays well in circular or square containers.
- Use a non-transparent background for consistent rendering across platforms.
- The logo file should not exceed 30KB in size.
How to Convert Your SVG Image to SVG Tiny PS
- Set Your Logo in SVG Vector Format
Logos made in pixel-based tools aren’t suitable for a Mark Certificate. First, you’ll need to set your logo in .svg vector format. - Export Your SVG Image as SVG 1.2 Using Adobe Illustrator
- Open Adobe Illustrator and select “Edit Artboards” in the “Properties” tab.
- Set the same value for both Width (W) and Height (H) to create a square aspect ratio, then press Enter.
- Once your logo is finalized, save the image in SVG format with the SVG profile.
- Click File > Save As.
- In the Save As dialog box, select SVG as the file format and click Save.
- In the SVG Options dialog, choose SVG Tiny 1.2 under SVG Profiles, then click OK.
- Format the SVG Tiny 1.2 Image as SVG Tiny Portable/Secure (SVG P/S) Format
The BIMI Working Group has published an Adobe Illustrator export script that enables users to convert an SVG Tiny 1.2 file into the SVG P/S format.
Step 3: Create your SSL.com Account and Validate Your Domain
Creating an account will enable you to submit requirements for your certificate and track the order status. A validated domain is a key requirement for the issuance of your certificate. Once an account is created, it is possible to pre-validate your domain name before ordering Mark Certificates. Please refer to the following SSL.com guides:
Account Creation
Step 4: Order your Mark Certificate
- Go to SSL.com’s Mark Certificate product page.
- Click Buy Now.
- Select the duration of your certificate.
- Confirm the purchase and payment.
Step 5: Accomplish Validation Requirements
Fill Out the Registrant Information
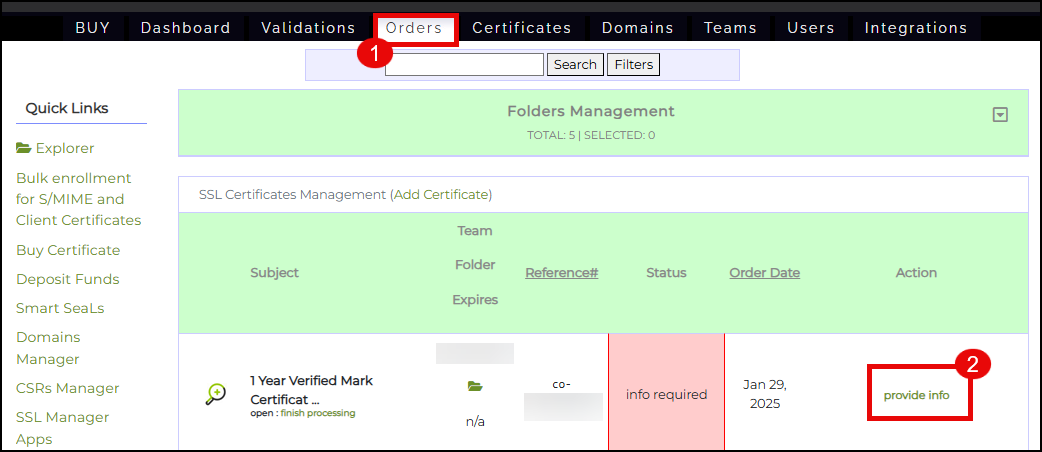
- Login to your SSL.com account. Click the Orders tab. Locate your order and click the provide info link.

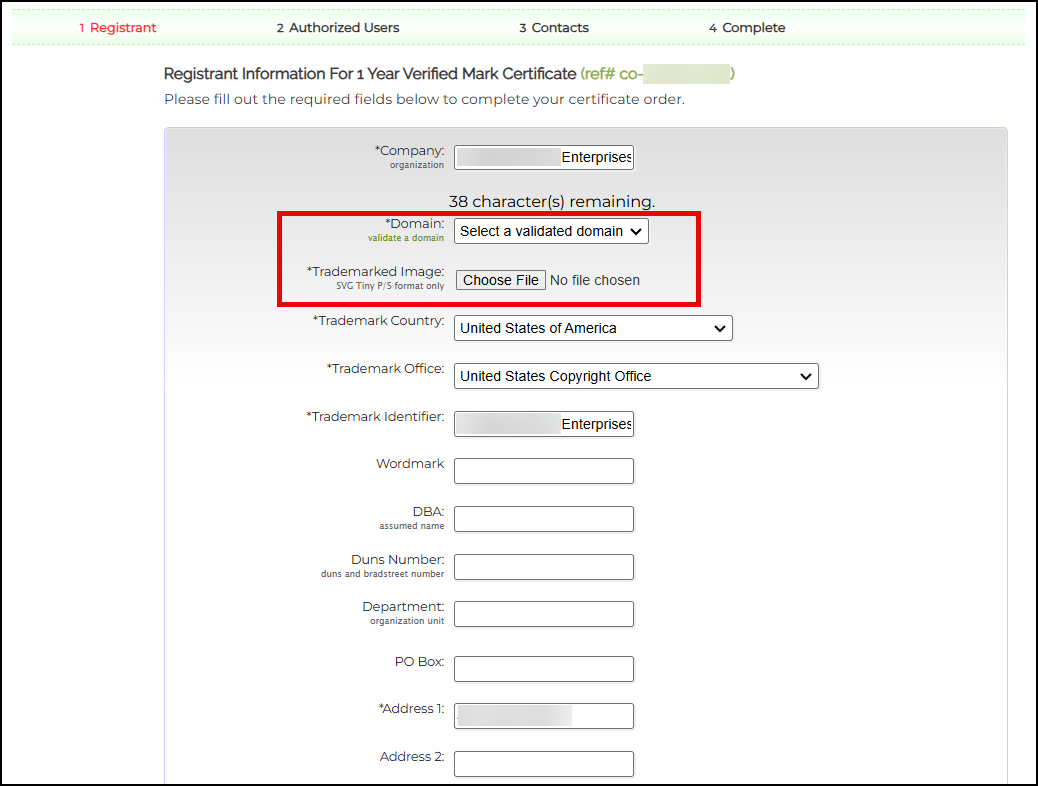
- Place all the required information for your company. On the Domain field, click the drop down arrow and select the domain you have previously validated. On the Trademarked Image field, upload your company logo that is formatted as SVG Tiny-PS. Take note that the maximum file size is 30KB.

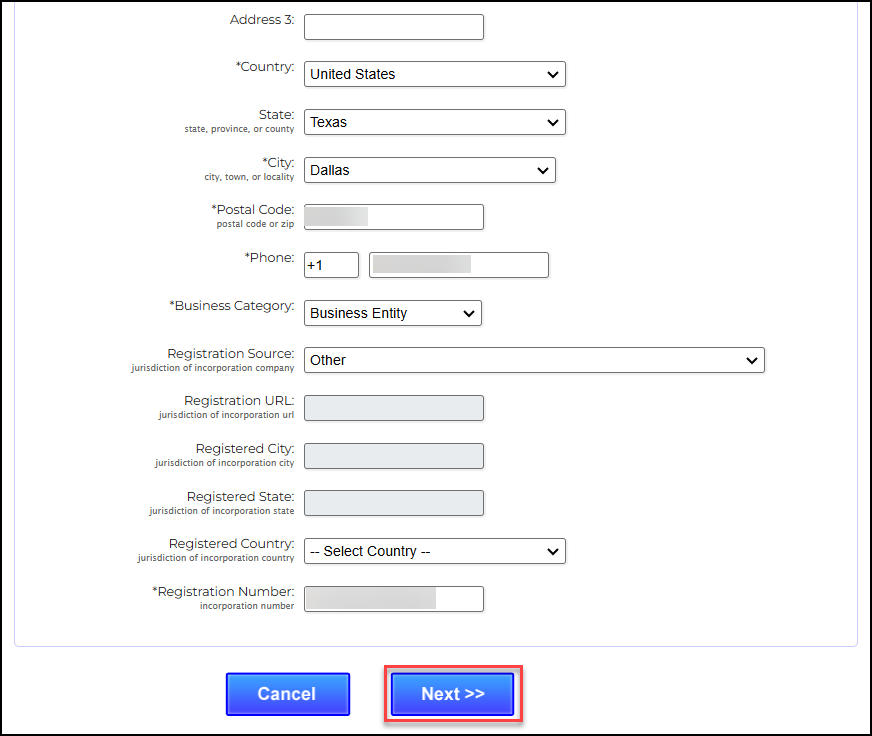
- After filling out all the required fields, click the Next>> button.

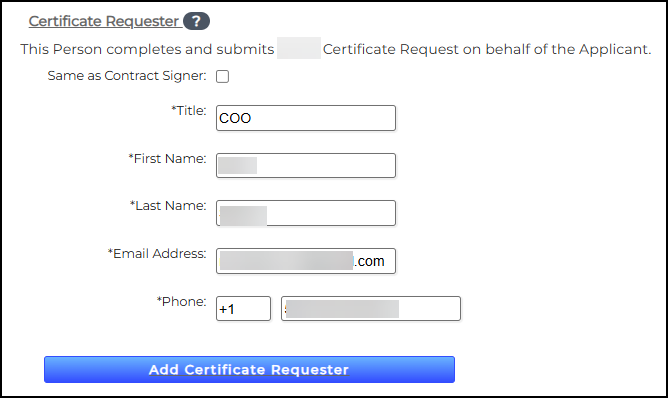
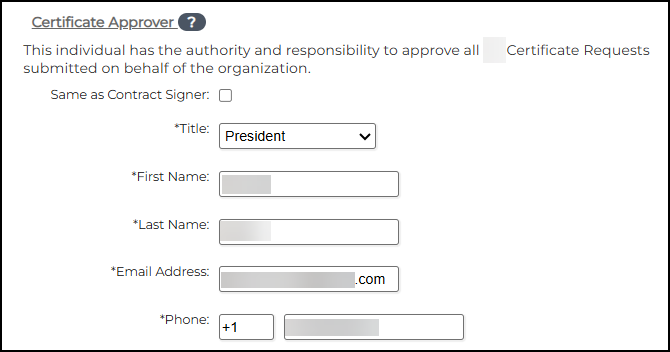
Fill Out the Fields for Contract Signer, Contract Requester, and Certificate Approver
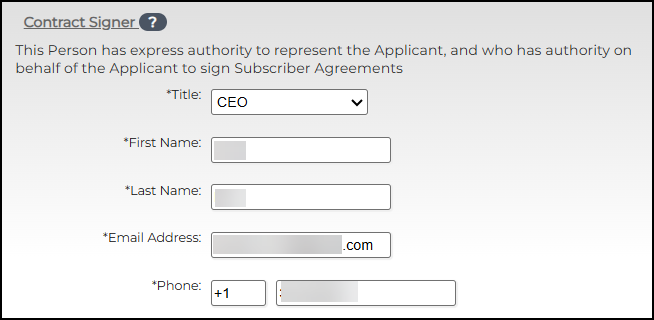
Fill in the name of the individual(s) with authority to sign contracts for your organization. This must be an Officer of the Organization, such as CEO, President, Corporate Secretary, Treasurer, Vice-President, COO, CIO, CFO, CSO, Managing Member, Director, or Department Head, etc. The Contract Signer will be considered to hold all roles, but you may also add other individuals to specific roles.
- Contract Signer – This Person has express authority to represent the Applicant, and who has authority on behalf of the Applicant to sign Subscriber Agreements

- Certificate Requester – This Person completes and submits a Certificate Request on behalf of the Applicant. If this person is the same as the Contract Signer, check the box provided.

- Certificate Approver – This individual has the authority and responsibility to approve all Certificate Requests submitted on behalf of the organization. If this person is the same as the Contract Signer, check the box provided.

- Click the Next>> button


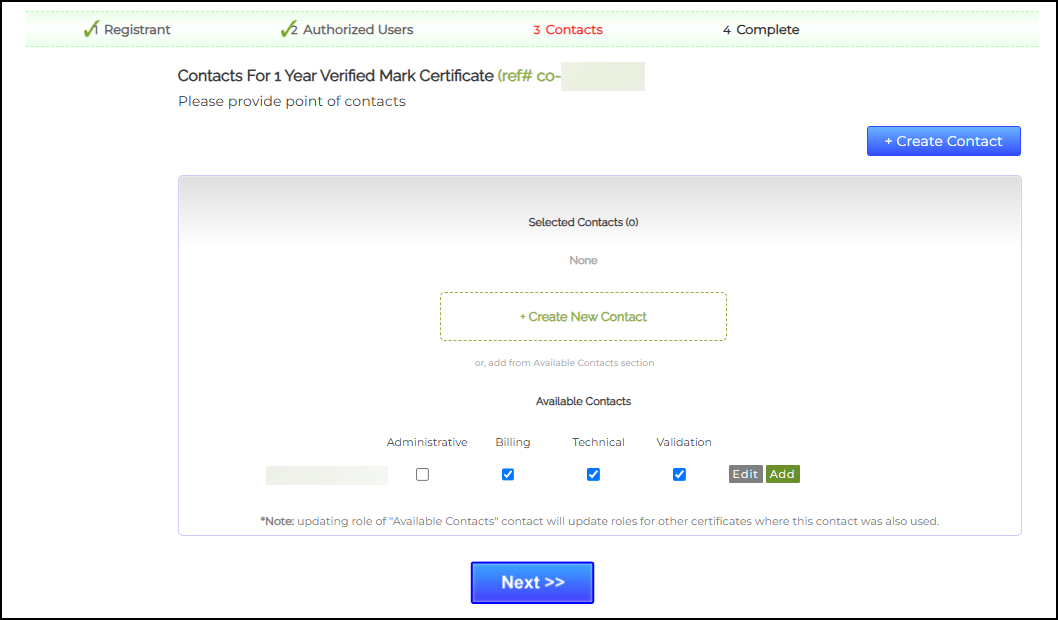
Add Contacts
- Provide contact persons in your organization who can provide further requirements to SSL.com’s validation team. Check all the appropriate boxes regarding the role of the person. You can also click the +Create New Contact button to add additional contact persons if necessary. Afterwards, click the Next >> button.

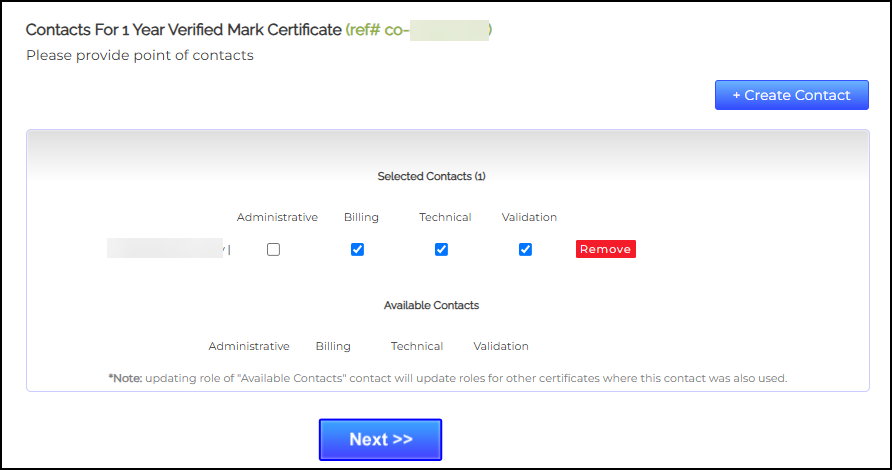
- Finalize your list of selected contacts. Upon confirmation, click the Next>> button.

From here on, the SSL.com validation team will contact you to provide information on the remaining requirements for your order, including the following:
- Face-to-Face Verification Procedure
SSL.com partners with reputable third-party AI identity verification providers. Together with a manual review by SSL.com’s validation team, they facilitate secure Face-to-Face (F2F) identity verification for the Designated Individual (such as the Contract Signer or Certificate Approver).
Once the validation team has informed you that all requirements are completed and your certificate is issued, you can proceed to Step 6.
Step 6 – Upload Your Mark Certificate to Your Web Server
For the issuance of your Mark Certificate, you will receive a .pem file containing your certificate. If you inspect the file, it will follow a standard PEM format, beginning with —–BEGIN CERTIFICATE—– and ending with —–END CERTIFICATE—–.
To complete the deployment, upload this .pem file to your public web server. Make a note of the certificate’s URL, as it will be required for the next step in the BIMI setup process.
To send a request, email support@ssl.com and ask for the updated BIMI DNS text. Once hosted, we’ll send you the links for the SVG and PEM files, which have to be added to your DNS records.
Step 7 – Configuring Your BIMI TXT Record
The next step in enabling BIMI for your domain is to create and add a BIMI TXT record to your DNS settings through your hosting provider.
Start by generating your BIMI record. You’ll need the location of the PEM certificate file you saved earlier, along with the URL of your SVG logo. Format the record as follows:
v=BIMI1;l=https://images.yourdomain.com/brand/bimi-logo.svg;a=https://images.yourdomain.com/brand/certificate.pem
Once your record is ready, add it as a DNS TXT entry through your domain provider’s management portal. While the exact process may vary by provider, the key details you’ll enter include:
|
Field |
Value |
Description |
|
Type |
TXT |
Specifies the DNS record type |
|
Host |
default._bimi.yourdomain.com |
Prefix “default._bimi” followed by your domain name |
|
Value |
v=BIMI1;l=https://images.yourdomain.com/brand/bimilogo.svg;a=https://images.yourdomain.com/ brand/certificate.pem |
Your BIMI TXT record |
|
TTL |
1 hour (3600 seconds) |
Recommended time-to-live (TTL) setting |
After adding the record, allow up to 48 hours for propagation. To confirm everything is set up correctly, use the BIMI Group’s verification tool to check your record.
Finally, send a test email to verify that your logo appears as expected. Once it’s visible, your BIMI configuration is complete!
For more information about Mark Certificates from SSL.com, contact our sales team today.