


The SSL.com SSL/TLS Health Check Monitoring (HCM) service provides a real-time snapshot of your website’s SSL/TLS certificate installation health. It performs a deep scan of the installation to determine security level and installation quality of the domain’s certificate. The HCM service detects things such as which ciphers and algorithms are supported by your website as well as which browsers and trust stores (Google Chrome, Microsoft Edge, Mozilla Firefox, Apple Safari, Java) are trusted by your certificate installation. In addition, HCM determines if the correct certificate chain and intermediate certificates have been installed properly to ensure your site visitors can browse the website without security warnings.
The HCM also notifies all account managers of upcoming certificate expiration dates so that system and website administrators can take proactive action to renew the certificates. Certificate changes such as a new installation or switching certificate authorities also trigger notifications. Finally if there is a state change such as the site going down due to an expired certificate or simply the certificate being removed, account managers are also notified as well.
Scheduling website scans is easy with our intuitive interface. Scans can be scheduled for certain intervals down to the minute or on specific days or dates.
SSL.com provides a wide variety of SSL/TLS certificates for websites. Click the button to choose your SSL certificate!
Opting into the HCM Service during the submission of the Certificate Signing Request
The option to activate the HCM service is available during the submission of your Certificate Signing Request (CSR) for an SSL certificate that was ordered on the SSL.com website. This is found on the Schedule SSL Scans field.
There are three choices in scheduling the HCM service/SSL Scans: Simple, Custom, and None.
The default choice is Simple: Daily (at midnight). If you click the drop-down arrow for Simple, you have the choice to set the SSL Scans hourly, daily, weekly, monthly or yearly.
![]()
![]()
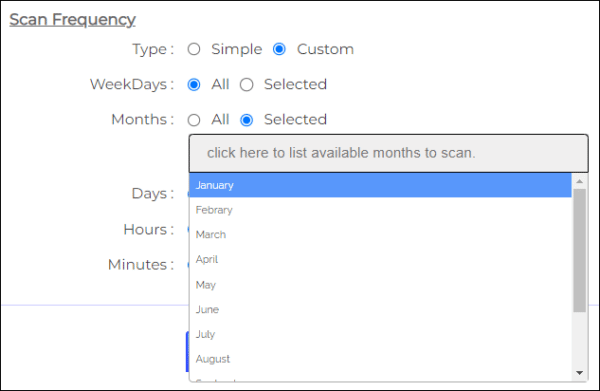
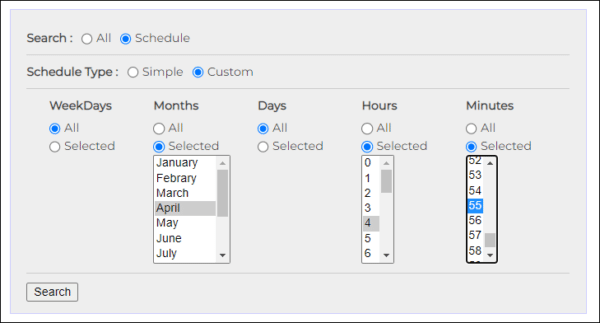
If you want your scans to be more granular, you can choose the Custom option. Here, you can customize the SSL scans to occur all of the time or only on certain minutes, hours, days ,and months.
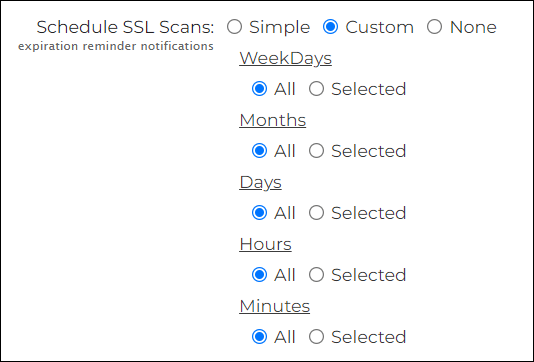
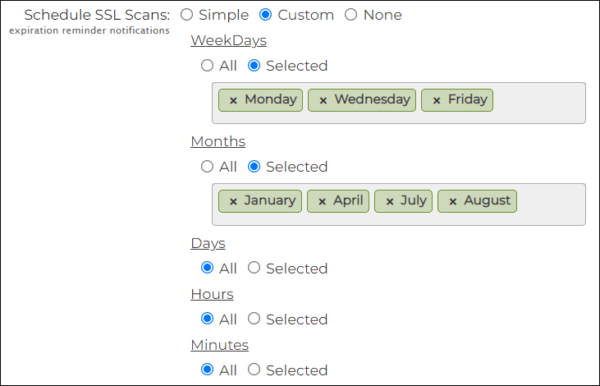
If you choose to go with Selected instead of All under the Custom option, you can greatly specify which exact time periods you want the scans to occur.
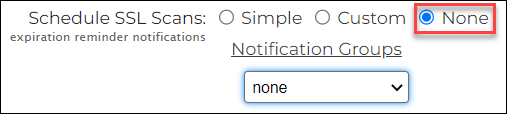
The third choice is None. This is what you should click if you do not want the SSL Scan service.
Introduction to the Interface
Due to user security concerns, every publicly trusted SSL certificate (such as those issued by SSL.com) will only be valid for a predefined period of time. All compliant client software (e.g. browsers or operating systems) will consider such certificates expired after that time, and present the user with a security warning about their connection not being safe.
To avoid having your customers greeted with such unpleasant messages, the Health Check Monitoring service allows you to define automated reminders that will send you an email message when your certificates are close to expiring.
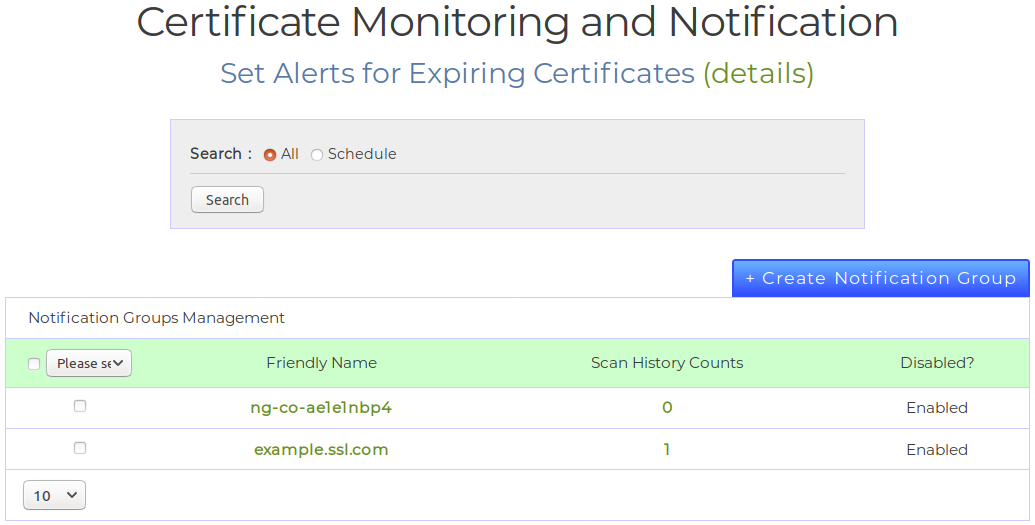
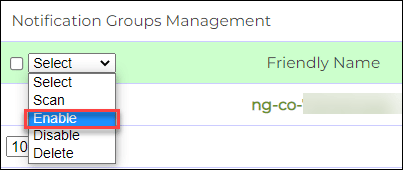
On the Monitoring page, you will find an overview of all the reminders (or Notification Groups) you have defined. Each notification group is shown as a row in the Notification Groups Management table at the bottom of the Monitoring page.
Each entry is assigned an easy-to-remember Friendly Name, shown in the second column from the left, which you can set to anything when creating the group. The next column, Scan History Counts, shows you the number of times the Health Check Monitoring Service has scanned your domains for expired certificates. Finally, the Disabled? column informs you whether a notification group is enabled (i.e. will scan your domains and notify you of any expired certificates) or not.
In the left-most column, the check-boxes allow you to select one or more rows and choose an action to perform on them via the drop-down menu at the top of the column.
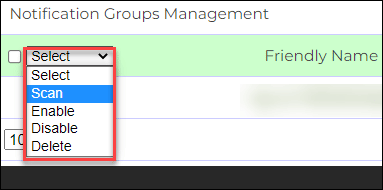
The available actions are shown in the following list (these actions are explained in more detail in subsequent sections):
- Scan the domains associated with the notification group for expired certificates.
- Enable the notification groups (if disabled).
- Disable the notification groups (if enabled).
- Delete the notification groups.
Create a Notification Group
The Monitoring page allows you to create new notification groups to be placed in the Health Check Monitoring service by clicking the blue Create Notification Group button, just above the group table.

Clicking the button will redirect your browser to a new form that will create the new notification group for you. It is always a good idea to start with a Friendly Name for your groups, in order to make their management easier.
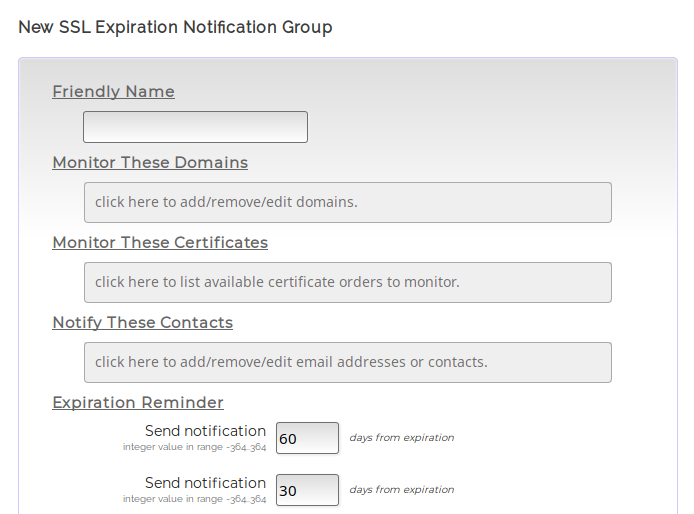
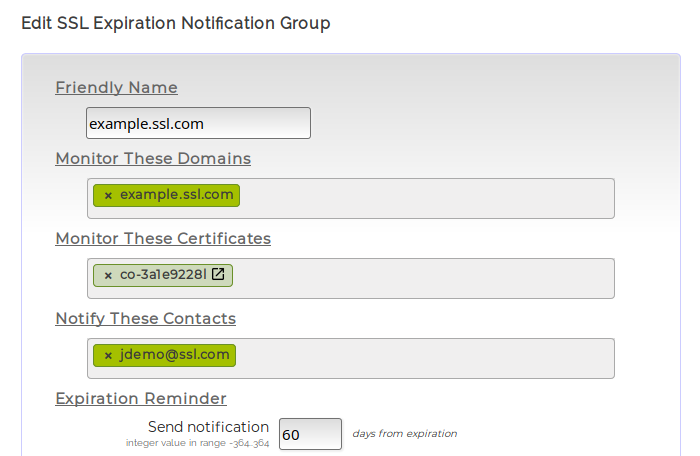
For example, to create a notification group for a server certificate, we can use the server’s domain name as the Friendly Name, and select the domain from the Monitor These Domains list.
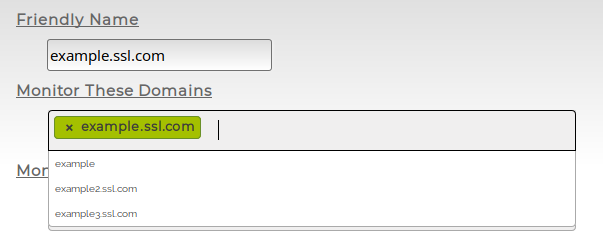
The portal will automatically filter the available certificate orders, and contacts, to only show you the ones pertaining to the domain(s) you have previously selected. A notification group requires at least one domain, certificate order, and contact to notify.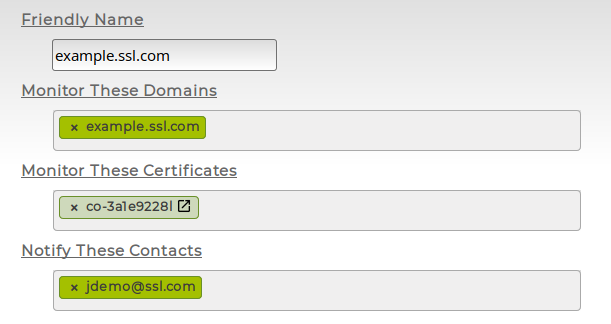
After having selected one or more of each from the drop-down menus in this form, the next step is configuring the expiration reminders and scan settings for the group. The default settings will send an expiration reminder to the contacts you have previously selected every 15 days, starting 60 days from the certificate’s expiration date. Unless you have a specific need for more or less frequent reminders, we recommend leaving the default date ranges for reminders as they are.
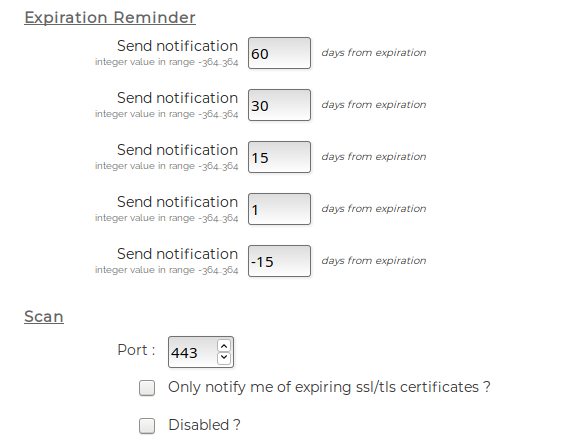
Following the Expiration Reminder, the form allows you to specify the domain Scan settings. Notification groups will periodically scan the monitored domains and check if their certificates are about to expire. You can use this form to configure which Port your server listens to (the default being the default HTTPS port, 443) and whether this notification group will start as disabled (via the Disabled? checkbox). Naturally, you can enable and disable any of your reminders at any time of your choosing.
By default, a notification group will also inform you about a certificate’s installation status. For example, you might receive a notification if one or more of the monitored certificates cease to be installed on the monitored servers. If you only wish to receive expiration reminders, you may enable the Only notify me of expiring SSL/TLS certificates check-box.
The last option you might need to configure before your notification group is ready for use is the scan schedule. The portal offers you the choice between a Simple and a Custom schedule type, determined by the two radio buttons in the Schedule section of the form.
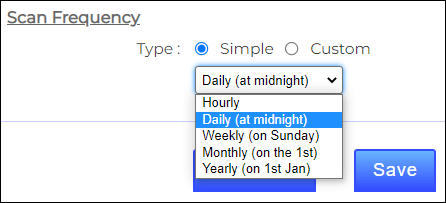
The Simple schedule allows five choices: Hourly, Daily, Weekly, Monthly and Yearly. If this schedule granularity does not suit your needs, you may select the Custom radio button. Selecting this will change the Schedule section to contain a more detailed date-range picker. With this date-range picker, you can either select All of the available Weekdays, Months, Days, Hours, or Minutes to execute the domain scan, or limit any of these values by clicking on its Selected box, as shown in the following image.
After everything has been filled out, clicking the Save button will create the Notification Group. After it is created, the group will be shown in the main table in your customer account’s Monitoring page.
Edit a Notification Group
You can edit a notification group you have previously created by simply clicking its Friendly Name column in the Monitoring page. This will redirect your browser to the same form used to create the notification group, but all of the fields will be filled in with the values previously entered when the group was created.
 You can proceed to update any of the options, and then click Save when you are done, for your changes to take effect.

Scan Domains Manually
Apart from the scheduled domain scans, you may also manually scan a group’s domains any time you wish to. You can scan domains using two alternative methods. The first is to enable the group’s check-box in the group table in the portal’s Monitoring page, and select the Scan action from the drop-down menu with the available actions. The scan will be performed immediately, and in turn the group’s Scan Count will be increased.
Alternately, you may click on a group’s Friendly Name and visit its edit page. Clicking the Scan now button at the bottom of the page will perform the scan (and also increase the scan count). If a soon-to-expire certificate is discovered in any of these scans, reminder notifications will be sent to the selected contacts.

Enable a Notification Group
You can opt to enable or disable a notification group at any time. A disabled notification group will neither scan its domains, nor send any expiration reminders, even if their conditions are satisfied. This can be useful for archiving old expiration reminders instead of removing them, or suspending a reminder until a problematic situation with a certificate or a server has been resolved. Whatever your reason, enabling or disabling a notification group only takes a couple of seconds, and there are two alternative methods to do this:
The first method is to use the action drop-down menu, above the main notification group table in your portal’s Monitoring page. Click a group’s check-box and select Enable from the action menu to enable it.
Search for Notification Groups
If you don’t see a particular group in the table, it might be because you have several groups defined. By default, the table only shows the 10 most recently-created notification groups. You may use the drop-down menu below the table to select the number of items shown on the table. Alternately, you can use the search form located at the top of the Monitoring page.

The search form contains two radio buttons, All and Schedule, which allow you to filter notification groups based on their scheduled reminders. Selecting All and clicking Search will refresh the table to contain all available notification groups. Selecting Schedule will expand the form to allow you more finely tuned control over the search criteria; it works the same way as the scan-scheduling form on the notification group creation and editing page.
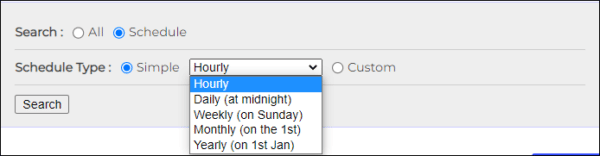
Selecting the Schedule Type allows you to choose between Simple and Custom search criteria. The Simple criteria are a drop-down menu of five choices, hourly, daily, weekly, monthly and yearly. To see the notification groups that match a specific schedule type, select it from the drop-down menu and click Search.
If you have more refined criteria for your search, you may select the Custom radio button. This will change the search form’s appearance to include a detailed schedule picker. This form allows you to select any or all of the available Weekdays, Months, Days, Hours, and Minutes to match any notification groups that scan their domains at such times. To see the result of your search, select your criteria and click Search.
How to Discontinue the HCM Service
Method 1
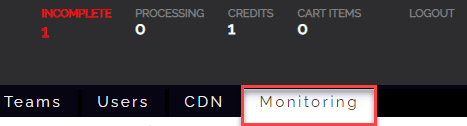
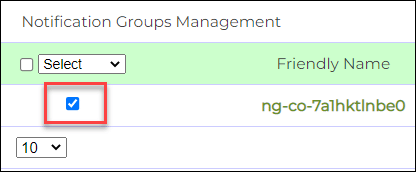
Login to your SSL.com account and click the Monitoring tab on the menu.
Tick the check box for the notification group that you want to be discontinued of the SSL Scan service. The default friendly name for notification groups will be ng- followed by the reference number of your SSL certificate.
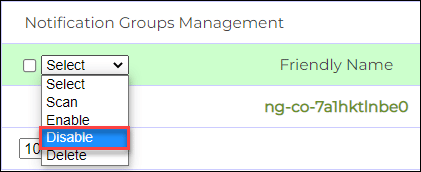
Click the Select drop-down list and choose the Disable option if you are considering to resume the HCM service in the future. If you want to permanently remove your order from the HCM service, choose the Delete option.
Method 2
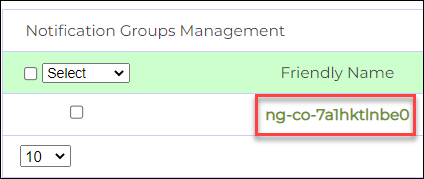
Click the Friendly Name of your notification group to redirect your browser to its edit page.
Once you are redirected, scroll down to the Scan section and tick the check box for Disabled? option.
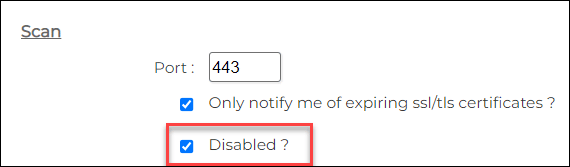
Next, scroll down to the bottom of the page and click the Save button.

HCM Pricing Tiers
| Tier | Max Scan Count | Max Domain Count | Monthly Rate | Annual Rate (25% discount) |
|---|---|---|---|---|
| 1 | 31 | 1 | $14.99 | $134.91 ($11.24/mo) |
| 2 | 18,250 | 5 | $34.99 | $314.91 ($26.24/mo) |
| 3 | 1,314,000 | 30 | $99.99 | $899.91 ($74.99/mo) |
| 4 | 4,380.000 | 100 | $149.99 | $1,349.91 ($112.49/mo) |
| 5 |
13,140,000 | 300 | $299.99 | $2,699.91 ($224.99/mo) |
| 6 |
26,280,000 | 600 | $499.99 | $4,499.91 ($374.99/mo) |
| 7 |
430,800,000 | 1,000 | $749.99 | $6,749.91 ($562.49/mo) |
| 8 |
861,600,000 | 2,000 | $1499.99 | $13,499.91 ($1,124.99/mo) |
For higher scan volumes or to inquire about custom plans, please use the form below or contact SSL.com Enterprise Sales at sales@ssl.com
HCM Tier Placement
The default HCM Tier classification will depend on how many domains are included in the SSL.com certificate.
In reference to the HCM Pricing Tiers guide table, if an SSL certificate is ordered for 1 domain, the HCM subscription will be set to Tier 1. If an SSL certificate is ordered for 2 to 5 domains, the HCM subscription will be placed in Tier 2. A certificate covering 6-30 domains will be placed in Tier 3. And so on as indicated in the HCM Pricing Tiers guide table.
If you wish to have your HCM Tier placement changed, please contact support@ssl.com or click the chat link at the bottom right of this page.
SSL.com provides a wide variety of SSL/TLS certificates for websites. Click the button to choose your SSL certificate!