This tutorial will show you how to sign files from the Windows command line with a code signing certificate and private key stored in Azure Key Vault. To follow these instructions you will need:
- An Azure account
- A Key Vault
- A code signing certificate installed in your Key Vault. You can either:
- Azure Sign Tool installed on the computer you will use for signing
What is Azure Sign Tool?
Azure Sign Tool is an open-source utility that offers SignTool functionality for certificates and keys stored in Azure Key Vault. You can install Azure Sign Tool with the following command in Windows PowerShell (requires .NET SDK):
dotnet tool install --global AzureSignTool
Step 1: Register a New Azure Application
First, you’ll need to register a new Azure application so you can connect to your Key Vault for signing.
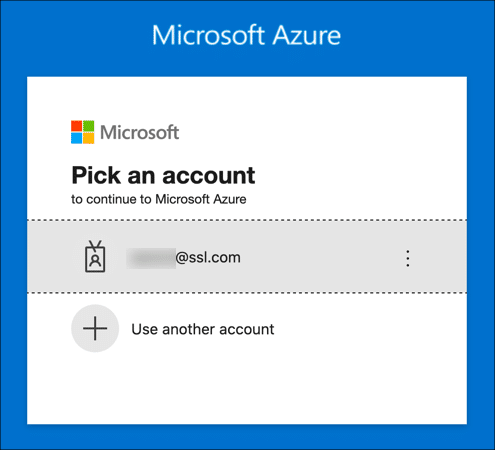
- Sign into the Azure portal.
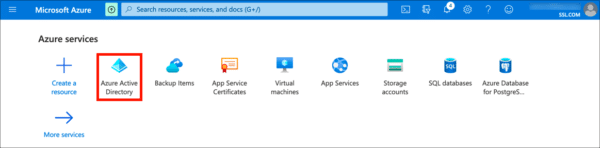
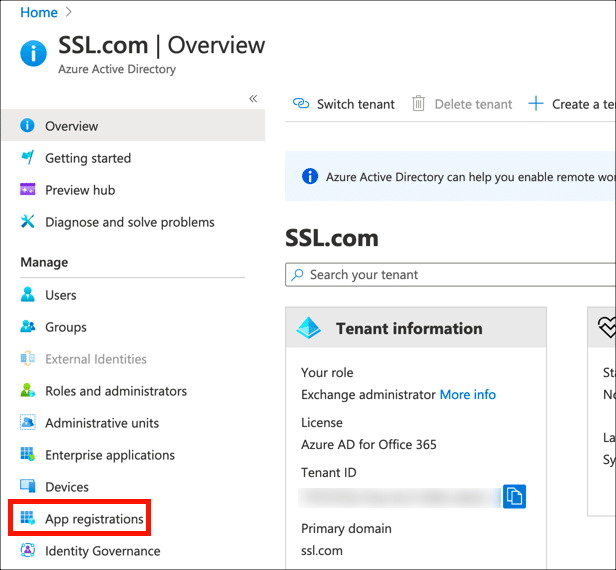
- Navigate to Azure Active Directory. (Click More services if the Azure Active Directory icon isn’t visible.)
- Click App Registrations, in the left column.

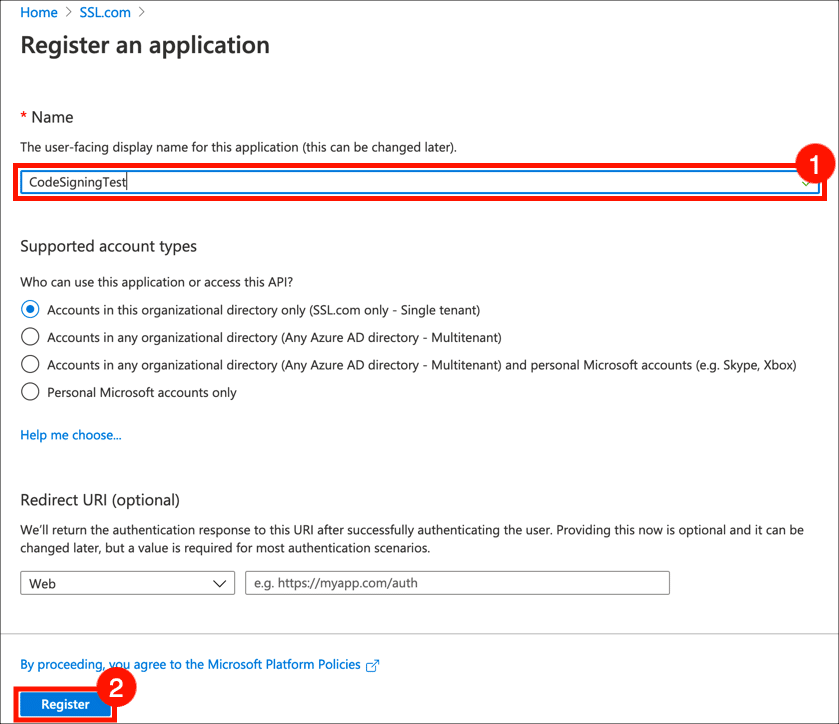
- Click New Registration.

- Give your application a Name and click the Register button. Leave the other settings at their default values.

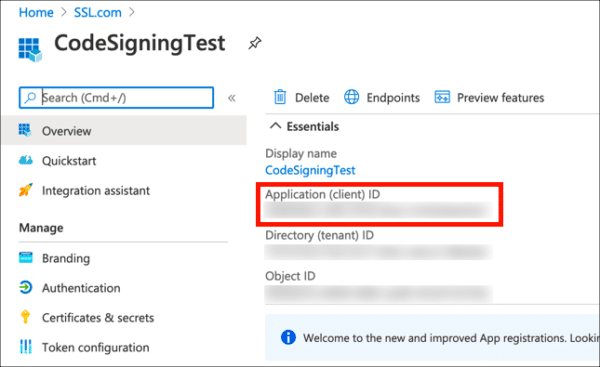
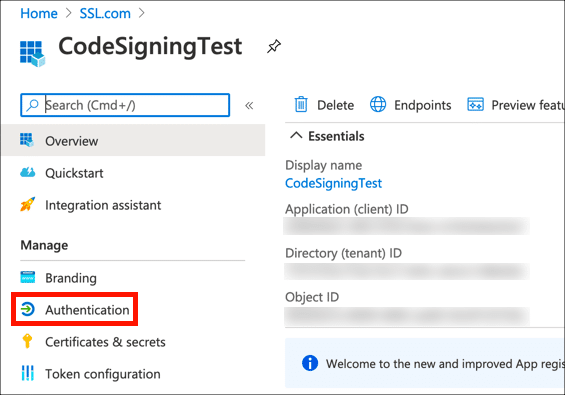
- Your new application has been registered. Copy and save the value shown for Application (client) ID, because you’ll be needing it later.
- Click Authentication.
- Under Advanced Settings, set Allow public client flows to
Yes.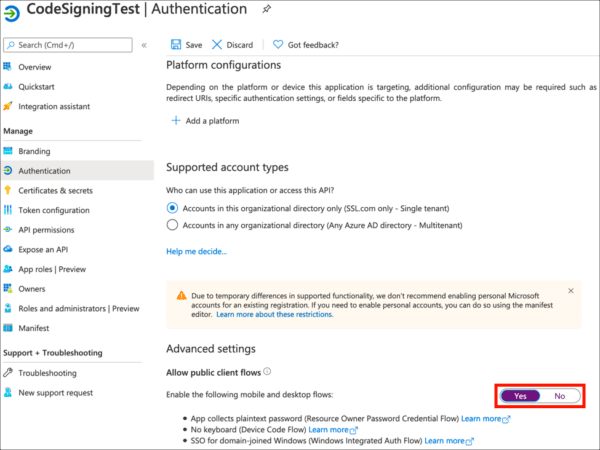
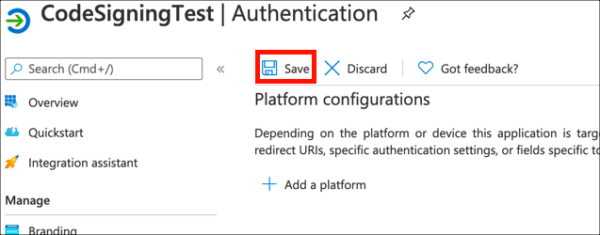
- Click Save.


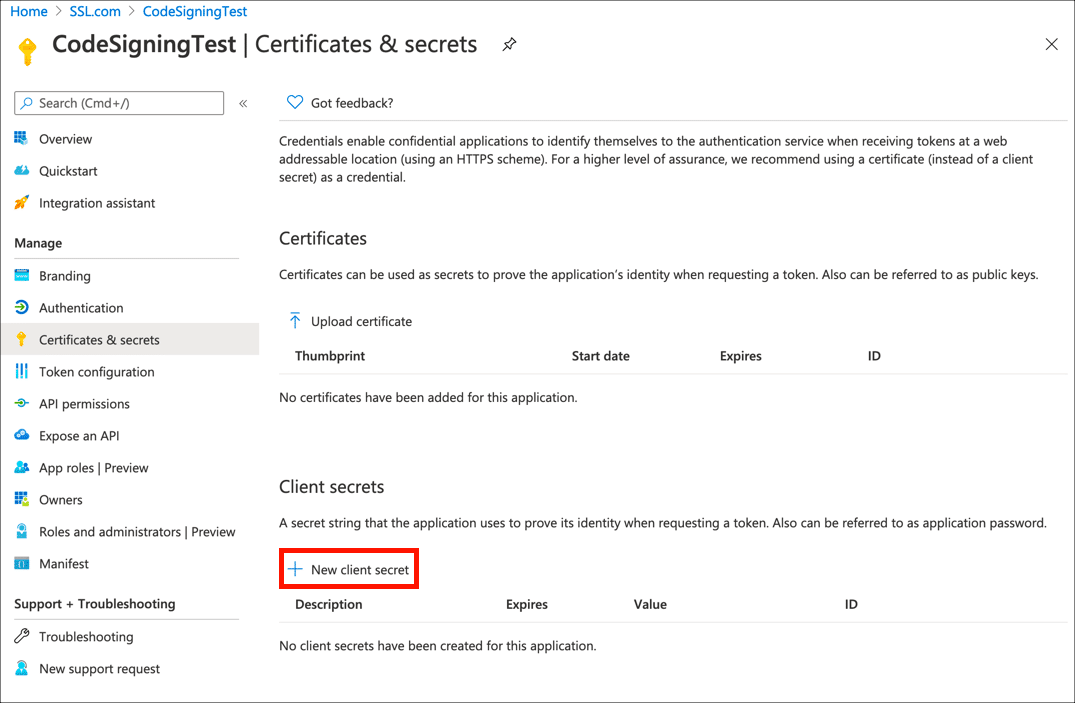
Step 2: Create a Client Secret
Next, generate a client secret, which will serve as a credential when signing.
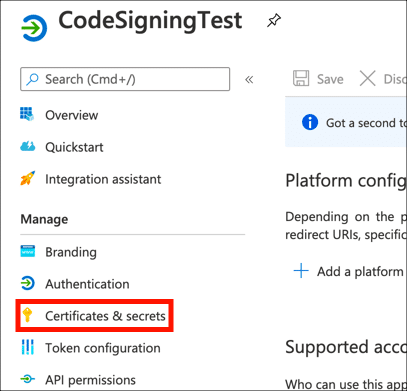
- Click Certificates & secrets in the left-hand menu.
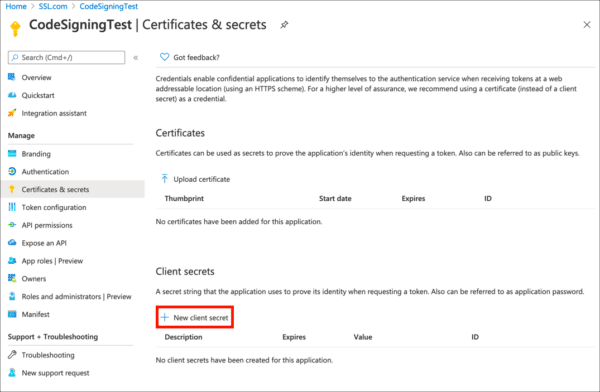
- Click New client secret.
- Give your client secret a Description, set expiry as desired, and click the Add button.
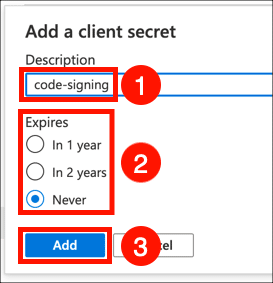
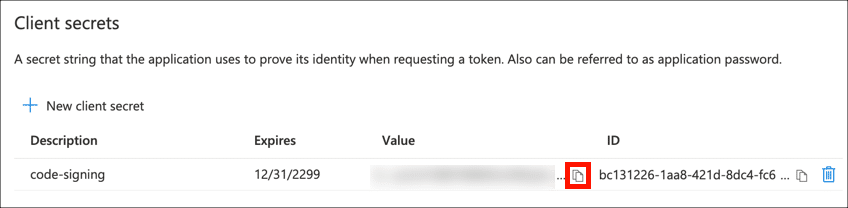
- Copy the Value of your new client secret immediately and save it in a safe place. The next time the page is refreshed this value will be masked and irretrievable.

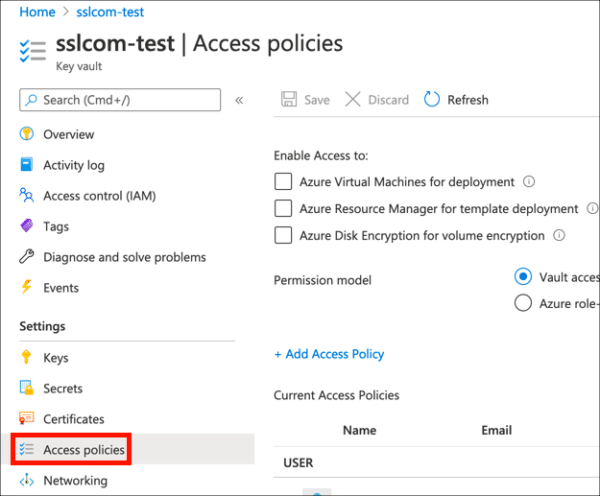
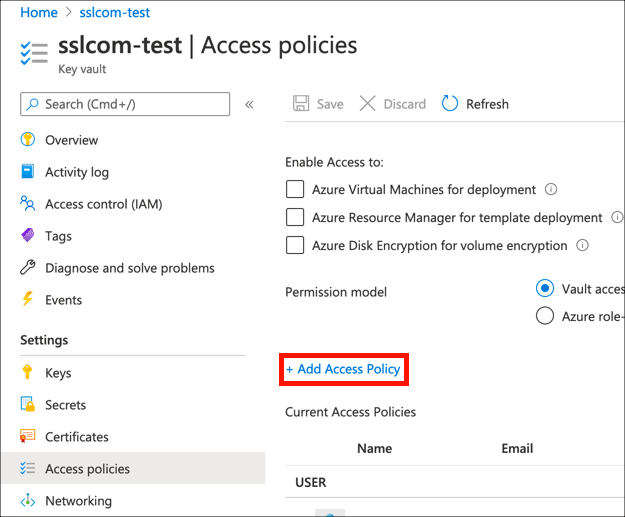
Step 3: Enable Access in Key Vault
Now, you’ll need to enable access for your application in Azure Key Vault.
- Navigate to the Key Vault containing the certificate you want to use for signing and click the Access policies link.
- Click Add Access Policy.
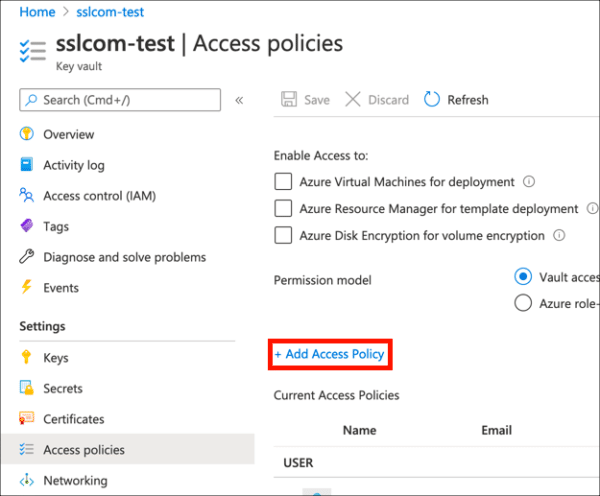
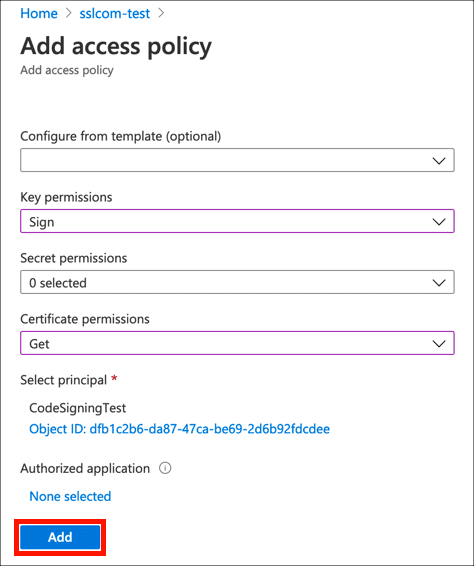
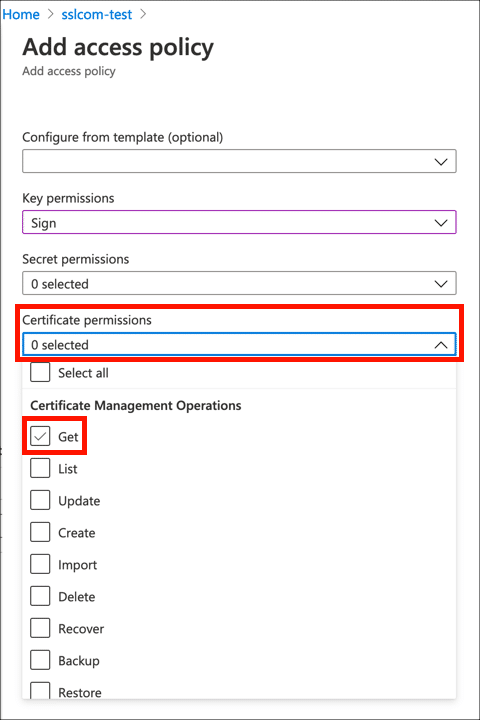
- Under Key Permissions, enable
Sign.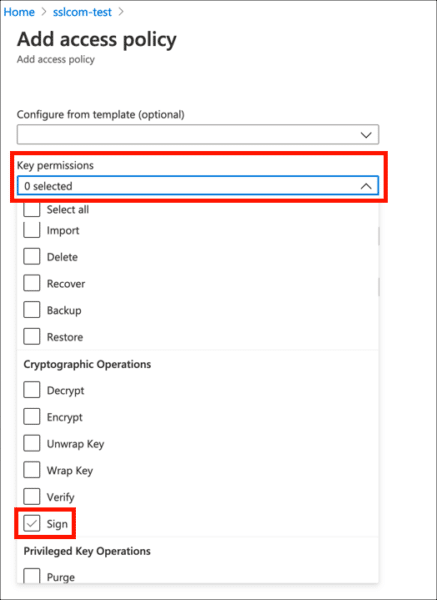
- Under Certificate permissions, enable
Get.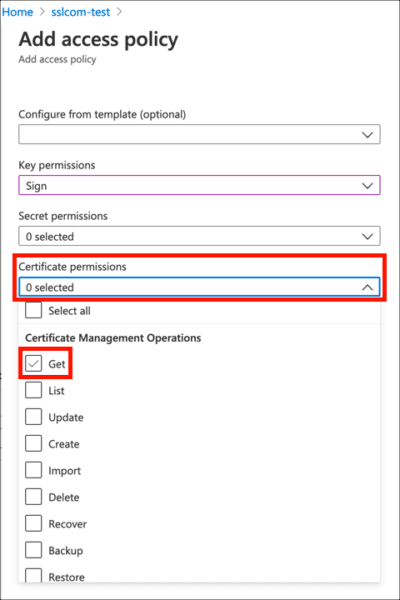
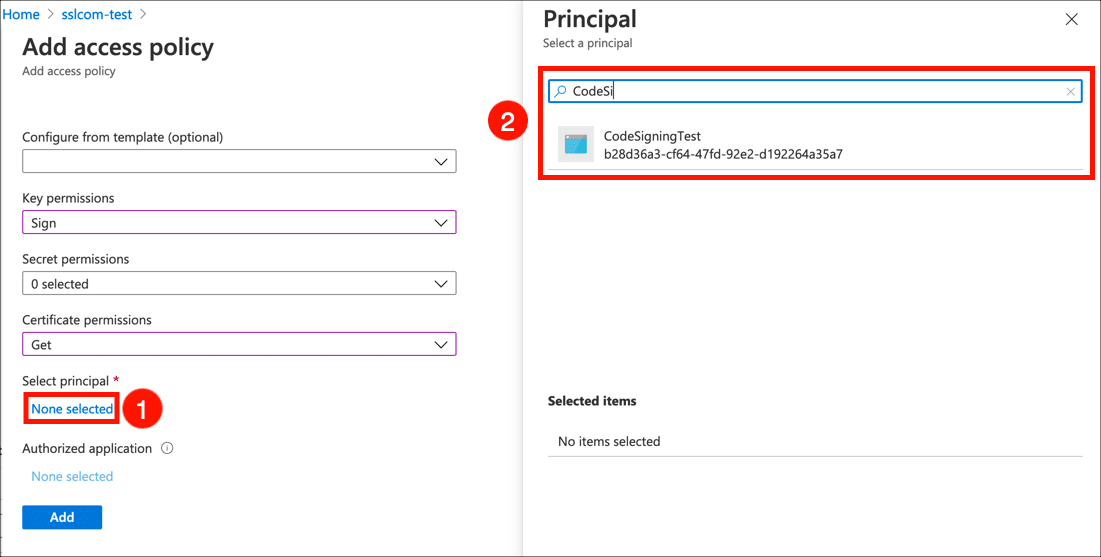
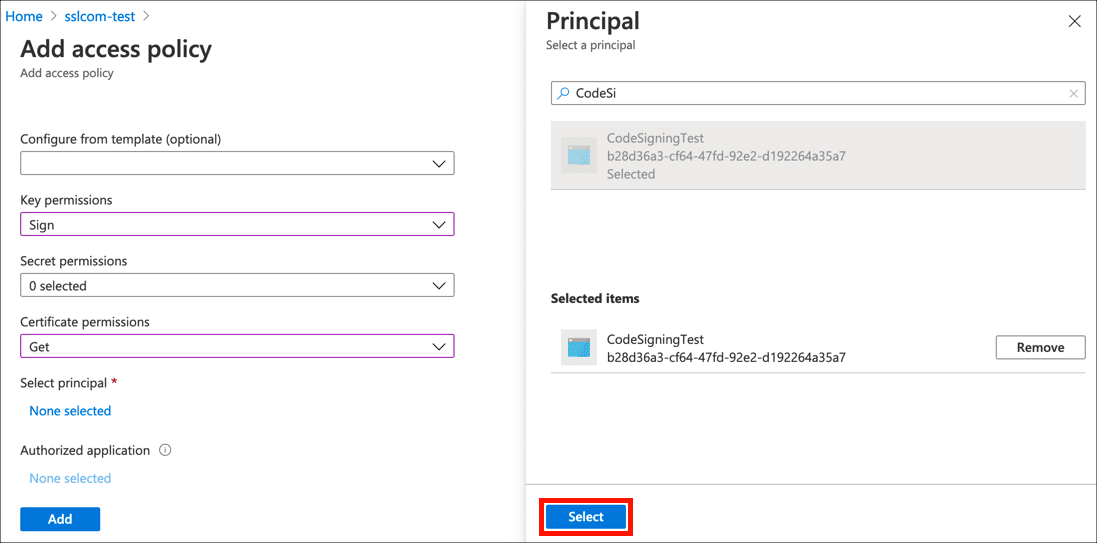
- Click the None selected link, under Select principal, then use the search field to locate and select the application you created in the previous section.

- Click the Select button.

- Click the Add button.
- Click Save.
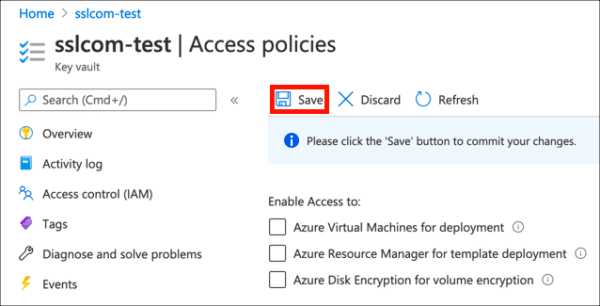
- Your access policy is set, and you’re ready to start signing files.


Step 4: Sign a File
Now you’re finally ready to sign some code!
- You will need the following information available:
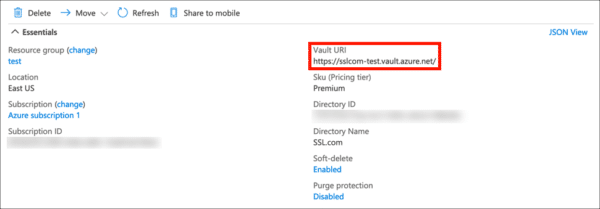
- Your Key Vault URI (available in the Azure portal):
- The friendly name of your certificate in Key Vault:

- The Application (client) ID value from your Azure application:
- The client secret you generated above:
- Your Key Vault URI (available in the Azure portal):
- Below is an example command in PowerShell to sign and timestamp a file with Azure Sign Tool. Replace the values in ALL CAPS with your actual information:
azuresigntool sign -kvu KEY-VAULT-URI -kvc CERTIFICATE-NAME -kvi APPLICATION-CLIENT-ID -kvs CLIENT-SECRET -tr http://ts.ssl.com/ -td sha256 PATH-TO-EXECUTABLE
- If signing is successful, you should see output like the following (unsuccessful signing will produce no output):
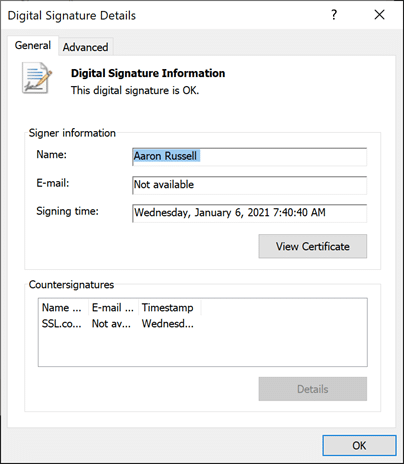
info: AzureSignTool.Program[0] => File: test.exe Signing file test.exe info: AzureSignTool.Program[0] => File: test.exe Signing completed successfully for file test.exe. info PS C:\Users\Aaron Russell\Desktop> - Details about the new digital signature will be available in the file properties: