
This guide, part of our portal documentation series, is an introduction to your SSL.com account’s Orders page. The Orders page allows you to easily manage your account’s certificate orders. You can use the following Table of Contents to navigate the sections of this document:
Introduction to the Interface
At first glance, the Orders page provides a general overview of currently active certificate orders. You can find important information about an order, such as its Order Date, Expiration Date, or the order’s Status.
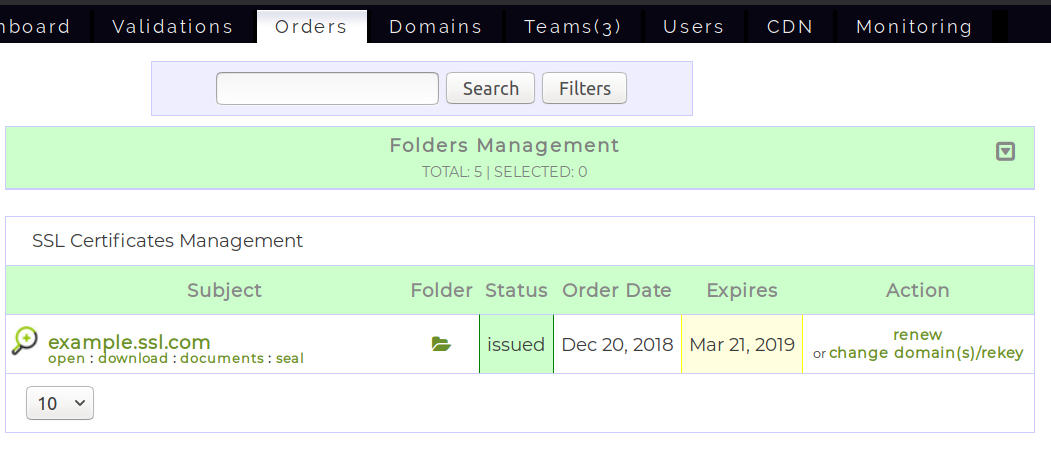
If you are looking for a specific order, you can either search for it using the search form above the order list, or look for it in the Certificates Management list (use the drop-down menu at the bottom left to specify how many orders will be shown on each page.)
Searching for a Certificate Order
The Orders page contains a search form that allows you to filter orders on almost any characteristic. If you already know the domain you are looking for, you can type it into the search box and click Search. The list should refresh to show only the orders that match your query.
For more complex queries, you can use search filters. Click the Filters button to bring up the filters menu.
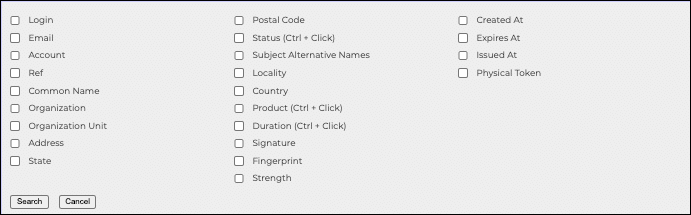
Each filter expects information in a different format, and the input method will change depending on the selected filter. For example, Organization Unit will ask you to type the query in an input box, while Status will allow you to select from a list of possible order statuses (use Ctrl+Click to select multiple entries).
You can also add Tags to your orders. Tags are labels you can freely assign to your certificate orders in order to facilitate your record keeping. If you are interested in Tags, please take a look at our how-to on using tags in your customer account portal.
After specifying as many filters as you require, click Search to perform the query. Clicking Cancel will close the filter menu.
Order Actions
Each certificate order allows you to perform context-specific actions, such as reprocessing an issued certificate, downloading its server bundles, or performing validation on a new order. The available actions are recorded in detail in the following sections:
- View Order Details
- Renew Order
- Reprocess Certificate
- Download Certificate Bundles
- Manage Validation Documents
- Manage Seal
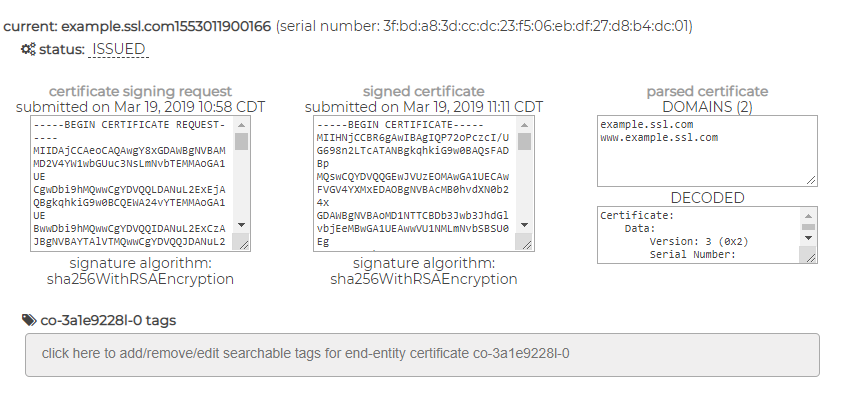
View Order Details
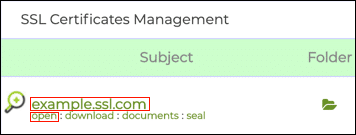
You can view an order’s details by clicking on the order’s name or the open link just below it:
Clicking either of these links will open a pop-over box containing detailed information about the order. In this box, you can find information such as the order’s certificate type, its validity period, and relevant dates. Moreover, you can discover administrative data such as the order’s contacts and the certificate’s serial number.
To close the pop-over box, simply click on the order’s name again, or the close link under its name.
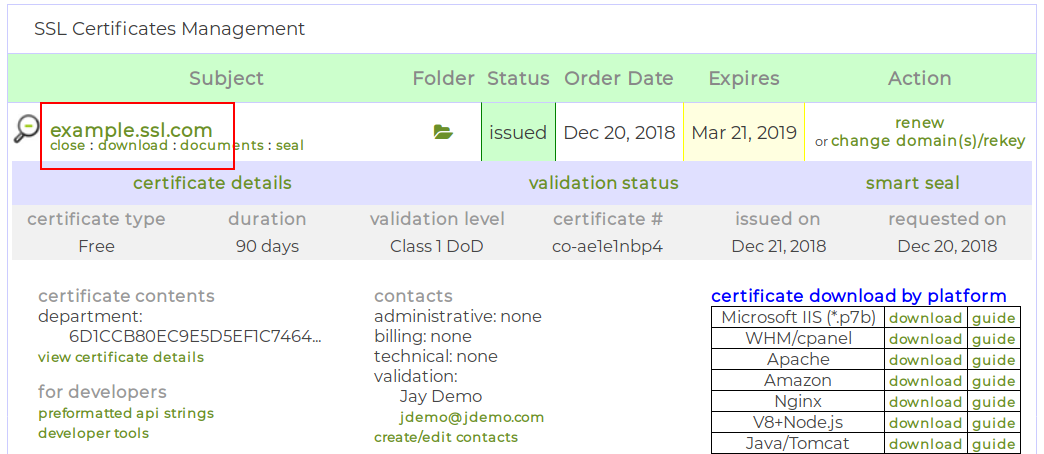
View Certificate Information
The link next to open will be either named download or details depending on whether your order’s certificate has been issued. Clicking the download/details link will redirect your browser to the certificate information page, which contains certificate information in addition to the order’s details. This page also allows you to assign tags to the order and its associated certificates.
Renew Order
Every certificate has an expiration date. However, you may still have the need for a certificate after it has expired. In this case, you can renew the certificate by clicking on the renew link in the order’s Actions column.
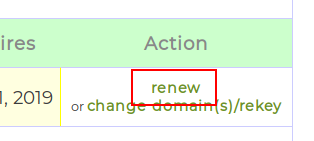
Clicking on the renew link will redirect your browser to the order renewal form, where you can manage your purchase.
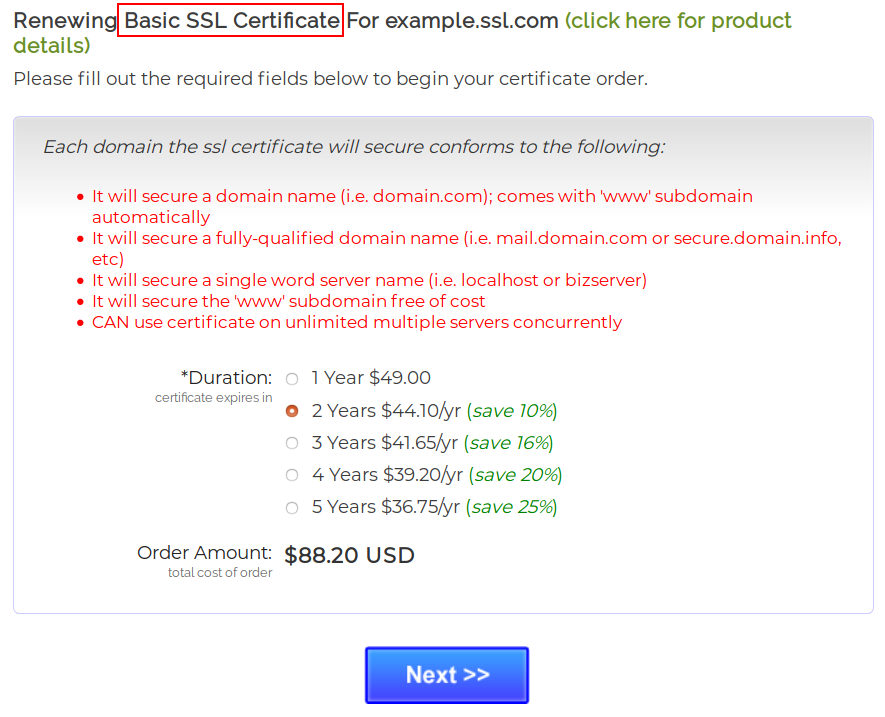
The renewal form states the certificate’s type (highlighted with the red box in the image above), along with the basic features provided by this specific certificate type. The form also allows you to choose your billing plan based on the duration you wish the renewed certificate to last for.
To avoid confusion (and accidental billing), the form also presents you with a dynamically-updated Order Amount.
After you have finished with your payment plan, click Next to proceed to the checkout page.
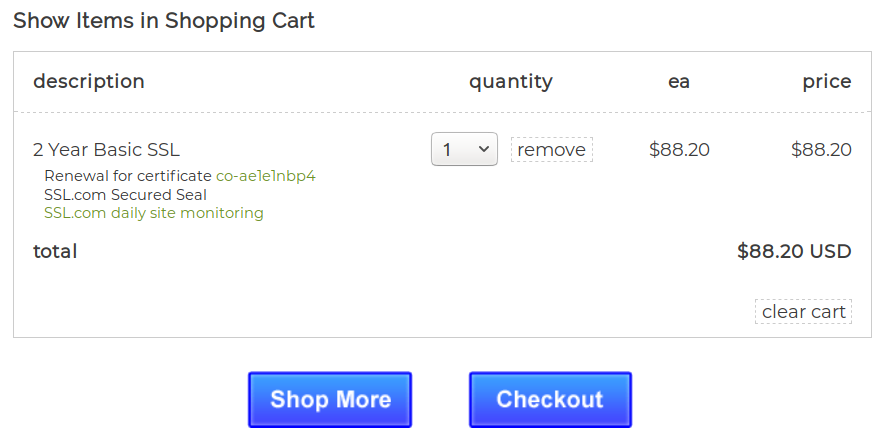
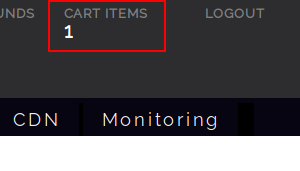
The checkout page allows you to manage your shopping cart before proceeding to check out. You may change the quantity of the items in your shopping cart, or remove them altogether if you’ve changed your mind. To finalize the purchase, click the Checkout button and follow the instructions for checking out.
If you wish to add more certificates to your order, click the Shop More button to continue shopping. Keep in mind that your shopping cart will remain unaffected and you can check out whenever you wish to. The header panel shows you an overview of the shopping cart at all times during your session.
Reprocess Order
A certificate must be re-issued if any of the information it contains changes or becomes obsolete. Examples include changing your website’s domain name, adding to or removing alternative domain names from SAN certificates, suspected or actual private key compromise, and so on.
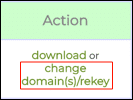
In such cases, reprocessing your certificate orders with SSL.com’s customer portal is very simple. To start the procedure, locate the order you wish to reprocess from the Orders list and click the change domain(s)/rekey link in the Action column:
Clicking the link will redirect your browser to the order reprocessing page, which will allow you to manage the new certificate’s details.
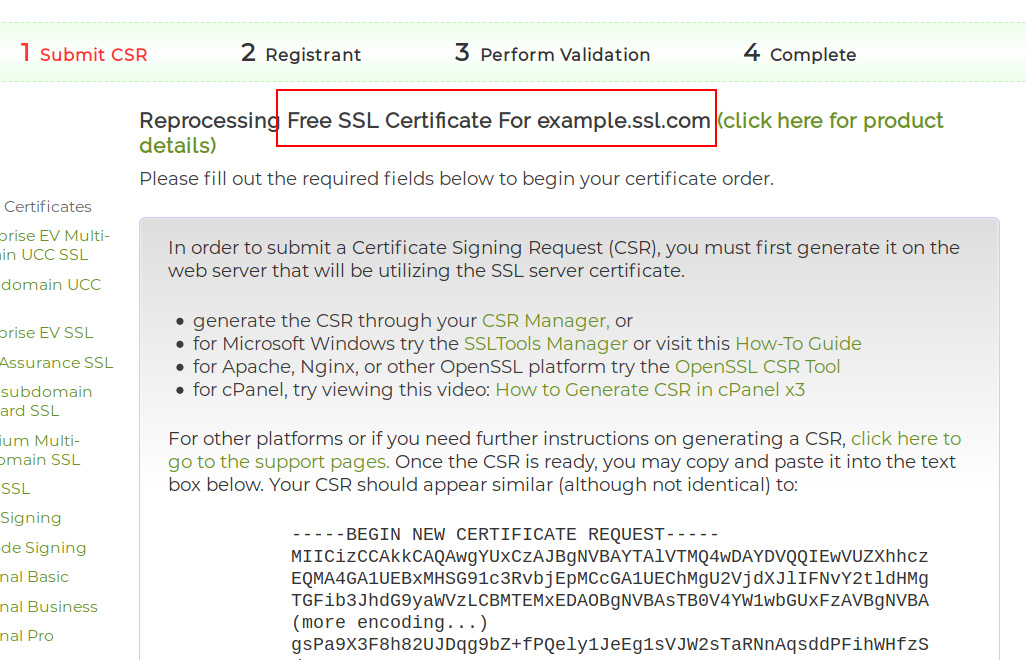
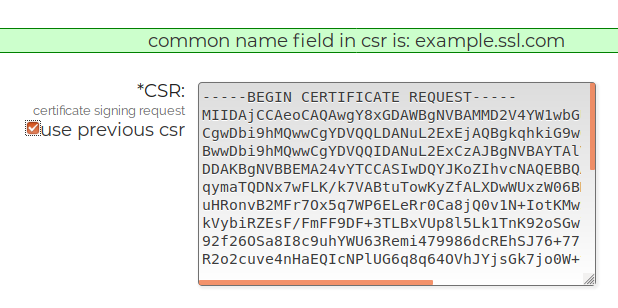
This page contains the domain name and certificate type for the order you are trying to reprocess, along with simple instructions on how to use the form. The actual form, shown in the following image, can be found just below the instructions.
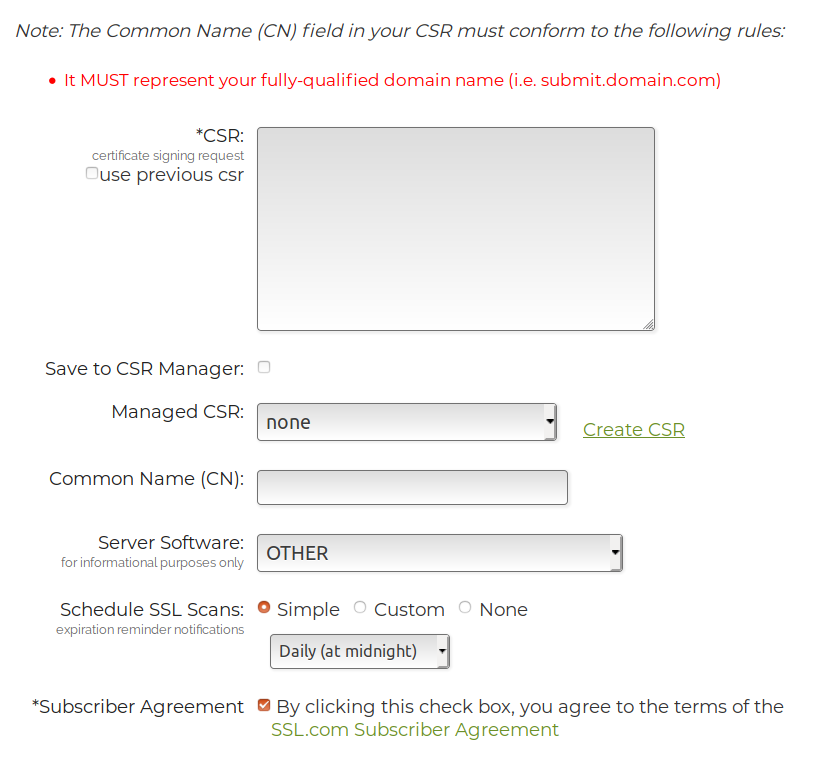
It is quite common to want to re-issue a certificate using the same certificate signing request (CSR) that issued the original certificate. You can do this by clicking the use previous csr checkbox. Selecting this checkbox will automatically fill the rest of the form with the information contained in the original CSR.
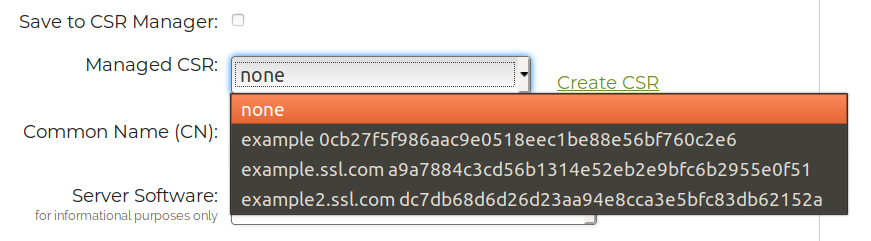
If you want to use a different CSR, the form allows you to specify it using two different methods: selecting a managed CSR from the CSR Manager, or directly pasting one into the CSR text area.
In both cases, after having input your CSR, you will need to follow the rest of the process as you normally would for a new certificate.
Using a Managed CSR
Your customer account portal can save your CSRs into an application called CSR Manager. CSR Manager allows you to view or edit previously used CSRs and, more importantly, use them to re-issue certificates, saving you the trouble of bookkeeping.
You can use any CSR from your CSR Manager in the order reprocessing form (including the original, as with use previous csr), by selecting from the drop-down list. Selecting one will automatically fill out the rest of the form with the CSR’s details.
If you are not sure about the details of each CSR, you can find CSR Manager using a URL directly (https://www.stg.ssl.com/team/<TEAM NAME>/managed_csrs) or by clicking on CSR Manager in the Quick Links section of the Orders page.
Your browser will present a list of managed CSRs, allowing you to entirely delete them, or view or edit their details. If you believe you are going to use a specific CSR often, you can assign it a Friendly Name, which will be shown in the use managed csr drop-down list.

Apart from already existing CSRs, you might require a new CSR. You can either create one locally, or use the portal’s CSR generator. If you already have a CSR, please skip ahead to the following section.
The portal provides multiple methods for creating CSRs, such as the Add CSR button in the CSR Manager or the Create CSR button in order reprocessing form. Ultimately, all methods will redirect your browser to the CSR generator page.
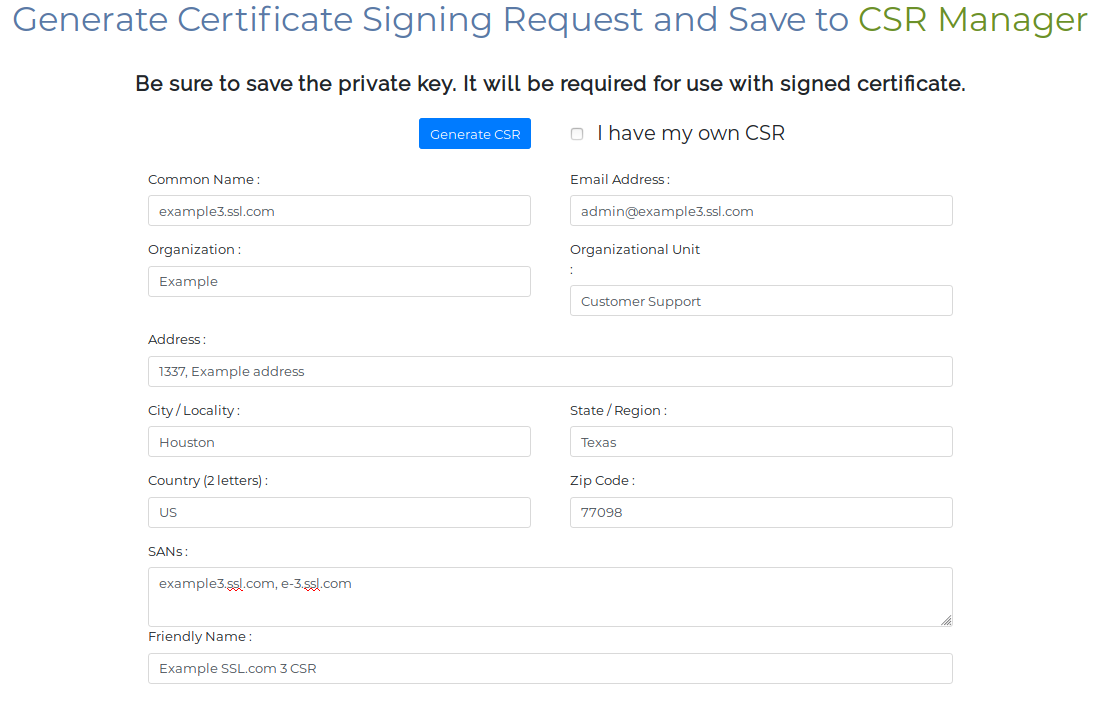
Enter your certificate details and click on Generate CSR to instruct the CSR generator to produce (and optionally store) the new CSR.
After this process is complete, your browser will inform you of your success and prompt you to download the private key bundle for storage in your computer. Please save your private key in a secure location and do not lose it, because it is necessary for you to use any certificates issued by this CSR. For a detailed walk-through of generating a CSR with CSR Manager, please see our how-to on the subject.
Using an External CSR
There are cases where you might need a one-off certificate that you will not likely need to re-issue again, or you already have a policy regarding generating your keys and CSRs. If that is the case, you can enter your previously generated CSRs in the CSR text area in the certificate order reprocessing form.
If you wish to save the CSR for later use, please enable the Save to CSR Manager checkbox. When you click outside the CSR area, the reprocessing form will parse your CSR and automatically fill the Common Name field.
Afterwards, you can optionally select the server software that you will use this certificate on. This information will be stored in the certificate, but it does not mean that you only have to use the certificate with this software.
When you are finished with your CSR, you can proceed to configure expiration reminders for your certificate and agree to SSL.com’s Subscriber Agreement. Click Next to move on to identity information. The next steps of this process are similar to the steps required to issue a new certificate.
Download Certificate Bundles
The Orders page can package your certificate in several different formats, or bundles, allowing you to choose the version that is best suited to your platform. Each bundle contains only the absolutely essential files required to install the certificate in your server.
You can find a list of bundles for the most widely used platforms in your order’s details or certificate information pages.
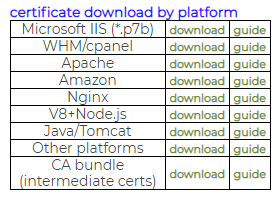
- Other platforms: Provides a ZIP file with all the relevant certificates (1 root, 1 intermediate, 1 server certificate)
- CA bundle (intermediate certs): Provides a single concatenated file containing all necessary intermediate and root certificate files, but NOT the server certificate
If you require a bundle for a platform not listed in the download table, you may refer to this page which contains all of our available server bundles.
If you still require more information, please feel free to drop us an email at support@stg.ssl.com and an expert will provide assistance.
Manage Validation
Depending on the level of validation and type of your certificate, you may have to provide various documents to aid SSL.com in validating your certificate request. To manage the validation documents for an order, please click either the the documents or UPLOAD DOCUMENTS link.
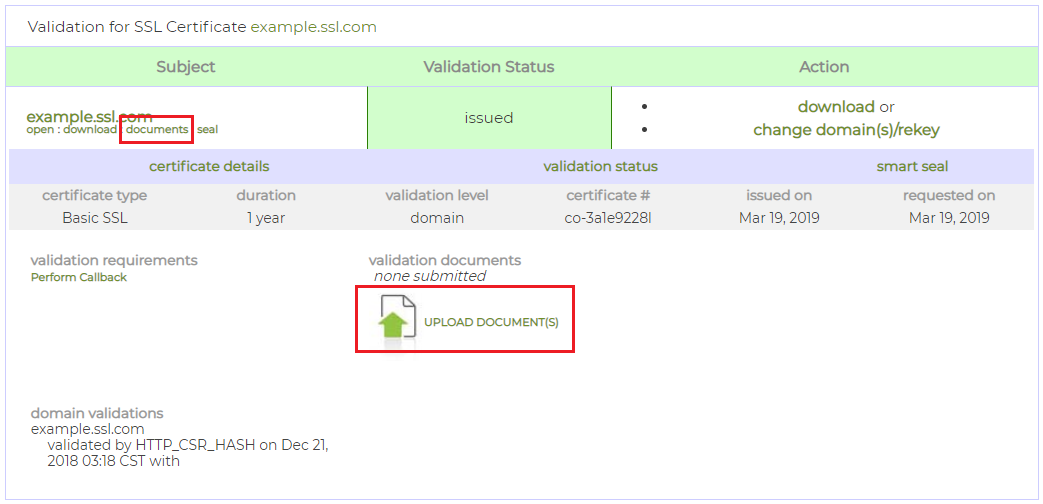
In the documents page you can view the validation status of your order, as well as upload any documents necessary for the validation to proceed. For more information, please refer to our validation article, that is part of our portal documentation.
Manage Site Seal
SSL.com’s site seal is an embeddable snippet of HTML code that works as a visual indicator of trust for your visitors. Our site seal comes free with every server certificate you install, and it is the only seal that contains your validation documents as Site Seal Artifacts. Your visitors can use the seal to acquire information about your identity, potentially increasing their trust in your services.
To manage the site seals for a certificate order, click the seal link in the Orders list.
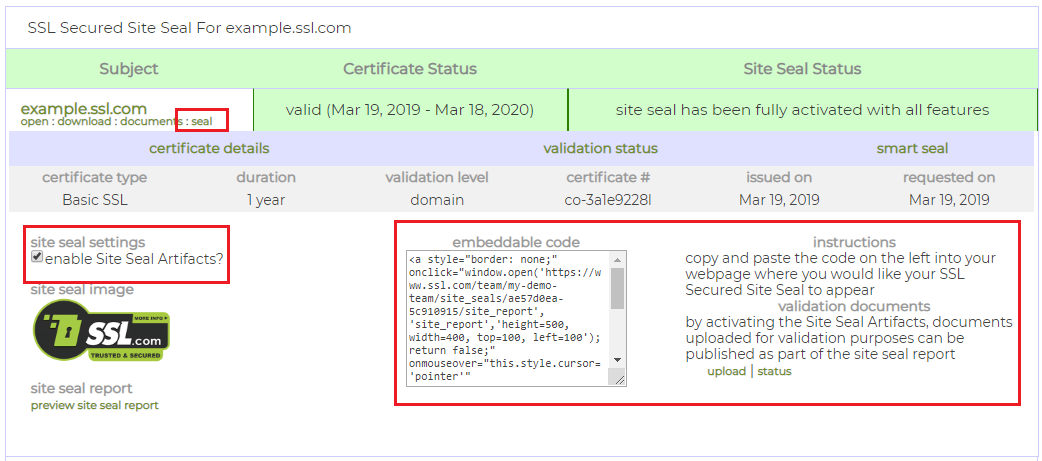
In the site seal settings you can decide whether to enable Site Seal Artifacts (i.e. specify that your seal will include your validation documents) and retrieve the code snippet for inclusion in your website. You can also preview the Seal report by clicking preview site seal report.
For more information about our Site Seals, please refer to our Site Seals details page.
Manage Folders
The Orders page stores your orders in a tree-like structure, similarly to how files and directories are stored in your local operating system. Orders are displayed as files and each can be stored in a single directory. To manage your folders, click Folders Management.

Folders exist to help you with your account’s book-keeping. By default, your account contains five folders, as shown in the following image:
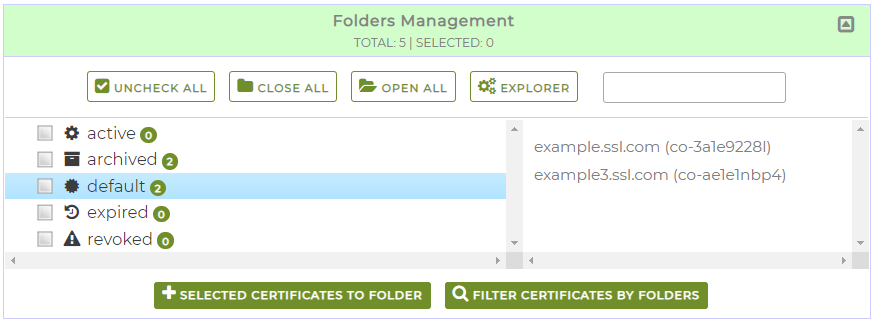
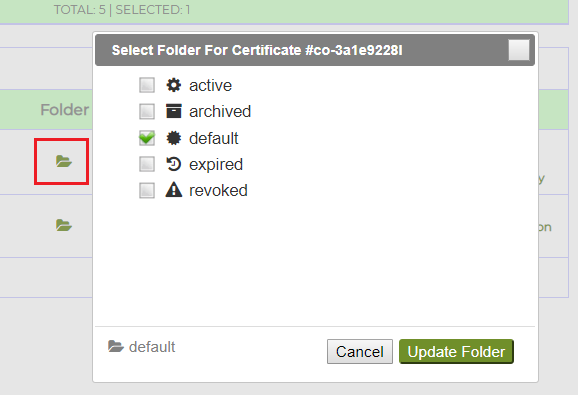
Initially, orders are created in the default folder. However, you may move them to any other folder at any time. You can use the buttons below the folder list window to find and move certificates between folders. You can also use the folder icon in the Order page’s list, as shown in the image below, to move an order to a specific folder.
Moving certificate orders to folders based on their status is a good method to organize and quickly search your orders. This is especially useful for customers managing multiple servers or other network devices, and thus requiring several certificates.
You are free to rename, move or remove any of the original folders, as well as create new folders and sub-folders. To edit your folders, click the EXPLORER button in Folders Management.
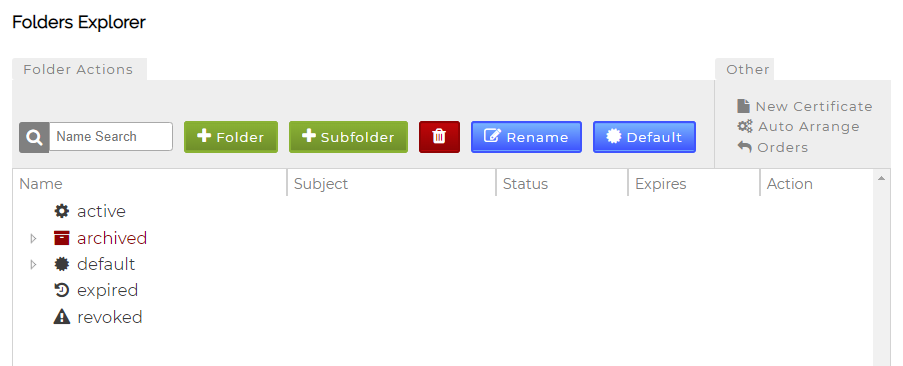
The Folders Explorer allows you to create and rename folders using the buttons above the folder list. In addition, you can use the same interface to set the default folder.
Clicking on a directory in the Folders Explorer shows its contents. Each file is accompanied by a details link, which leads to the order’s details page.

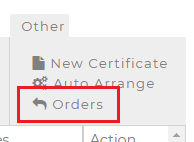
As mentioned above, you are free to change the folder structure as you wish, however if you retain the default folder structure, Folders Explorer can automatically arrange orders into directories (e.g. expired certificates will be copied to expired folder and so on). To enable this feature, click Auto Arrange in the Other menu.

Finally, you can also use the Other menu to return to Orders, by clicking the Orders link.
Need more resources for your SSL.com account? Here are more resources:
- Your SSL.com Account – Submitting a CSR
- Failed Pre-test?!
- Your SSL.com Account – Validations
- SSL.com’s SWS API – Introduction
- Your SSL.com Account – Domains
- SSL/TLS Certificate Issuance and Revocation with ACME
- Supported Cloud HSMs for Document Signing and EV Code Signing